Airfix 1/72 scale
Avro Vulcan B.2
by Steve Pritchard

Kit:
Airfix 1/72 Avro Vulcan B.2
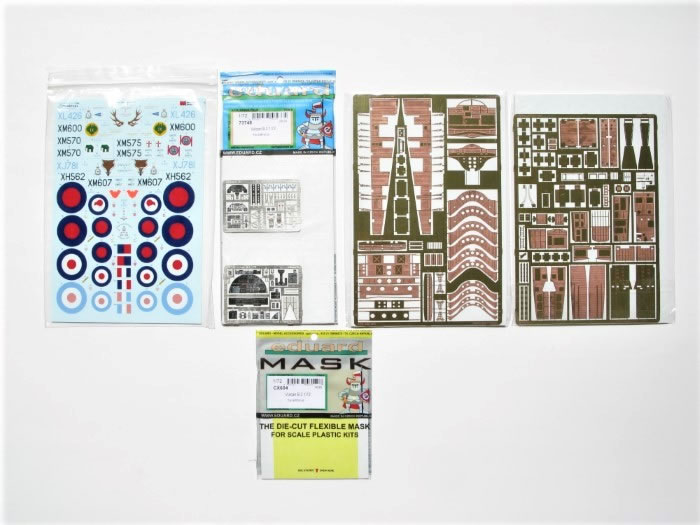
Aftermarket Accessories:
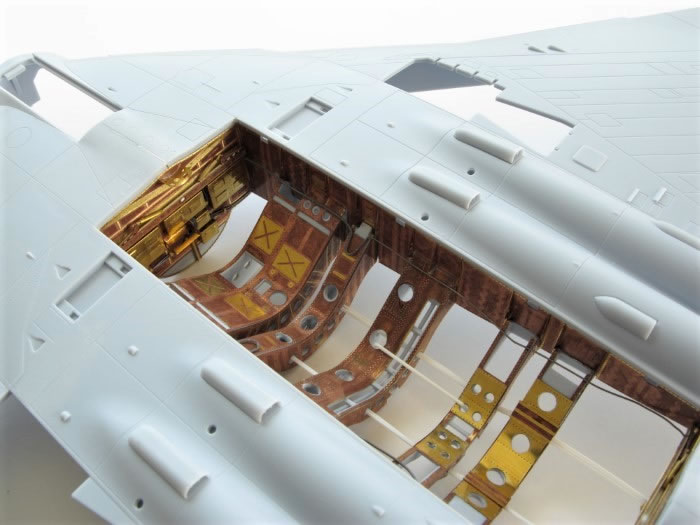
Eduard Big Ed (Big72167), comprising bomb bay, undercarriage, cockpit and mask sets.
Paints Used:
Mr. Color C332 Light Aircraft Grey for the undersides, C335 Medium Sea Grey and C330 Dark Green for the topside camouflage. Alclad II Dark Aluminium for the engine exhausts. Tamiya white primer for the bomb and undercarriage bays.
Construction is complicated by the sheer size of the Vulcan in 1/72 scale. It seemed to occupy most of my available workspace and at times my entire collection of bulldog clips.
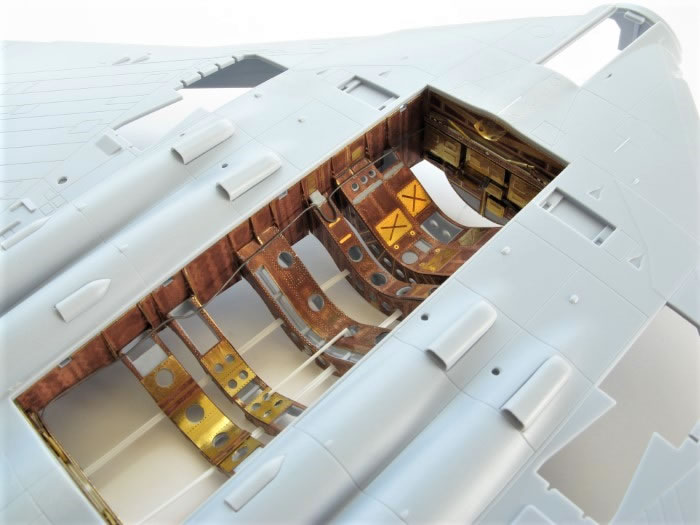
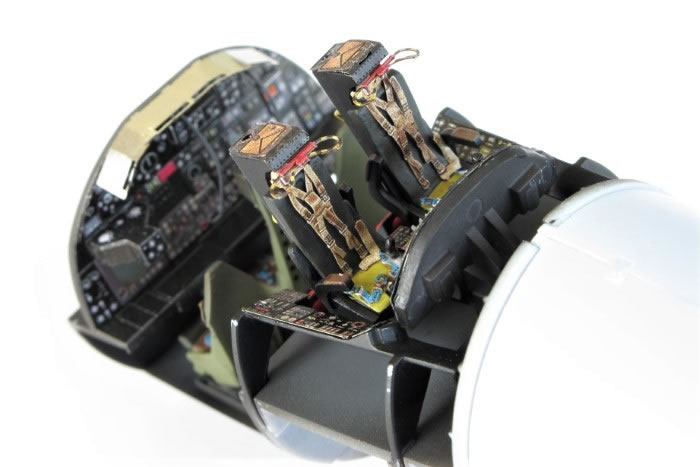

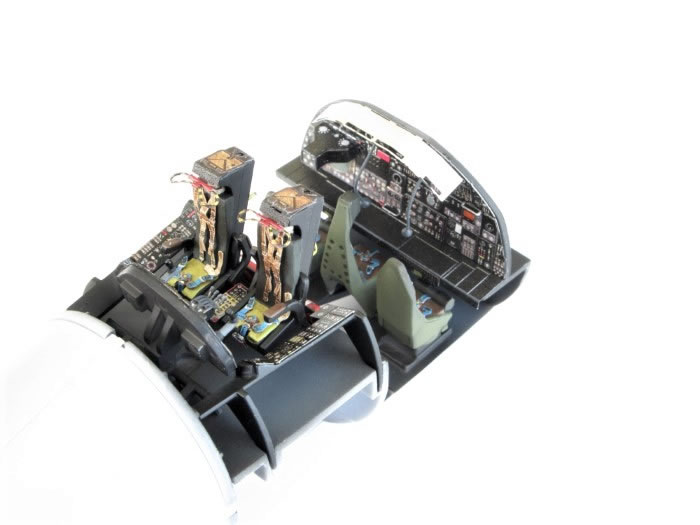
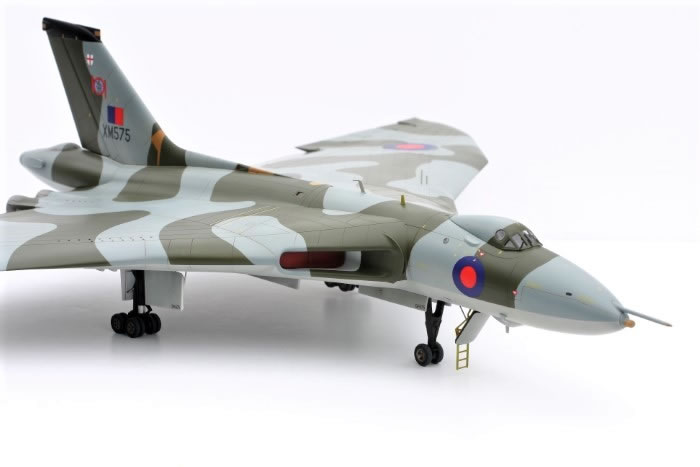
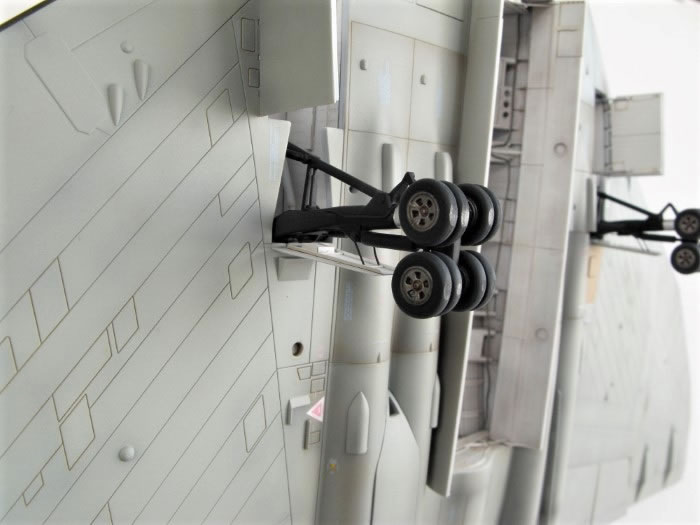
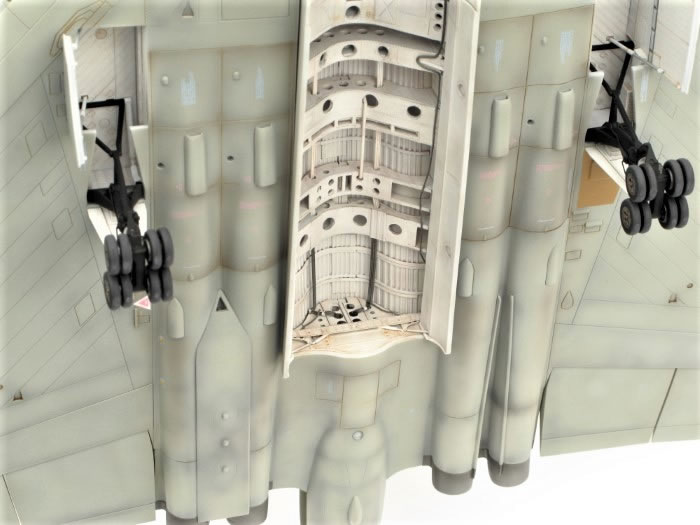
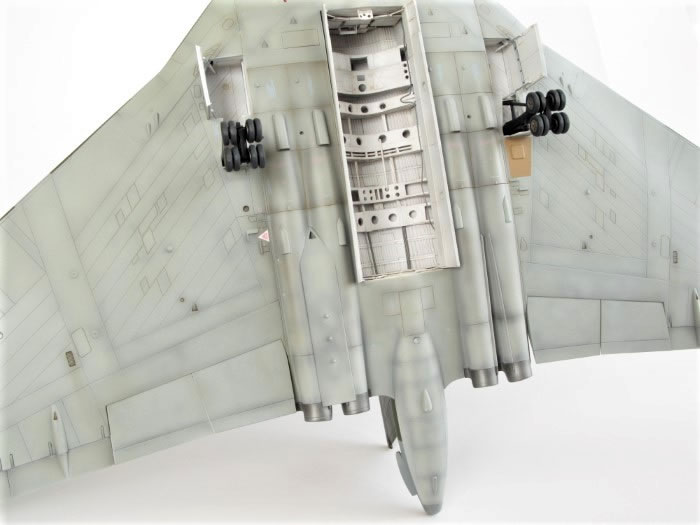
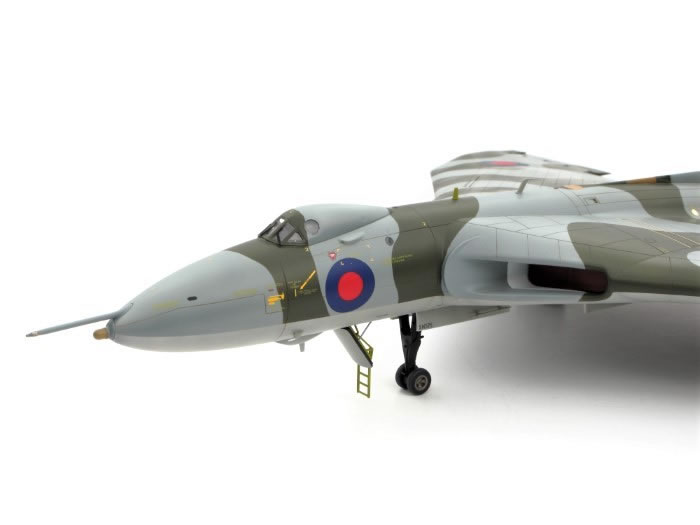
Work started in the cockpit - what Airfix provide is entirely adequate, and I can say the Eduard set was completely unnecessary, as almost nothing is visible through the small cockpit windows and access bay. Still, it was very enjoyable to put the set together and at least I have the photos. A solid fishing line sinker was added to the nose to prevent tail sitting. Care was needed to position the various wing spars, undercarriage and bomb bay components.
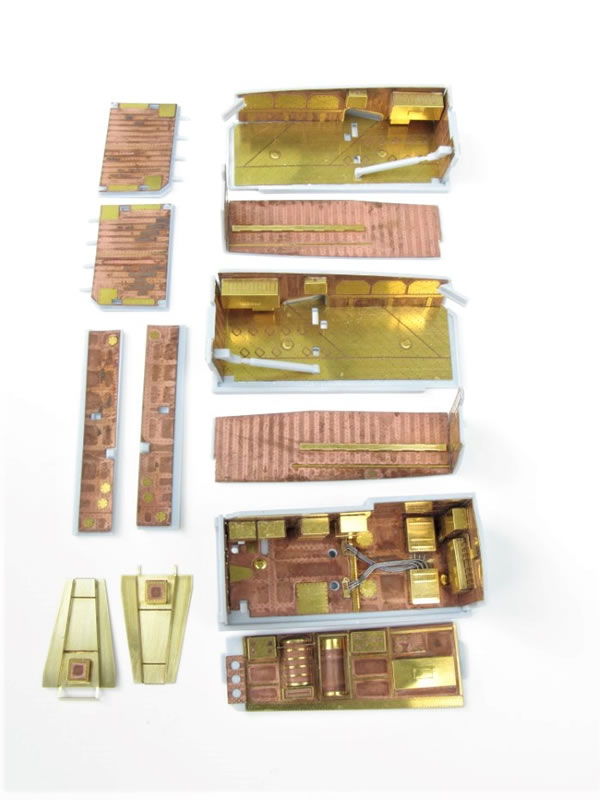

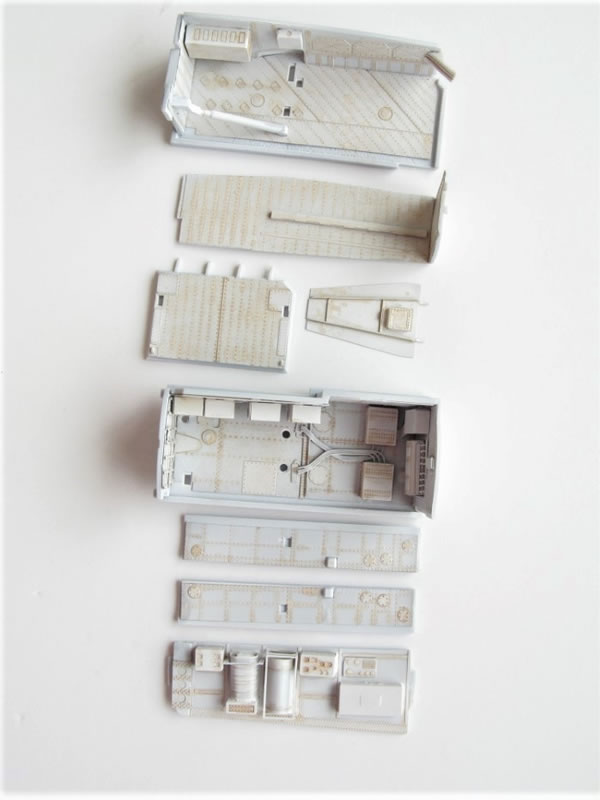
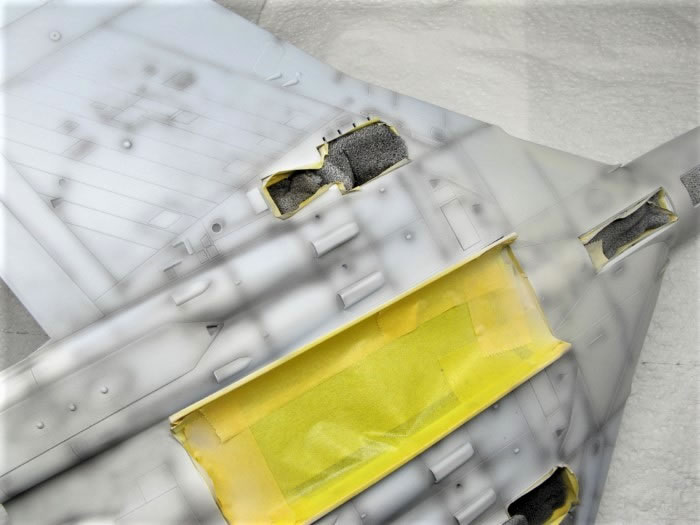
The Eduard sets for these added a lot of detail and this time remained visible after completion. Generally, the kit went together well, the only problematic seams were the forward to main fuselage, intakes and jet exhaust areas.

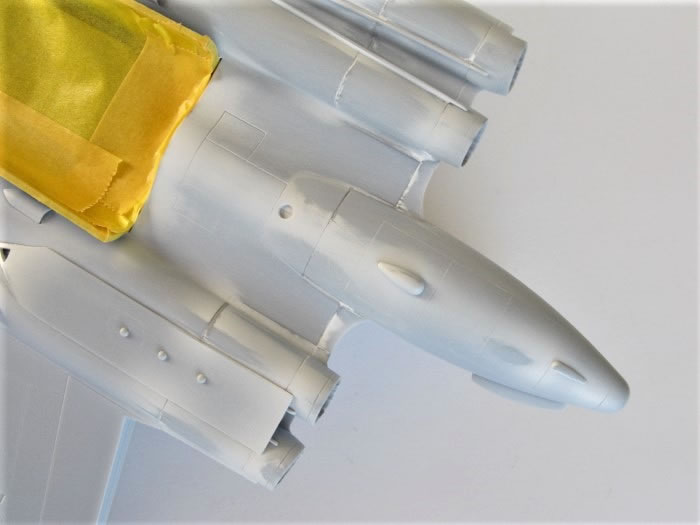
The instructions say to place the intake covers before closing up the wing, but I thought this would complicate masking further, so opted to fit later. In the end they slipped in without much problem, just a slight touch-up of the white paint was needed.
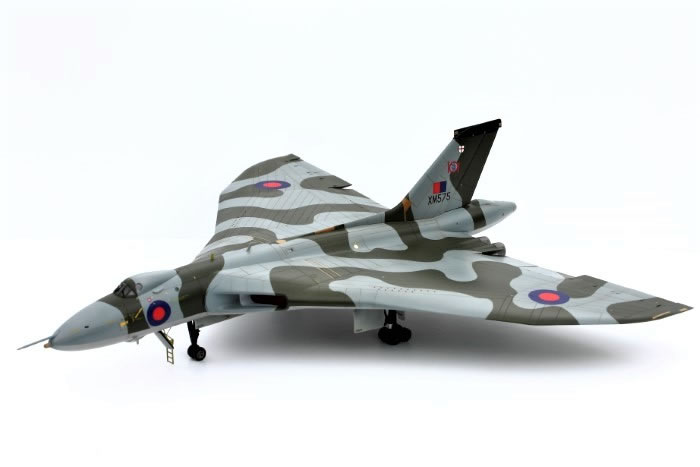
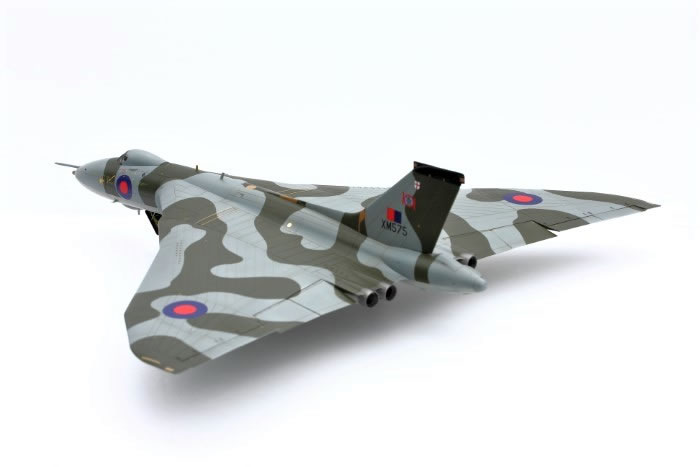
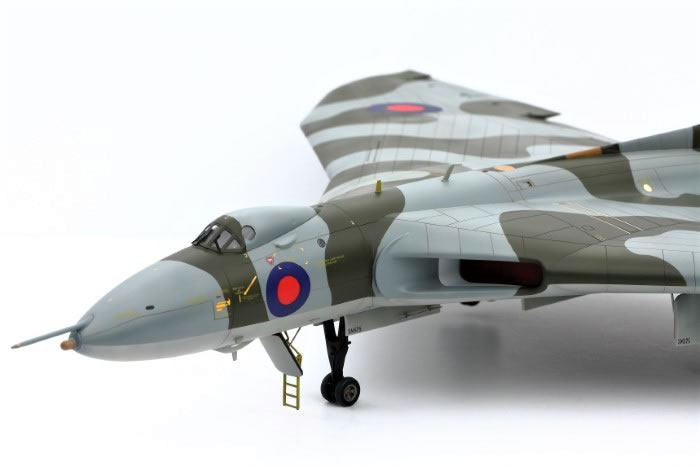
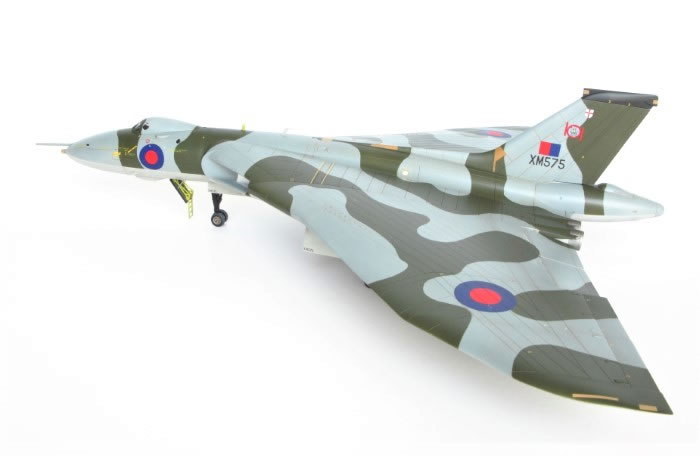
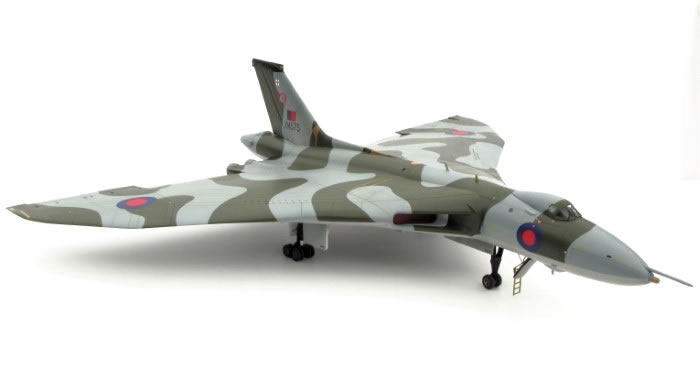
I wanted to do a camouflaged aircraft with the conventional bomb bay, but the decal option in the kit is for an overall white aircraft. Consequently, I went with the Xtradecal sheet featuring XM575, of 101 Squadron, Waddington in 1975. Oddly, the instructions suggest gloss white undersurfaces, but show a light grey in the diagram – I went with light aircraft grey. Also, the plan view shows an area near the starboard roundel without a patch of green camouflage. This is shown on the Airfix plan, and appears to be common to most Vulcans, so I added it.
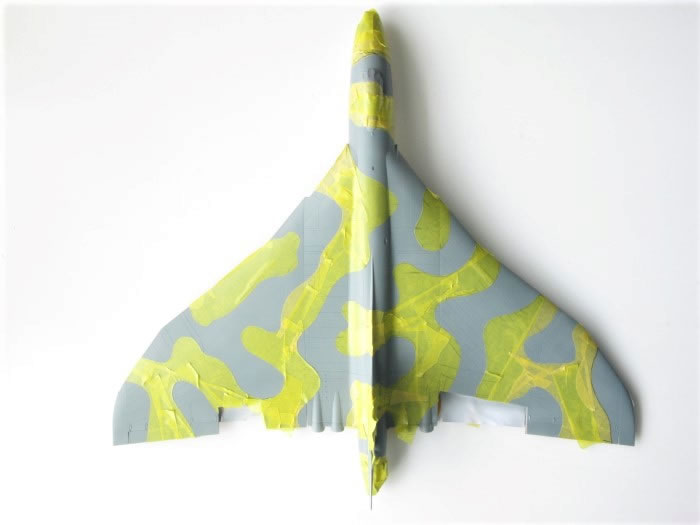
I pre-shaded the undersurfaces with thinned black, to break up the monotone grey – subsequently I sprayed on a lighter shade of grey, Mr. Color 325, in an irregular pattern to further break up the grey. The top surface was painted in just the two camouflage colours – I didn’t want to emphasise the panel lines as these are perhaps just a little too heavy already. I mixed up some Tamiya acrylics to paint the brown panels on the spine and tail.
Mr. Color GX100 Gloss Super Clear was applied prior to decaling. Both the Airfix (mostly stencilling) and the Xtradecals went on beautifully. Finish coat was Tamiya LP-24 Semi-Gloss Clear.
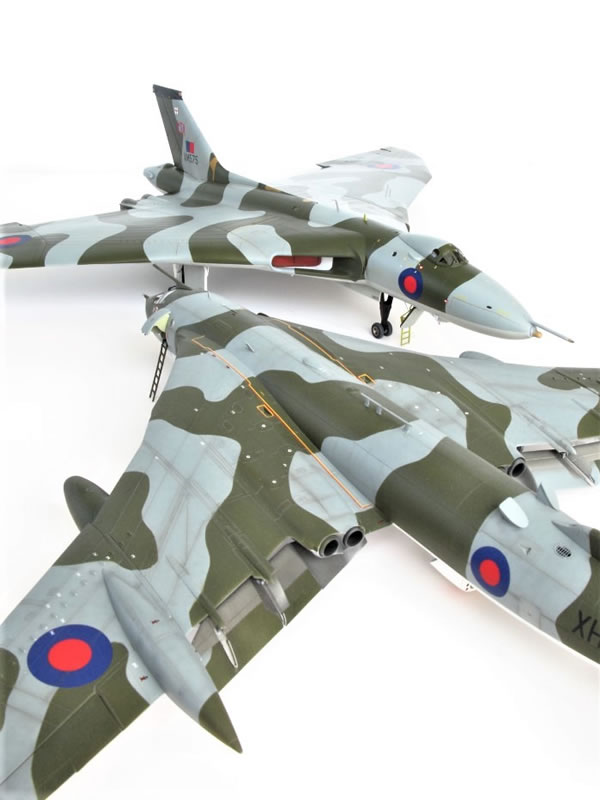
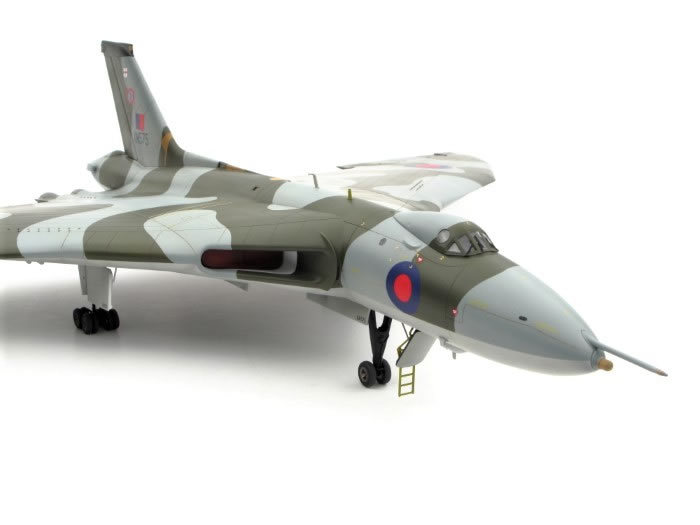
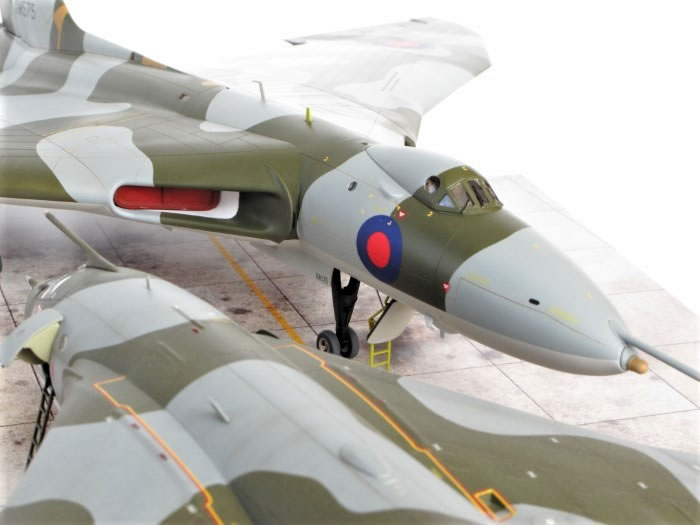
I didn’t expect to purchase another kit as large as this due to a lack of display space. However, I saw the Corgi 1/72 scale diecast model in a hobby shop and thought I just had to have one. The Airfix kit was about $400.00 cheaper so it was an easy decision to make that. It builds up into an impressive model, especially with some additional detail in the wheel and bomb bays – I wouldn’t bother with detailing the cockpit though! Overall, a straightforward build – it was only the painting of such a large subject that caused a few difficulties – only one wing at a time would fit into the spray booth, so care was needed in handling. It makes a nice companion for my Airfix Victor and Nimrod.
Steve Pritchard
Christchurch
New Zealand
Model, Images and Text Copyright ©
2023 by Steve Pritchard
Page Created 28 June, 2023
Last Updated
28 June, 2023
Back to HyperScale Main Page

|
 Home
| What's New | Features | Gallery | Reviews | Reference | Resource Guides | Forum |
Home
| What's New | Features | Gallery | Reviews | Reference | Resource Guides | Forum |