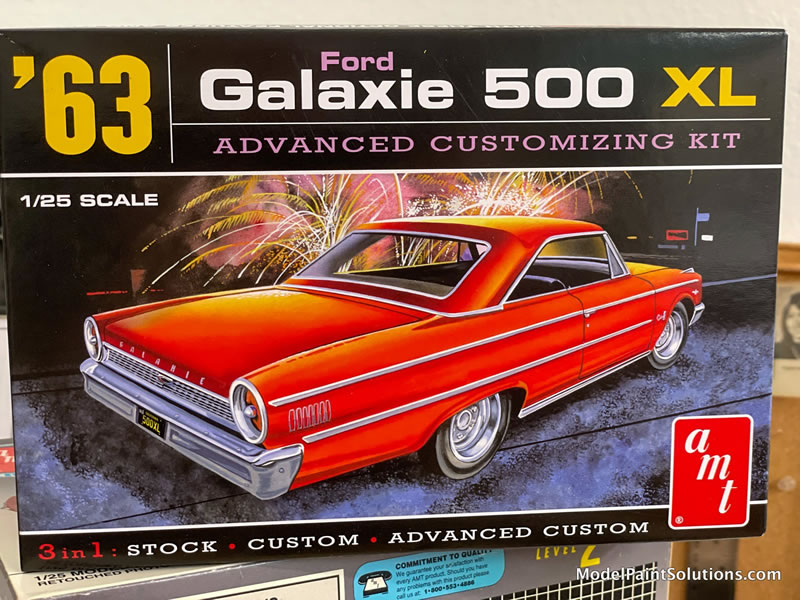
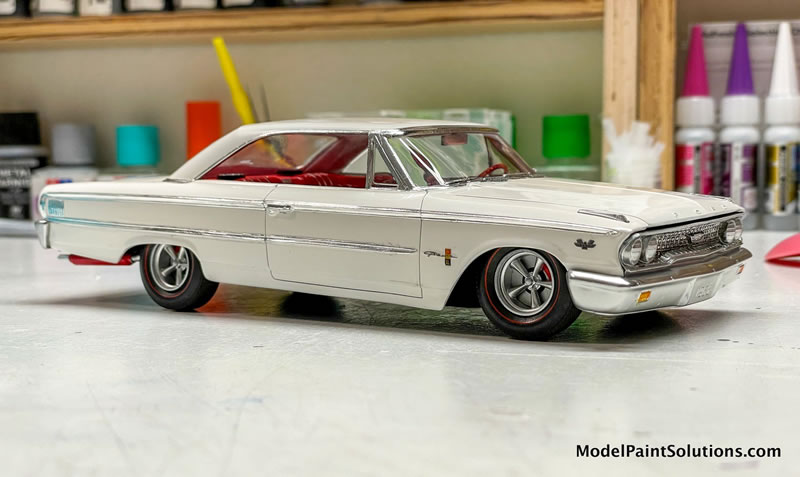
AMT's 1/25 scale
1963 Ford Galaxie 500 XL
by Brad Huskinson

Kit #: AMT 1186/12
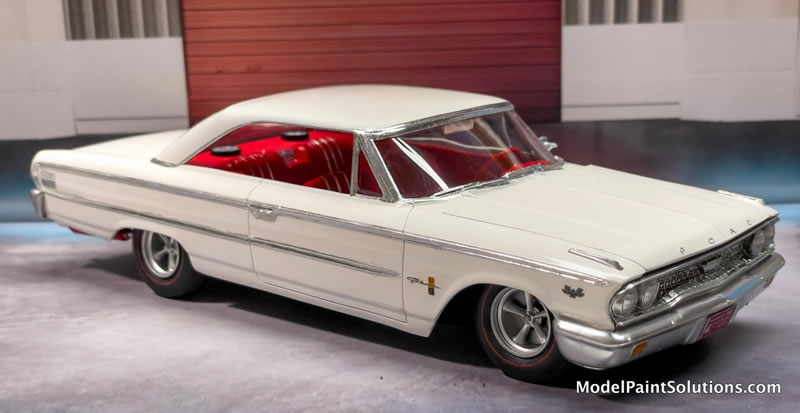
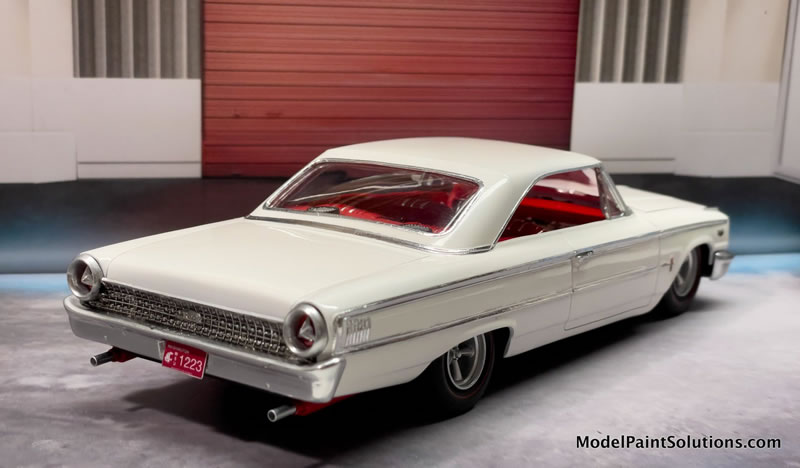
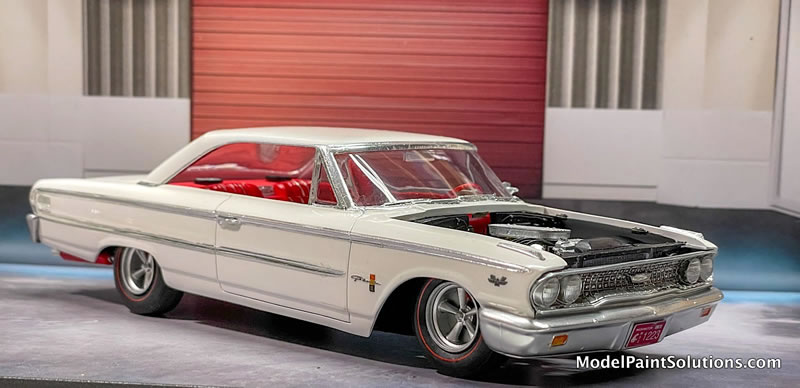
I had a friend in the late 60s who had this car in 1:1 scale. It had a 406 cubic inch tri-carb V8 and a 4-speed manual transmission. Definitely one of the earliest “muscle cars”. It was really quite the sleeper automobile. Big body Ford and not much indication of it being fast. I have modified my version with some custom wheels and tires and a more aggressive body stance.
I wanted to keep the number of colors to a minimum for a more thematic feel to the build. The body is a light ivory/white. The engine block, interior, disk brake calipers and Thrush mufflers are all the same shade of red. The tires are AMT Red Line as well. The chassis is black and the metals are different shades of metal paints for realism.
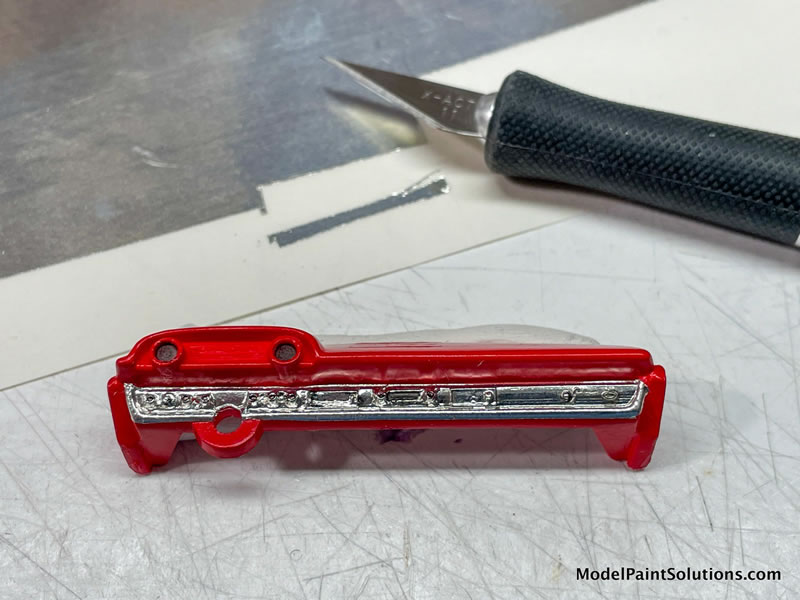
All parts are removed from the sprue with sprue cutters, and cleaned up with sandpaper, sanding sticks and a new addition, a ceramic bladed scraper. The ceramic scraper works great for removing mold lines and reduces the amount of sanding time considerably. X-Acto knives are also used extensively along with panel line cutters. Similarly painted parts are grouped together to save painting and cleanup time.
Several Real Difficulties |
This kit was definitely from an old well used mold. The body and several prominent parts had some wavy surfaces that should have been flat. The hood was slightly warped.
Body molding details were often very soft to nearly non-existent, which made cutting the Bare Metal Foil a very difficult and inaccurate process. The rear grill-like area above the bumper was warped with a vertical split in the plastic.
I use Tamiya Thin for unpainted parts and several different CA glues for the parts that have been painted. Occasionally I will use white glue for certain applications involving paper based items. Testors Clear Parts Cement for windows and other clear parts. For some pieces that really need to be bonded, I will occasionally use 2-part epoxy.
Essentially the kit was built box stock with the exception of custom wheels, mufflers, disk brakes and tires. The metal axles were not used so that I could lower the front end of the car, plus the custom wheels would not work with them.
The interior is very straight forward, but in the 60s everything had to have a lot of chrome. The seats had vertical strips of chrome in them, which I very carefully applied Bare Metal Foil. I made the narrow strips by sandwiching two #11 blades together and making long strips using a metal ruler as the guide.

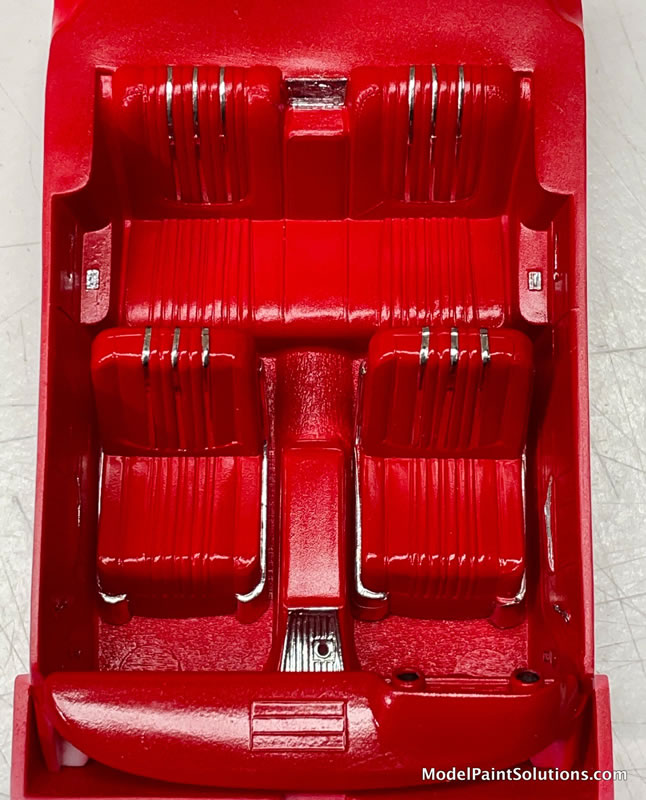
It is a great way to get consistent width strips. Extensive use of tweezers and magnifying lenses were used to complete the seats. The seat belts were made with masking tape and photo-etch buckles.
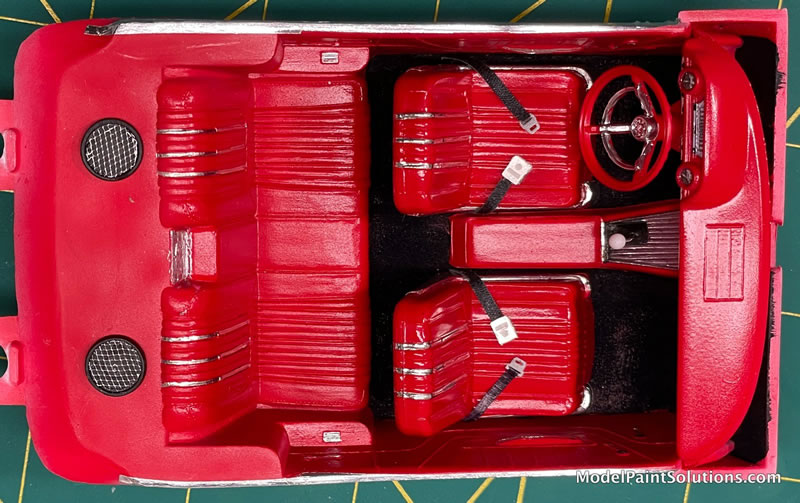
I made aftermarket stereo speakers for the rear deck from a couple of custom headlight surrounds, which needed extensive sanding for proper thickness, and some fine screen for the grills.
The lower half of the dashboard had a swath of BMF. The details were enhanced with black Tamiya Panel Line Accent. The window cranks and door handles were brush painted using Molotow Chrome. As are the FORD letters on the hood.
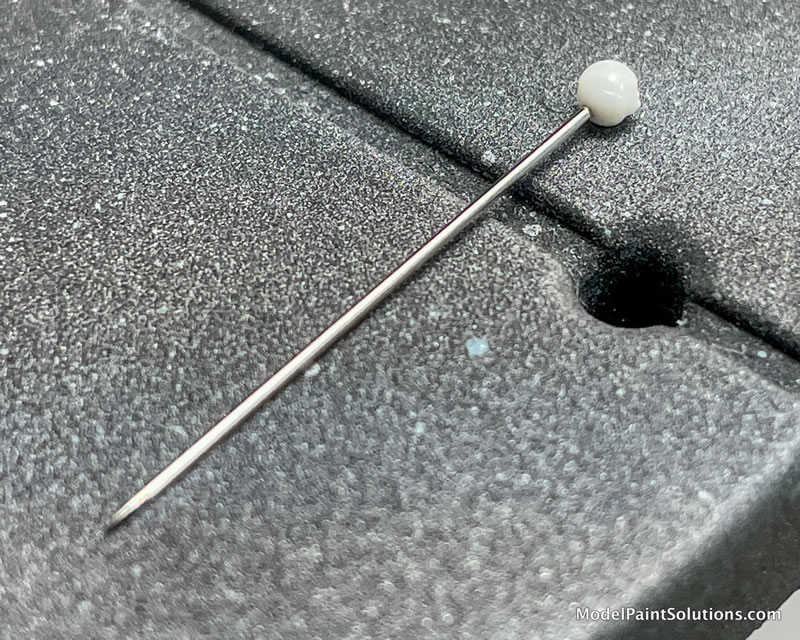
The manual shifter was made from a pin with a white ball on the end. The ball was out of scale, so I put the pin in my modeling drill and sanded until it was the correct size.
The interior floor was brush painted Tamiya Flat Black.
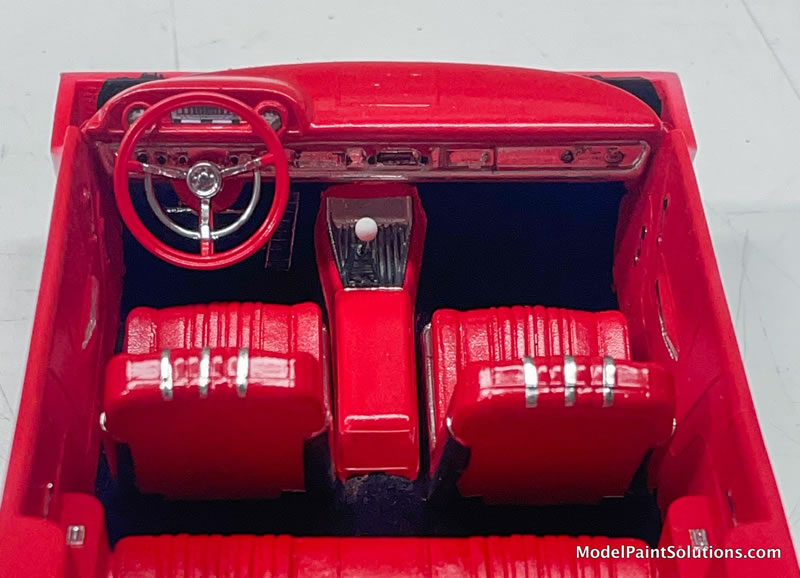
Black embossing powder was pressed into the wet paint to simulate the texture of automotive carpeting.
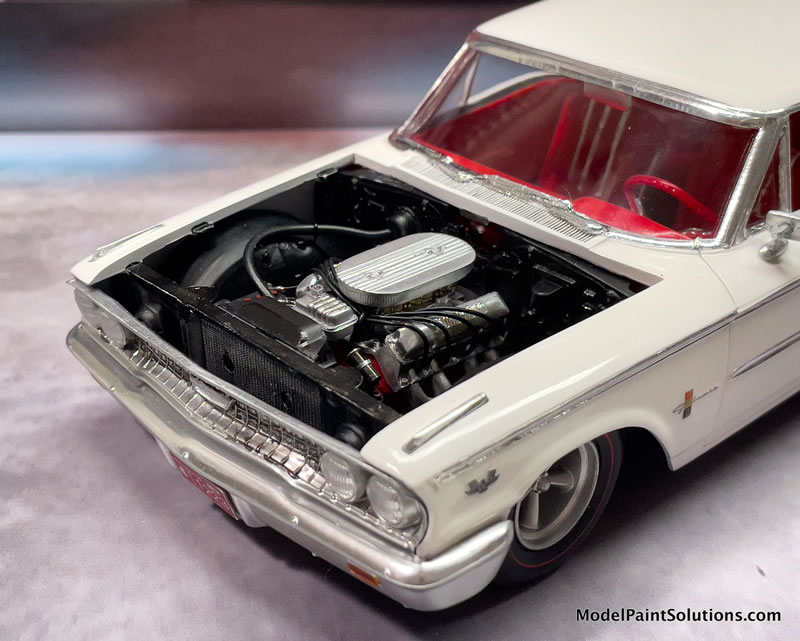
The engine is mostly stock. I really like the look of a wired engine, so I made my own distributor using a new method. I drilled out the center of the molded-to-the-manifold distributer all of the way through the manifold.
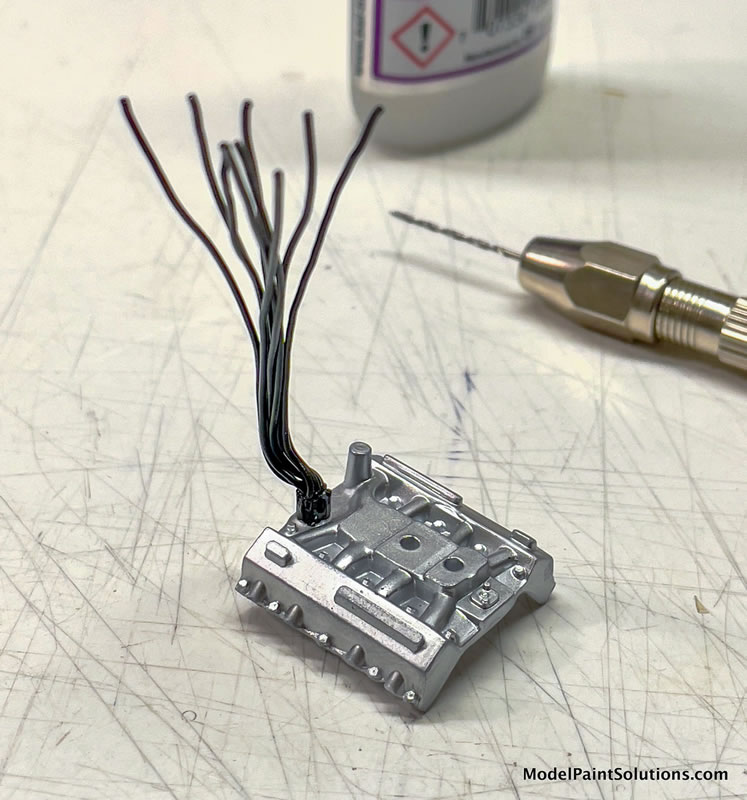
I stripped about 3/8” of the black coating off of nine 2-3” pieces of the wire.

Eight wires for the plugs and one for the aftermarket coil. Then twisted all nine bare wires together as tightly as possible and fed them through the drilled out distributor and out the underside of the manifold. A drop or two of CA glue was put into the hole from the bottom side. The wire bundle sticking through the manifold was snipped off. This worked so well, as I have had troubles before with wires coming out while trying to run them to the appropriate spots on the block.
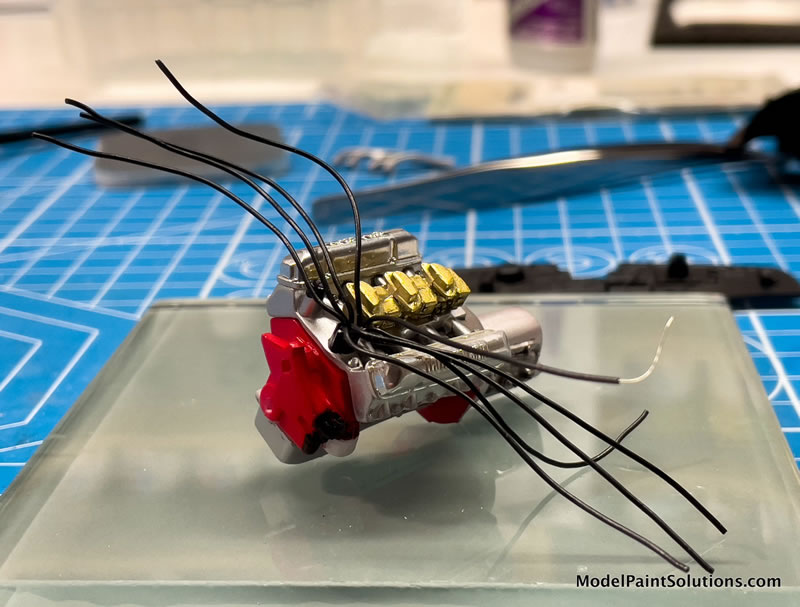
Paints used were: AK Aluminum for the transmission and air cleaner, AK Chrome for valve covers, AK Steel for exhaust headers, AK Flat Aluminum for the manifold, Model Master Brass for the carbs.
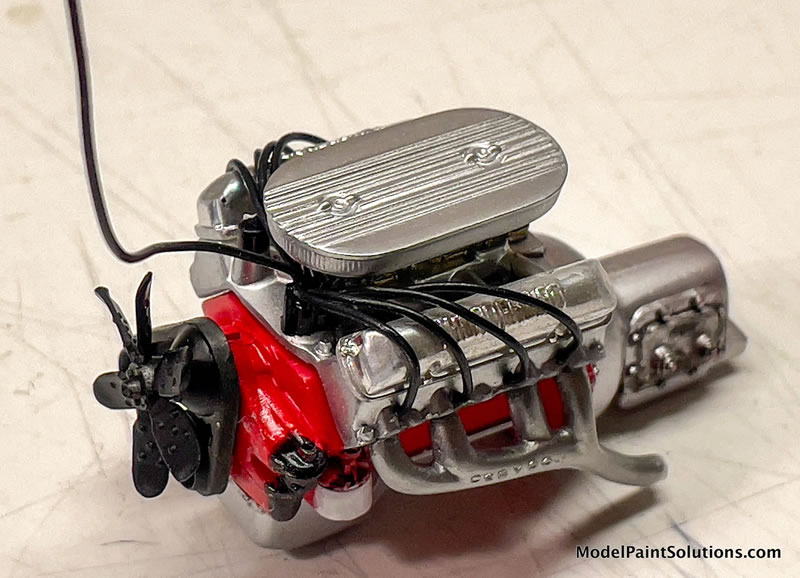
Battery, firewall and fan assembly Mr. Surfacer 1500 Black, fan belt Mission Tire Black.
Chassis / Muffler / Wheels / Tires |
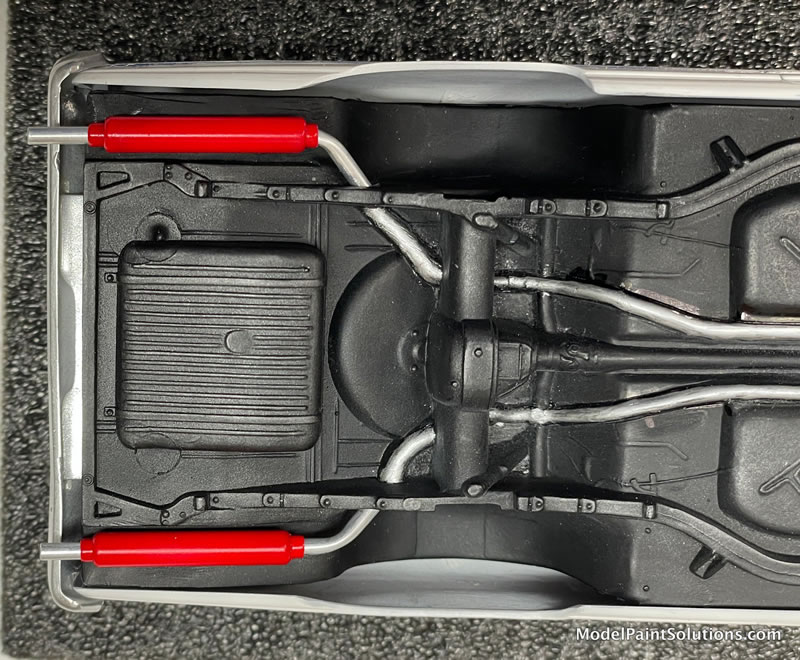
The chassis was a typical older AMT with the entire drivetrain, exhaust system and rear suspension all in one piece. I painted the exhaust system with a silver Sharpie (do not tell John Miller!). It allowed me to keep a fairly sharp/straight edge to define the pipes.
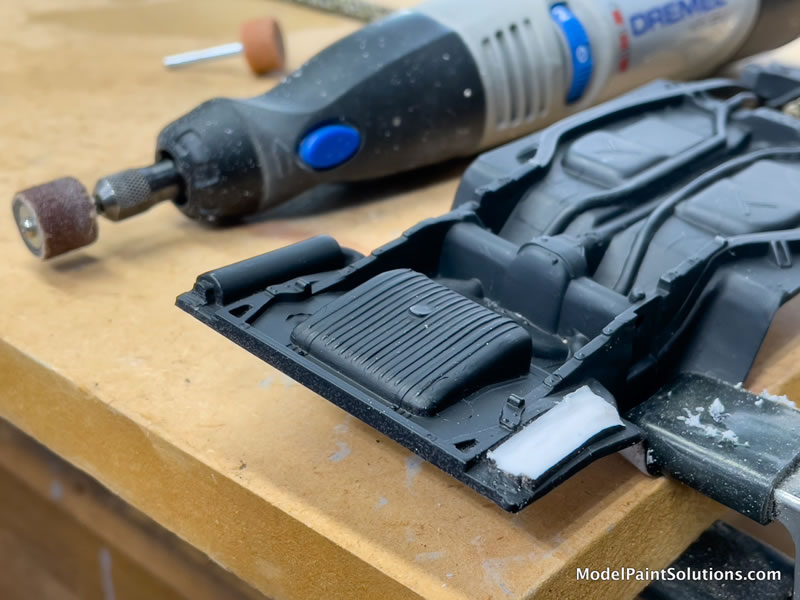
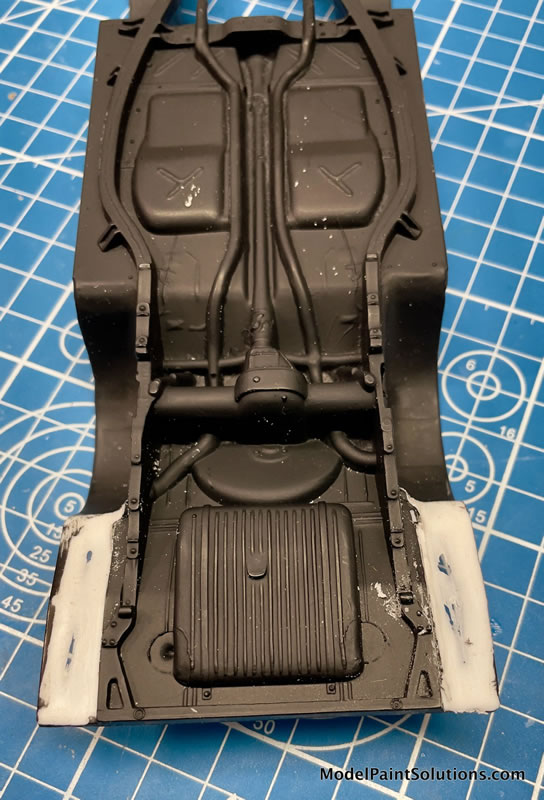
The molded in mufflers were large, ugly and would have made it difficult to have nice exhaust tips out under the rear bumper. I ground off the molded in mufflers with my Dremel.
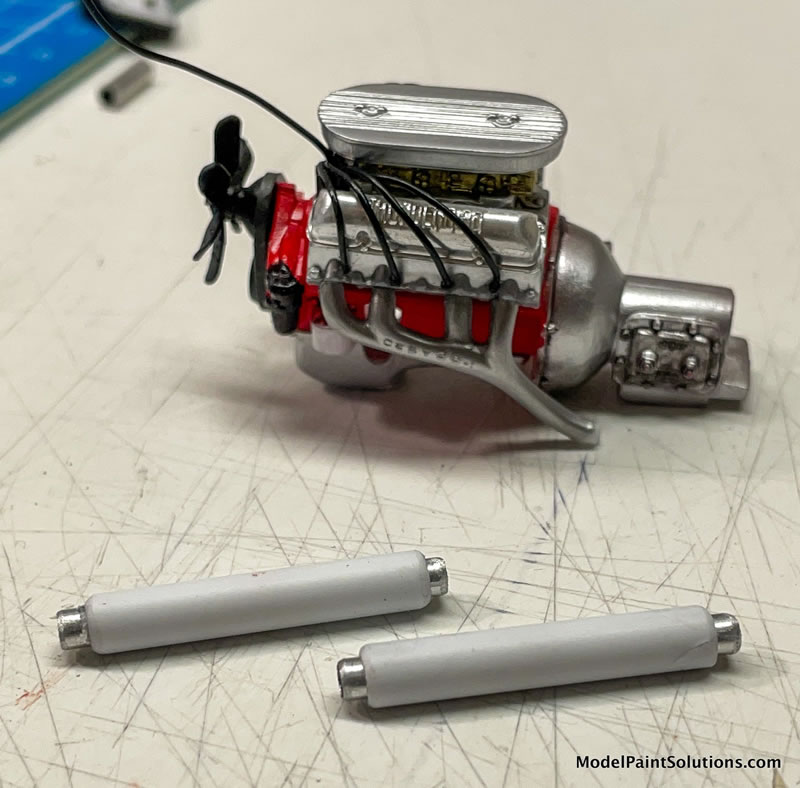
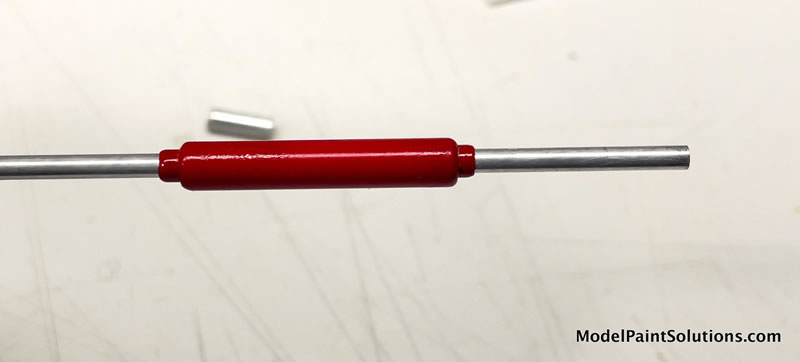
I replicated Thrush glass pack mufflers with a combination of two sizes of aluminum tubing and one size of styrene tubing for the outer muffler.
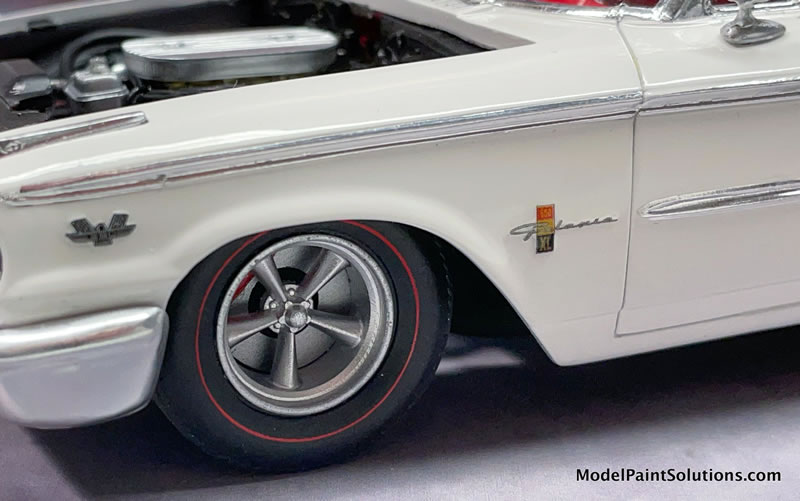
Wheels can make or break a cars appeal, so I chose a modern take on American Racing 5-spoke wheels from Scale Speed Garage, printed by SSG owner, Chris Bell. (If you are interested in 3D printing, definitely check out Scale Speed Garage.) The wheels are two part and so can adjust the depth/offset and then glue to size. The wheels were primed with AK Aluminum and over sprayed with AK Chrome, which gave a really nice finish.
Tires on any car that has been driven, don’t have perfectly shiny tread. I use my electric drill, two wooden balls from a craft store and a bolt to buff down the tread. It works great if you want to make very worn out tires as well. Just clamp the tire and spin the drill while hold sandpaper or sanding block against the tread.
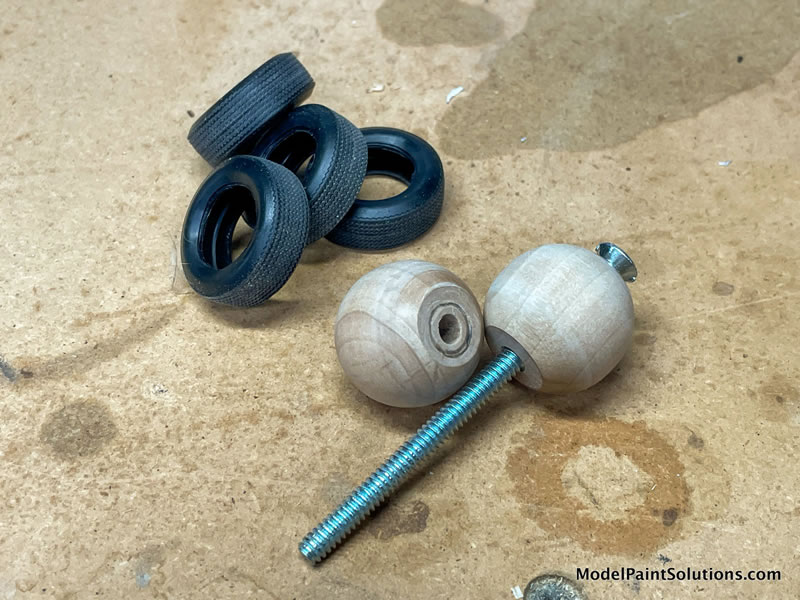
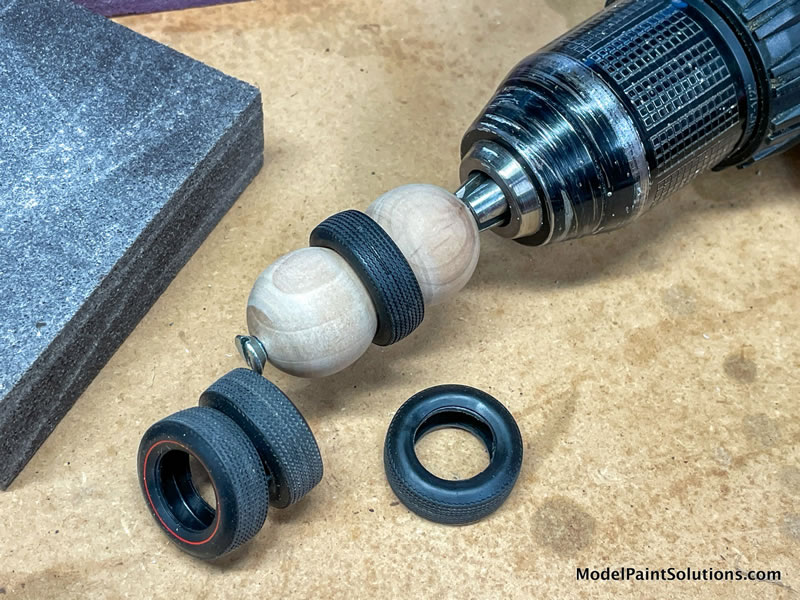
Depending on the tire material, you may have to reverse the drill to clean up some fuzzy residue.
The chassis was painted with Krylon Maxx flat black primer straight from the spray can. I put it in a bowl of very warm water for a few minutes, shake, and spray multiple light coats from about 2 feet away.
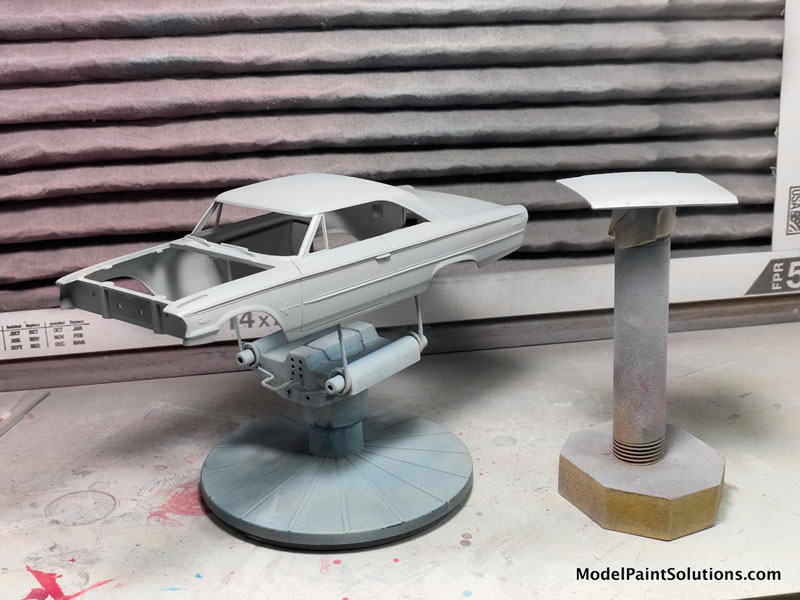
All parts were sprayed with various primers. The body was sprayed with Tamiya Grey Fine Surface Primer so that any imperfections stand out. White primer on white plastic just makes it too difficult to discern flaws. The engine and transmission were primed with AK Extreme Metal Aluminum.
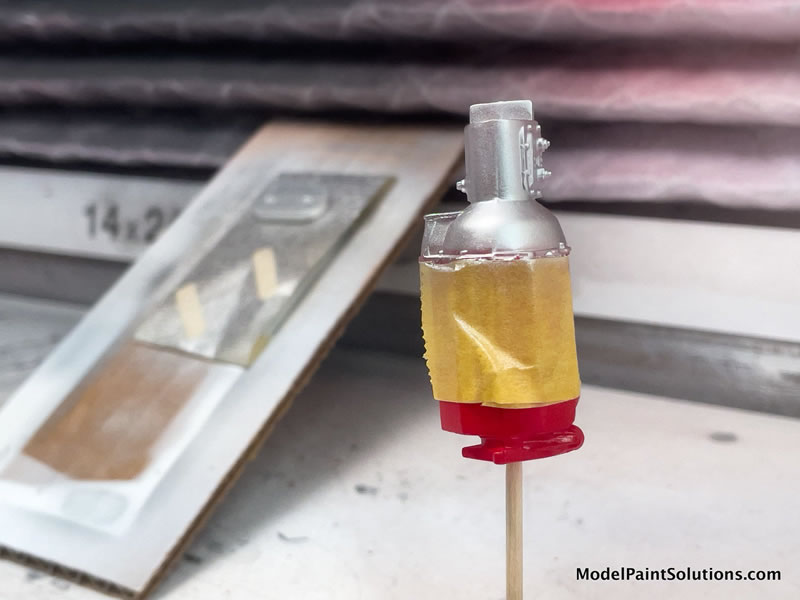
The interior was primed with Splash Paints Pink Primer. I used both a Harder & Steenbeck Infinity and Gaahleri airbrushes for this build. Based on the surface area/size of the part being painted, I switched between using either 0.20 or 0.40mm tips. Virtually every part was airbrushed, as I really don’t like brush painting.
Most paints were diluted from 50/50 to 30/70 (paint/thinner) and sprayed at 18-22 psi. The body was painted with a mix of AK Flat White and AK Creamy White. The interior and engine block were airbrushed Tamiya X-7 Red and topped with a semi-gloss clear. All other parts, except the chassis, were painted with a combo of Tamiya, AK Extreme Metal paints and Mr. Surfacer 1500 black.
The AK whites used for the body were shot 30% paint and 70% AK High Compatible Thinner. The body was clear coated using Splash 2K clear and buffed down a bit with Novus #2 Fine Scratch Remover.
The kit supplied decals were used for the body side markings and some of the dashboard.
A drop of clear epoxy glue was put over the gauge decals. It dries to make a perfect glass/plastic gauge cover.
Micro Set and Micro Sol were used to apply the decals.
Sometimes the finished model just isn’t quite what you hoped it would be. That is what this one is for me. Too many struggles along the way that don’t meet up with my normal level of quality creates a “good enough” attitude that follows me all the way to the finish line.
Another thing I learned while building this kit is that I was missing many details due to aging eyes. Once I put on the magnifying glasses and really studied the kit, I quickly figured out why this and a few of my previous builds also weren’t up to my usual standards. So I suggest putting cheater glasses or magnifiers on and see what you might be missing or could improve in the process! Plus they look really cool!! ;) Really!
For more on this article and other articles by Brad, go to:
https://modelpaintsol.com/builds/amt-ford-1963-galaxie-500-xl
Text & Images Copyright © 2024 by Brad Huskinson
Page Created 18 January 2024
Last updated
18 January, 2024
Back to HyperScale Main Page
Back to Reviews Page

|
 Home
| What's New |
Features |
Gallery |
Reviews |
Reference |
Forum |
Search
Home
| What's New |
Features |
Gallery |
Reviews |
Reference |
Forum |
Search