HobbyBoss 1/32 scale
Liberator GR.Mk.VI
by Roland Sachsenhofer

A quote from Paul Kennedy's book "Engineers of Victory" should open this article: "Closing the air gap did not happen because some great person decreed it. There was a group of chiefly Canadian air engineers who in early 1943 pulled one bomb bay from a B-24 Liberator, replaced it with extra fuel tanks, and at last created an aircraft that could reach the transatlanticgap." Canadian Warplanes 3: Consolidated B-24 Liberator (silverhawkauthor.com)
The characteristics of the B-24 Liberator actually predestined it for a purpose for which there was an increased demand from 1941 at the latest: with its impressive range and high payload, the Liberator was an excellent maritime surveillance aircraft, whose use in the squadrons of the British Coastal Command made it possible from May 1943 to close the "Black Pit" in the mid-Atlantic, where German submarines had been operating undisturbed beyond the range of Allied aircraft until then.
One of the squadrons activated for this purpose was the 10th (BR) Squadron of the Royal Canadian Air Force. Formed in Nova Scotia in September 1939, the unit was initially equipped with Westland Wapitis before switching to the Douglas Digby in May. From April 1943 until its disbandment in May 1945, the squadron flew the Mk.II, Mk.IV and GR.Mk.VI variants of the B-24 Liberator. Their logbooks record 22 attacks on German submarines, three of which resulted in the sinking of enemy vessels: in October 1942, the 10th Squadron sank U-520, and a year later, in September and October 1943, the Liberators of the 10th Squadron destroyed U-341 and U-420.
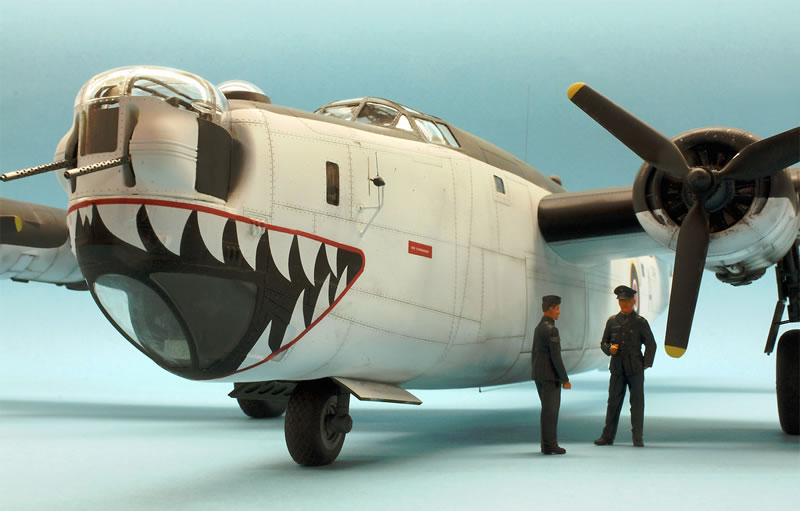
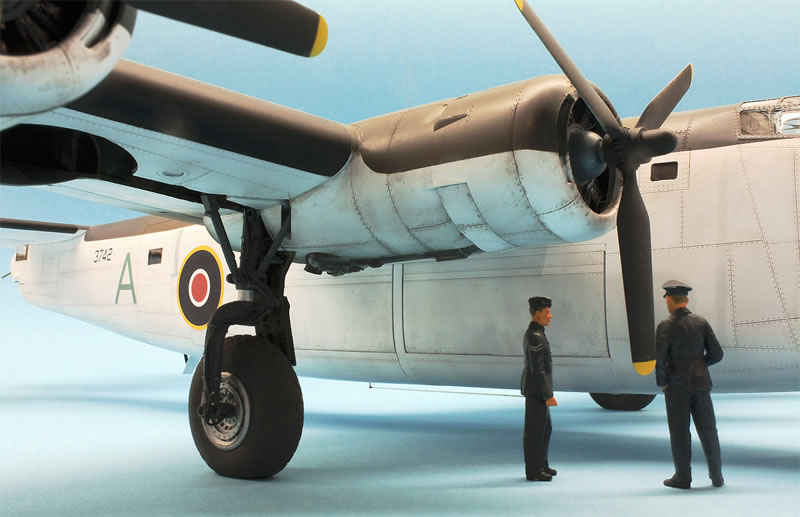
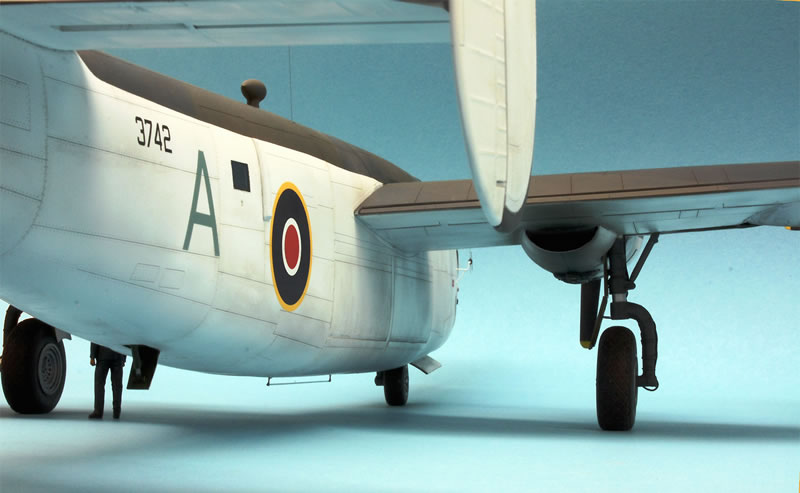
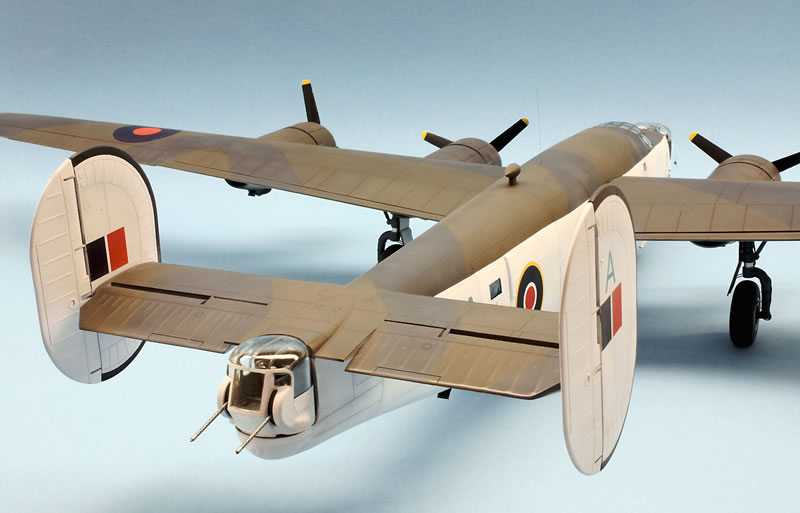
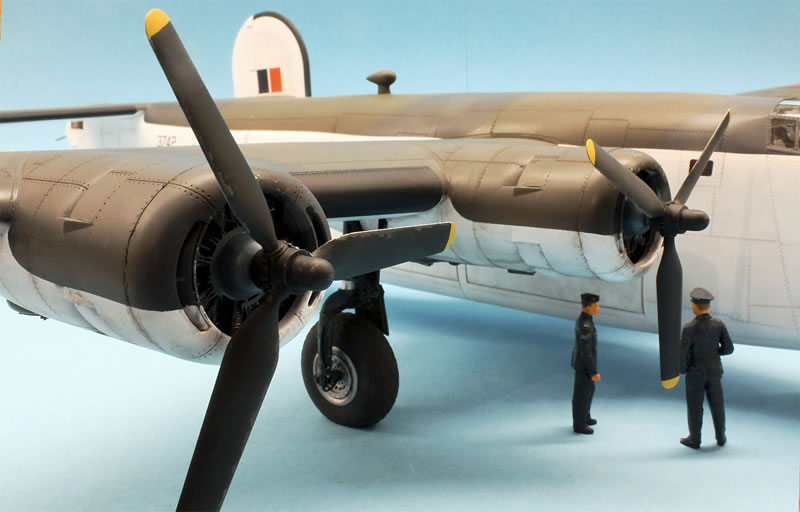
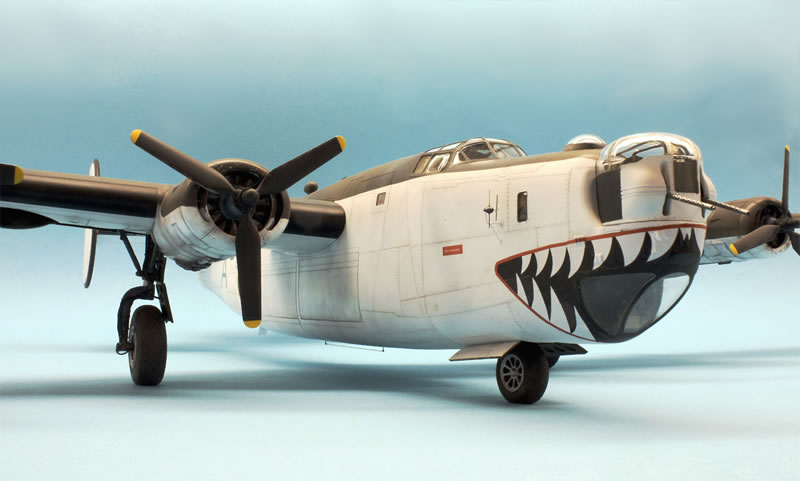
The model shown here is a Liberator GR.Mk.VI used in 1945 with the identification "A" and the construction number 3742. Several modifications were made to this aircraft. The lack of threat from enemy fighter planes at this time allowed the weight-saving removal of the ventral ball mount and the upper forward weapon mount, but investments were made in the installation of an ASV ("Air Sea Vessel") radar system to detect enemy submarines and a weapon load to combat them in the form of bombs, depth charges and torpedoes. Canadian Liberators also deployed the "Leigh Light" searchlights in conjunction with the ASV radar.
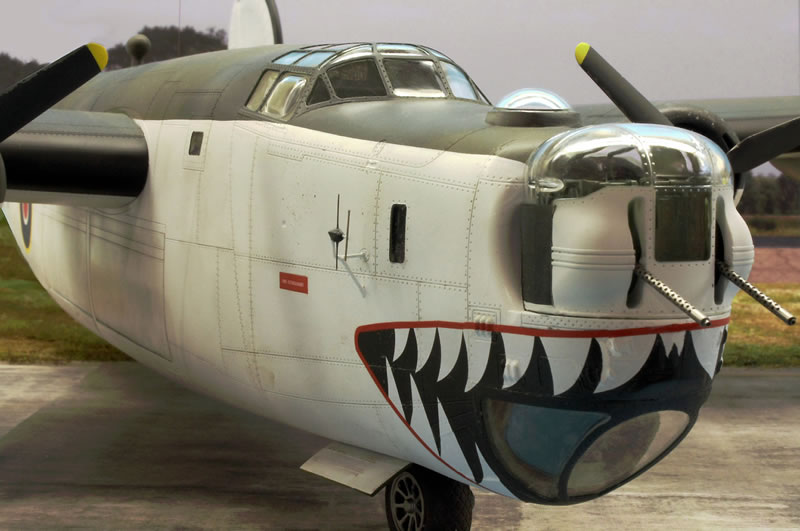
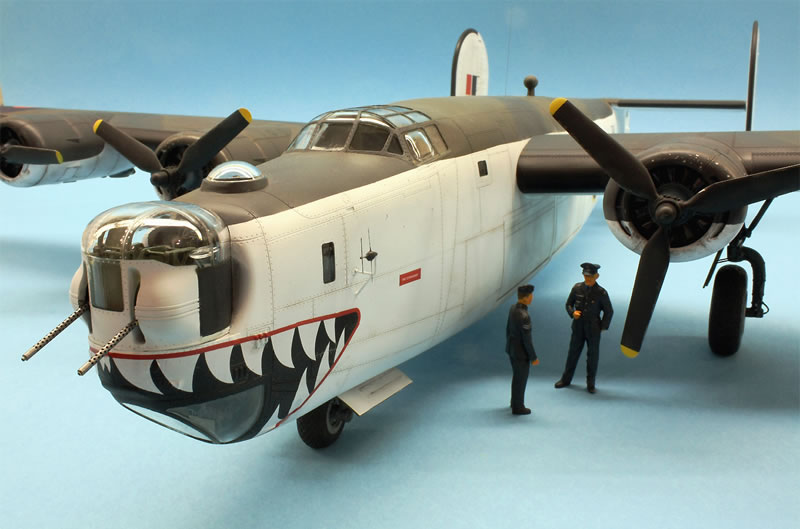
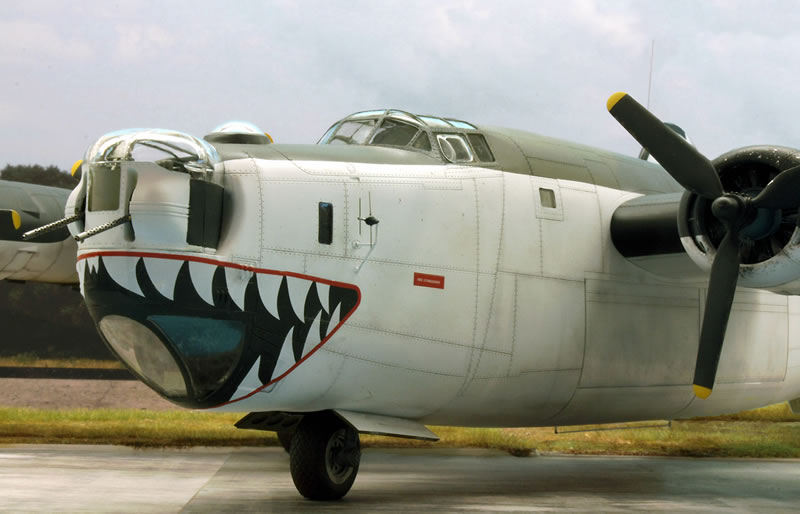
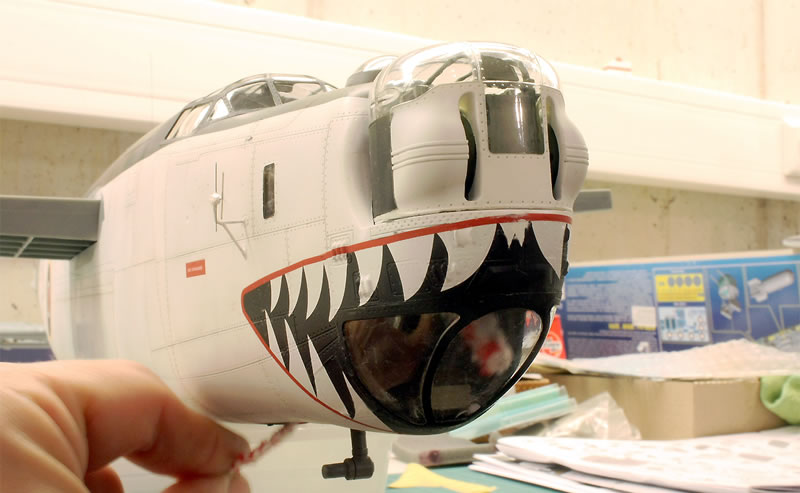
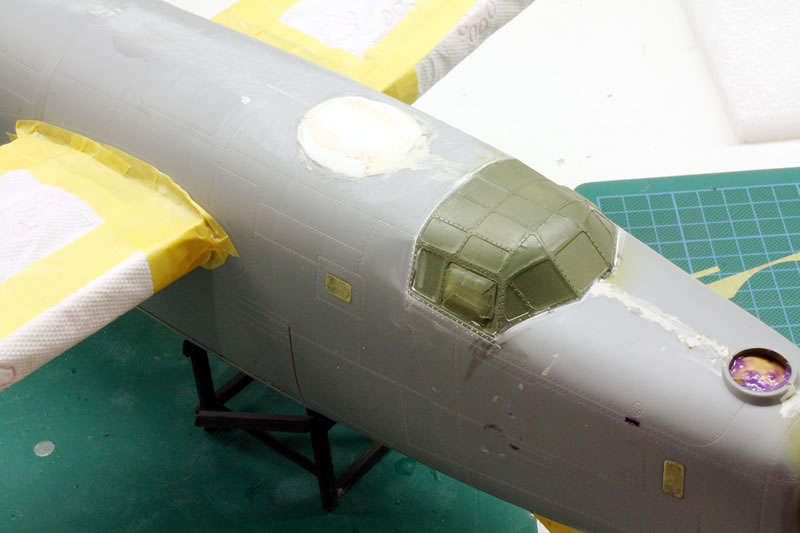
The photographically well-documented aircraft of the 10th Squadron show the widespread use of decorations in the form of "shark bites". The prototype of my model also has one. If I am not mistaken, one of the original photographs found of the "3742" shows a later (or earlier?) variation of this motif: the entire front bow area was painted in one colour, I assume yellow, and two eyes were painted on, so that the painted teeth fit into the larger context of a predator's head.
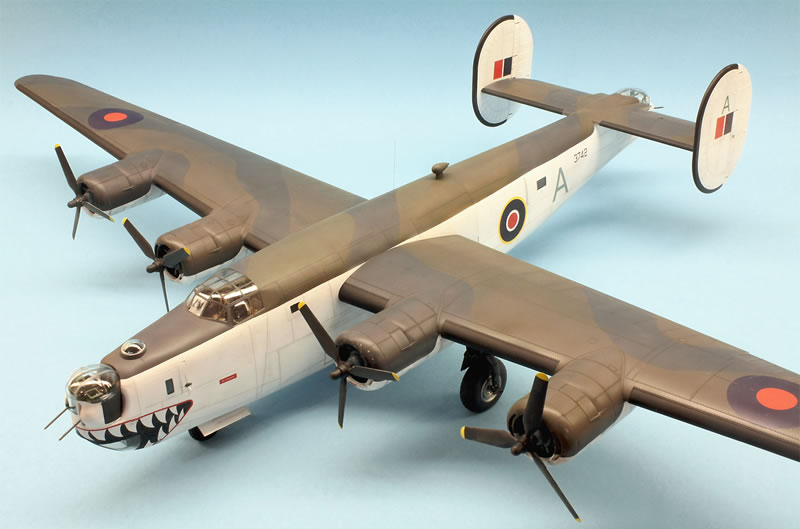
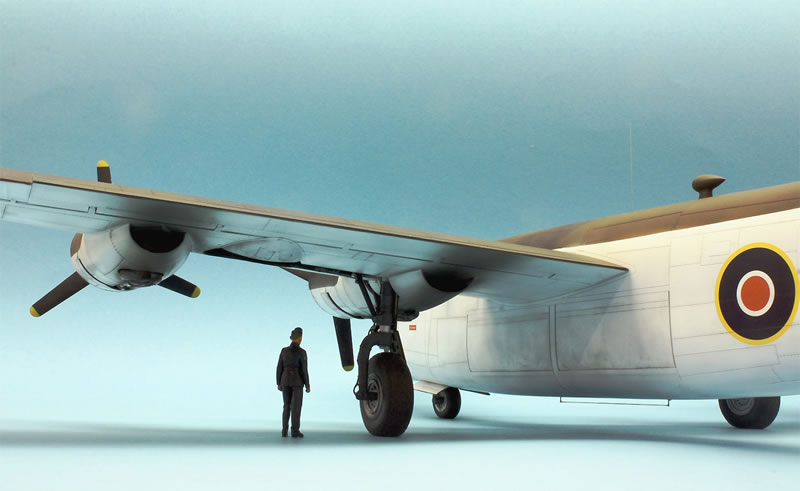
Even without the predator's head, this Liberator "3742" was exciting enough for me to choose it as the model for my "big" B-24 Liberator from Hobby Boss! Now it comes as no surprise when I say that superlatives often have to be used when describing a 1:32 scale model of a four-engined B-24 and the sheer size of the model is a challenge in itself. Even the dimensions of the kit box are impressive, once opened you see parts that have wingspans that I personally have never handled before.
Lots of light....
The tape measure has to be extended to over 60 centimetres to measure the fuselage, which consists of two continuous half-shells, from bow to stern. If you combine this length with the wingspan of around 100cm, which protrudes at right angles to it, you have a hugely expansive object in your hands that needs to be moved carefully across the "airspace" of the table!
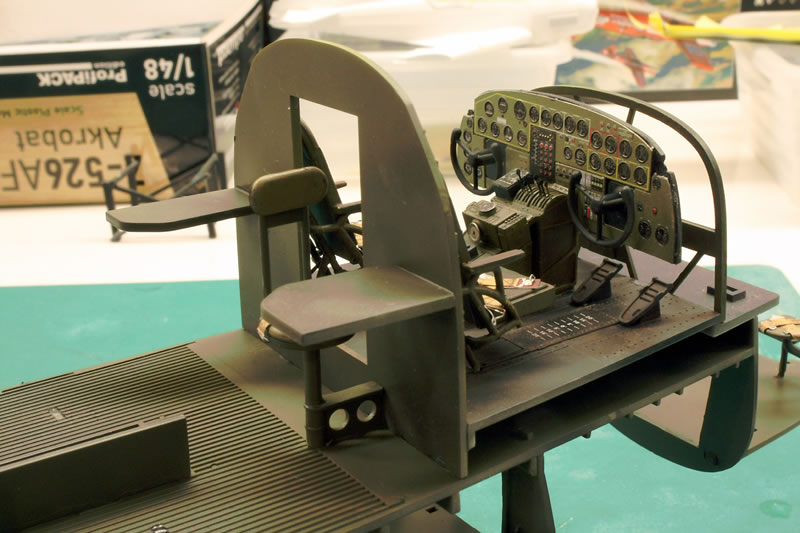
The kit is not only impressive in terms of its dimensions, but also in terms of the level of detail. I am referring in particular to the interior of the fuselage. You have a lot to do to fit the large number of parts, which leave no area untreated, from the nose turret to the cockpit and the bomb bay to the two gun emplacements and the gun turret at the rear.
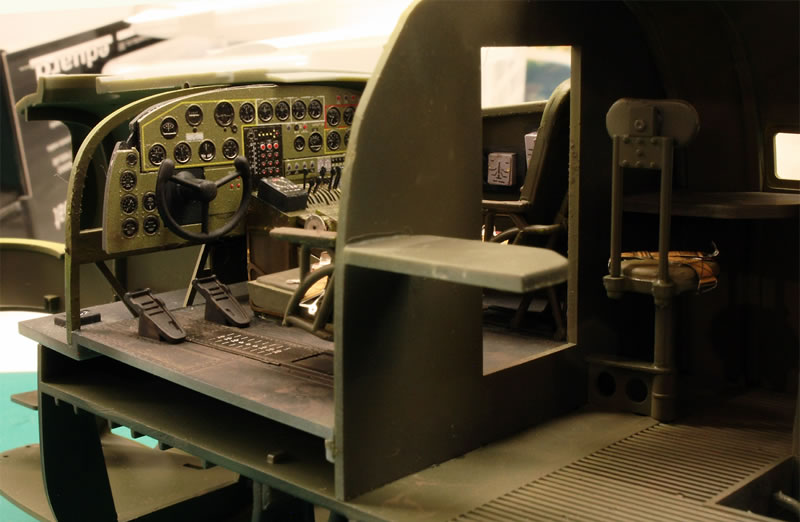
On my model, I used the recommended Eduard etched parts set to refine the cockpit area, while the two turrets were built from the box and fitted with the details from the kit. As it soon became clear that I would be building the fuselage largely closed, a lot of the details of the fuselage section behind the wing spars remained unbuilt. This not only saved time but above all: weight!
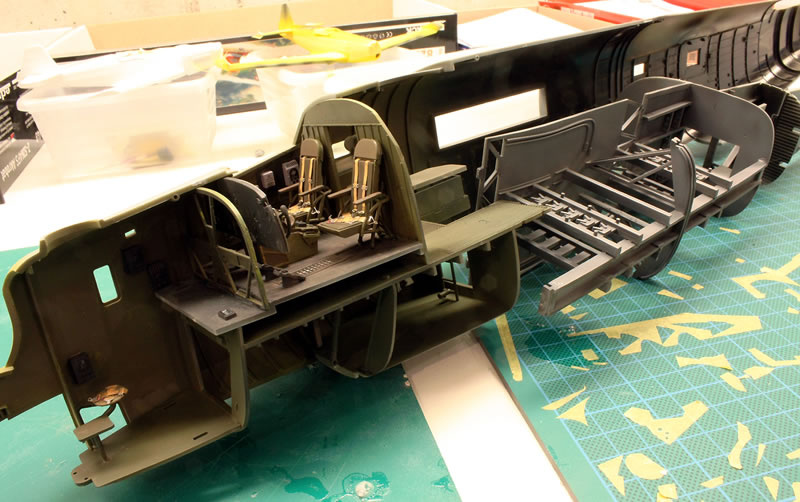
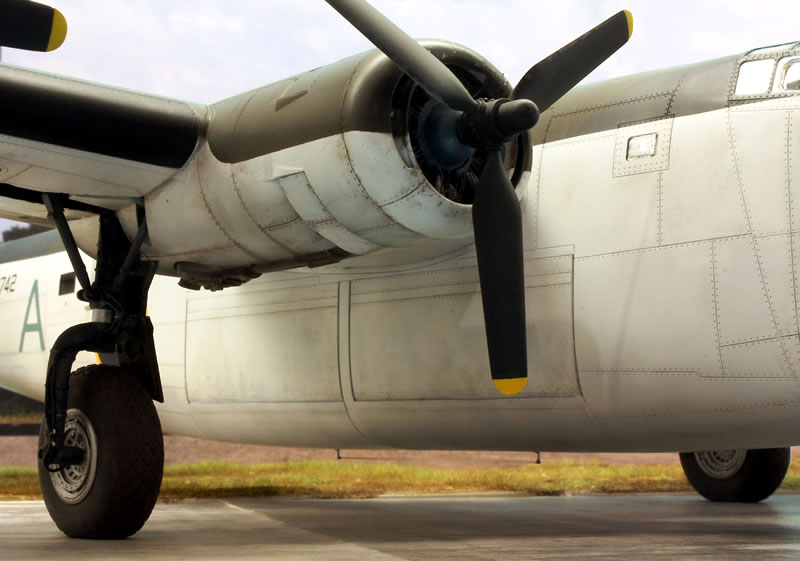
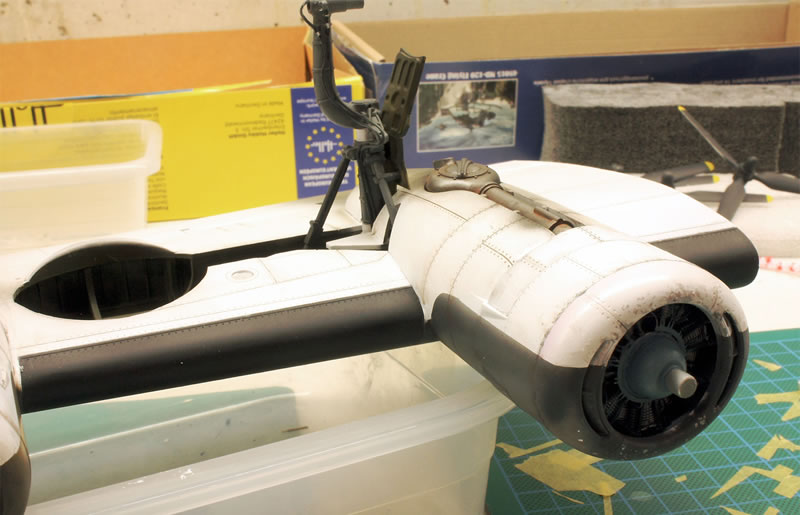
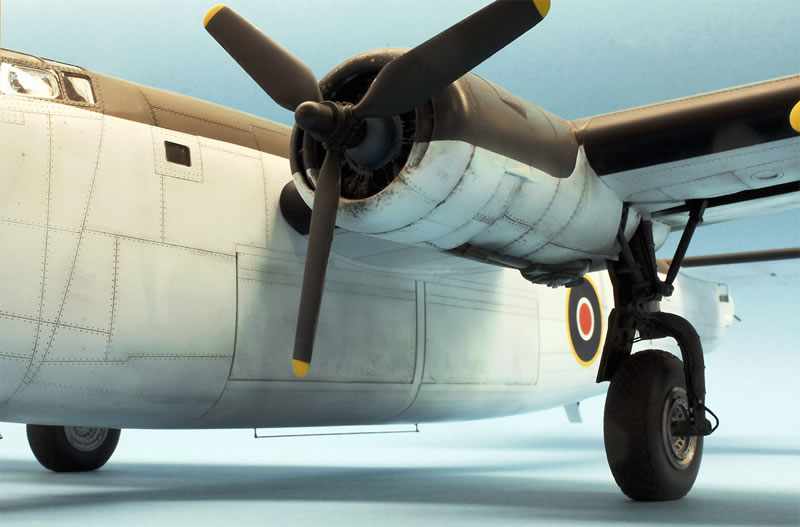
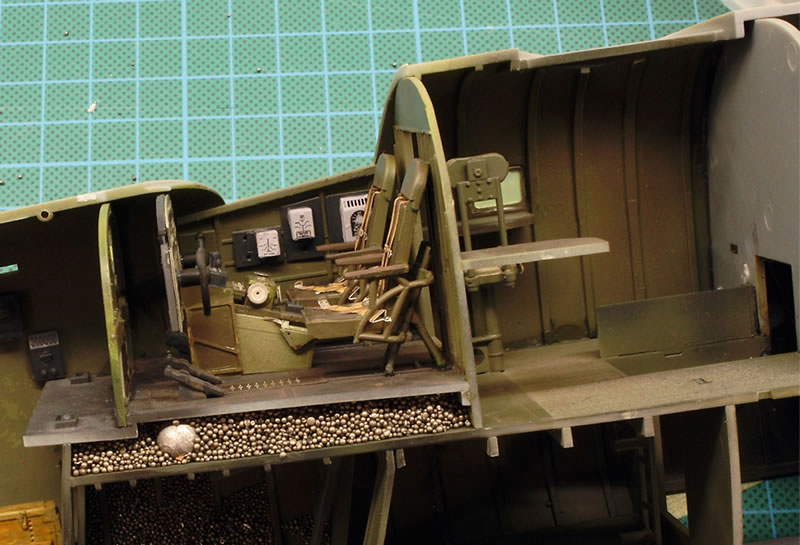
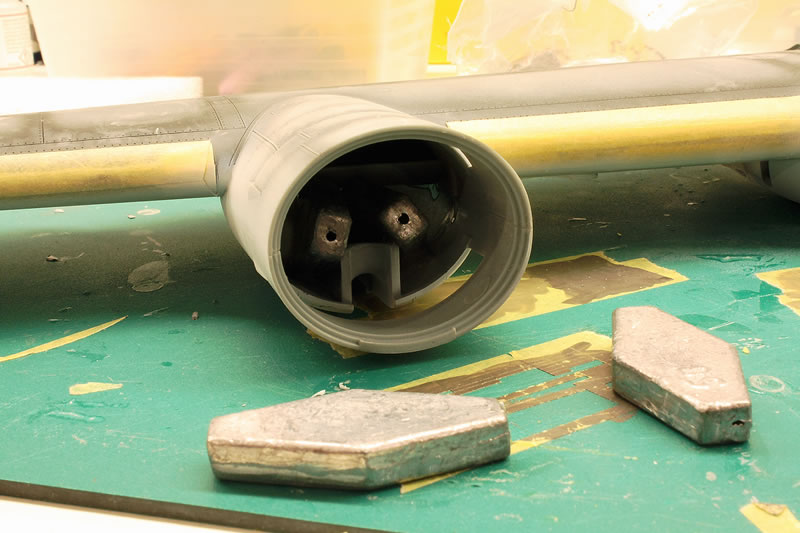
This was soon to prove a great advantage: a serious issue with the B-24 Liberator - of any scale, by the way, as I can now say - is the question of how to avoid a massive "tailsitter". Even with a largely empty rear end, I needed a lot of lead weights and a fair amount of ingenuity to get the now quite heavy aircraft stable on the nose wheel. The construction photos give you an idea of where I had to use lead to achieve this goal - in the end, even the front ends of the engine nacelles are not safe from weighty "lead"!
The accuracy of fit of the accurately moulded plastic parts without fish skin is impressive throughout and makes the time-consuming building process considerably easier. It is of course also advantageous that a good selection of etched resin and metal parts are now available for this B-24, which further enhance the good level of detail. In addition to the cockpit set, this model also features resin tyres from Eduard and brass-turned MG barrels/professional modellers. I can't say anything about the quality of the decals, which appear to be trustworthy, as I used the "B-24 Liberator in RAF/RCAF/RAAF Service" sheet from DK Decals. These were excellent to work with.
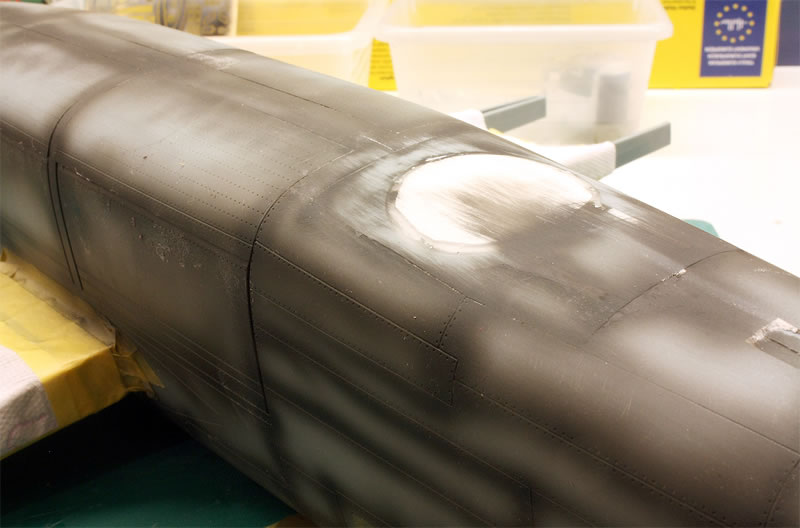
...and a little shadow!
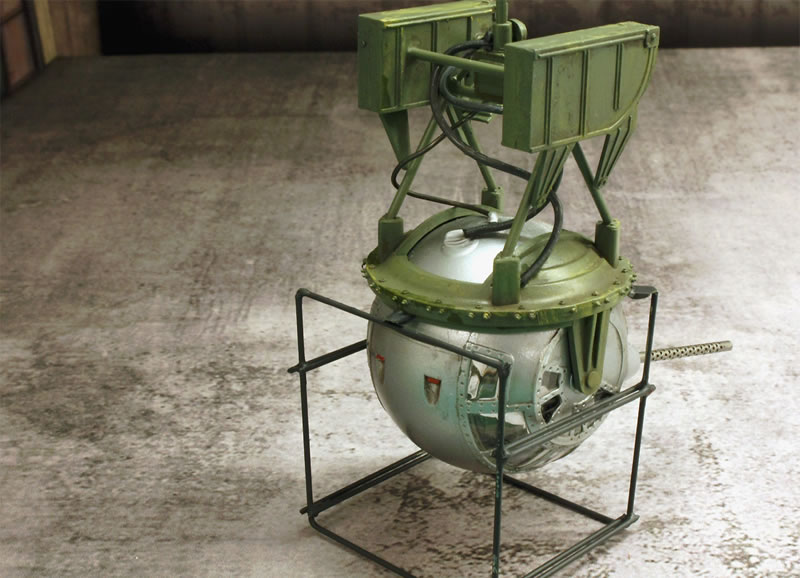
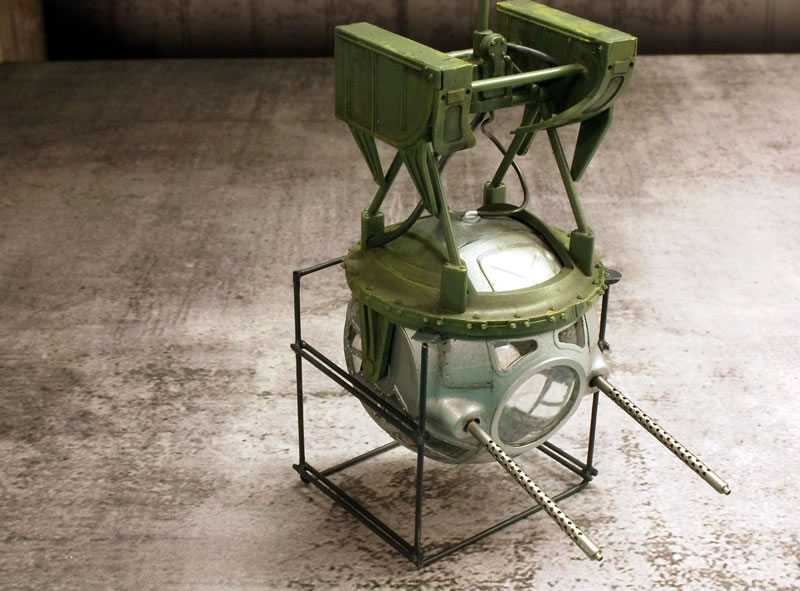
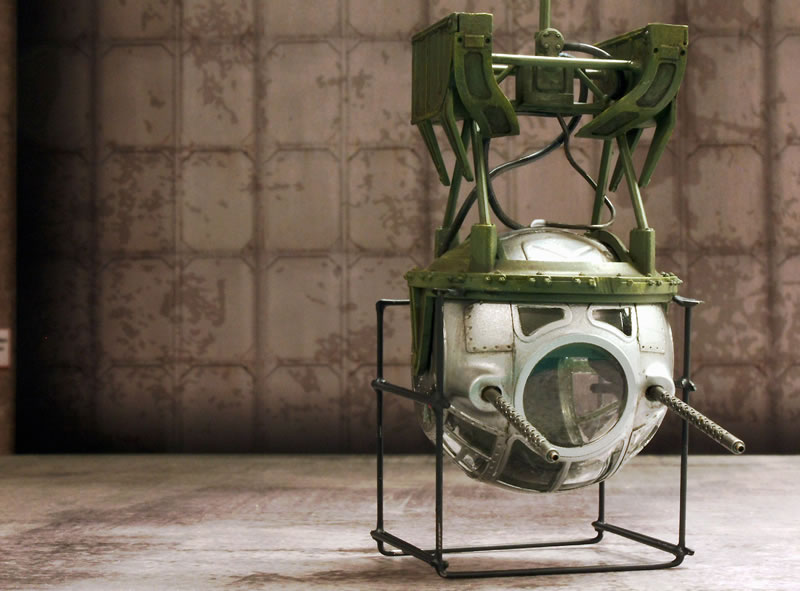
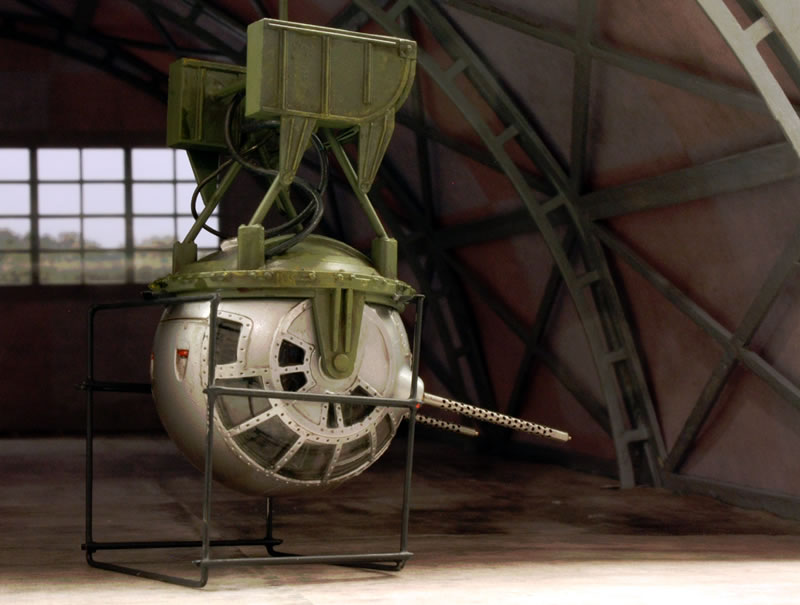
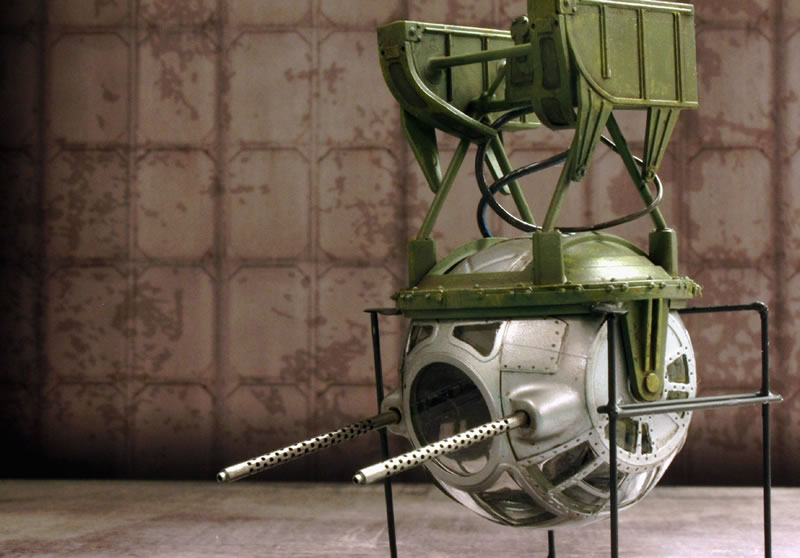
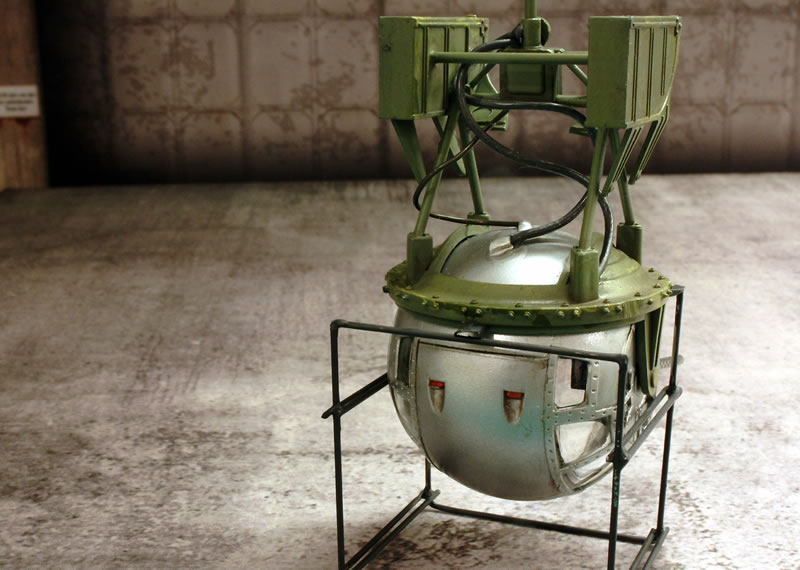
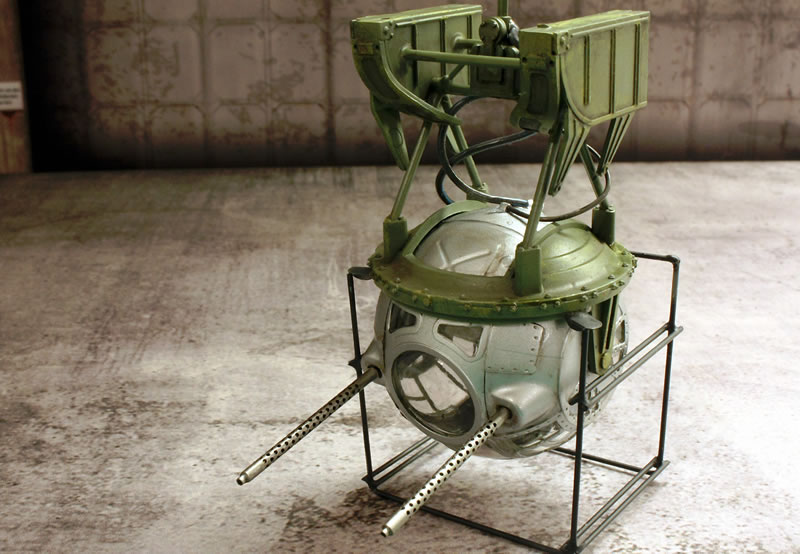
With a lot of light, there are also shadows: one shortcoming of the kit is undoubtedly the less than elegant glued seams, which are clearly visible across the centre of the respective transparent parts on the bow and stern stands. The only solution to this is to replace them with a continuous transparent part, which one manufacturer now offers. For my model, however, I decided to live with this unsightly detail - and to console myself with the potential of the impressive "ball turret". As this ball-shaped turret on the belly of my original was not fitted, I was able to take the liberty of attempting a "model within a model".

Mounted on a framework improvised from wire, this ball turret now serves as a small eye-catcher. Details such as hydraulic lines and cabling were added, and the brass-turned machine gun barrels also help to fill the model with realistic life. As a note: when looking at the weapon stand, I also realised that George Lukas must have taken a close look here: who could deny that the design of Sperry's ball stand was modelled on many a design from the "Star Wars" universe?
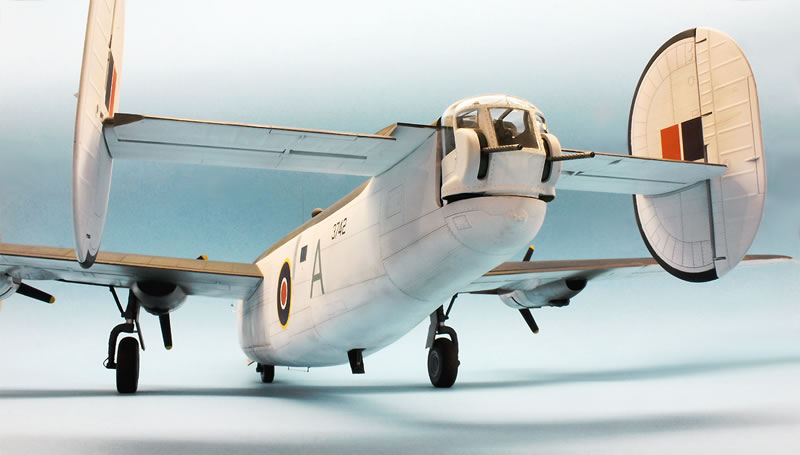
Finally, I would like to come back to the subject of the model's extremely expansive dimensions, which was briefly mentioned above. This becomes apparent as soon as the wings are attached to the fuselage. The building instructions call for the fixed connection of the wings and fuselage very early on in the building process and present this as an absolute necessity. I was able to make an experience that I consider to be quite helpful: apparently there is an alternative here! According to the building instructions, the two halves of a wing are glued together in such a way that two pegs on the inside of the parts slide securely into an opening on the wing spar. As a result, the fuselage and wings are then firmly and permanently joined together. I couldn't resist the temptation to try out what would come out if these two tenons were sawn off...
To make a long story short: with the connecting pins removed, you can easily pull the wings off the spar and push them back on again. This does not affect the strength of the wing, nor does it make the wing fit less firm and stable.
The forces exerted by the model standing firmly and heavily on its wheels even fix the pushed-on wings to the fuselage.
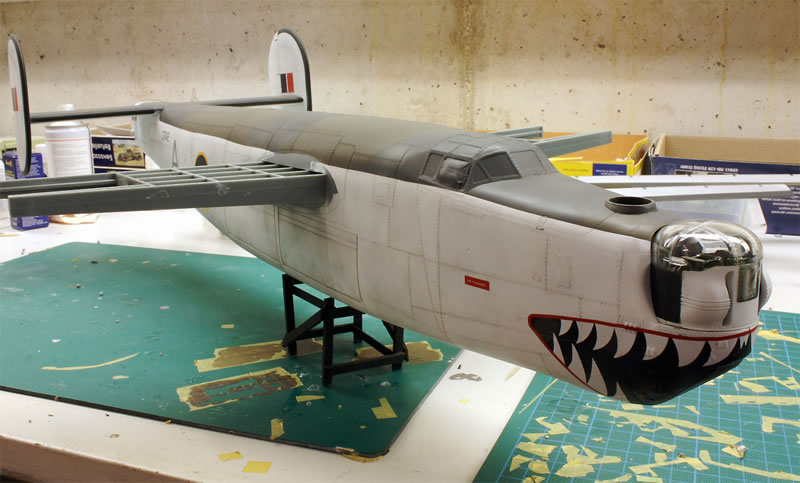
This is of course extremely good news! On the one hand, the construction of this Leviathan is much simpler, and on the other hand, storage or transport of the B-24 is much easier. The attached pictures can illustrate these points.
In conclusion, I can say that the B-24 Liberator from Hobby Boss met my expectations. You have to allow for a large amount of time, energy, stamina and, last but not least, manoeuvring space when building the model, as well as storage space for the finished model, but you get "great" things in return. The kit is - except for the mentioned issue with the turrets - comfortable and sensibly built, well equipped and scores with excellent accuracy of fit - it is guaranteed that the massive dimensions of the completed Liberator in the In conclusion, I can say that the B-24 Liberator from Hobby Boss has met my expectations: you have to take into account a large amount of time, energy, endurance and, last but not least, probably also manoeuvring space during construction as well as parking space for the finished model, but you get "great" back. The kit is - apart from the aforementioned issue with the turrets - comfortable and sensibly constructed, well equipped and scores with excellent accuracy of fit - it is guaranteed that the massive dimensions of the completed Liberator will keep the memory of the pleasure alive for a long time to come!
If you are interested in the building process, please have a look here on Scalemates:
https://www.scalemates.com/profiles/mate.php?id=10148&p=albums&album=105819
As always, I am open to suggestions and questions:
ro.sachsenhofer@gmx.at
Model, Images and Text Copyright ©
2024 by Roland Sachsenhofer
Page Created 13 March, 2024
Last Updated
13 March, 2024
Back to HyperScale Main Page

|
 Home
| What's New | Features | Gallery | Reviews | Reference | Resource Guides | Forum |
Home
| What's New | Features | Gallery | Reviews | Reference | Resource Guides | Forum |