Hasegawa 1/72 scale
Kawanishi N1K1 Rex
by Steven Hustad

Description:
N1K1 Rex
Japanese name ‘Kyofu’ – ‘Gale/Strong Wind’
Sasebo Naval Air Corps, as seen at Sasebo naval base, September 1944 – for MPS
Scale:
1/72
Kit:
1/72nd Hasegawa Kawanishi N1K1 “Rex”
Review Type:
Build
Introduction
This is not an old kit, but it’s not a new kit either. I think Hasegawa released their line of “Rex” seaplane fighters in 1995, so it’s nearly 30 years old! This model was built from their Kawanishi N1K1 Kyofu (Rex) `Early Type´, Kit No. 51335/AP 35. I’ve always loved seaplanes, and Japanese seaplanes in particular. So this was a no-brainer choice to tackle and was built alongside Sword’s new(ish) Mitsubishi G4M1 “Betty” (another story there…).
I’d pulled this kit out of my stash to look at probably a couple dozen times since I bought it (near it’s release year) to build it. And even though it has fine surface detail, reasonably accurate dimensions and shapes/outlines plus a great ‘fit’, I’d always put it back on the shelf. That was because to build it to the standard I wanted, I knew it would also require a lot of extra attention in the cockpit & engine, some careful research and work to open up and animate the flying surfaces, cowl flaps, and a new canopy (vacuform), etc. But last year it was time to take the bait!
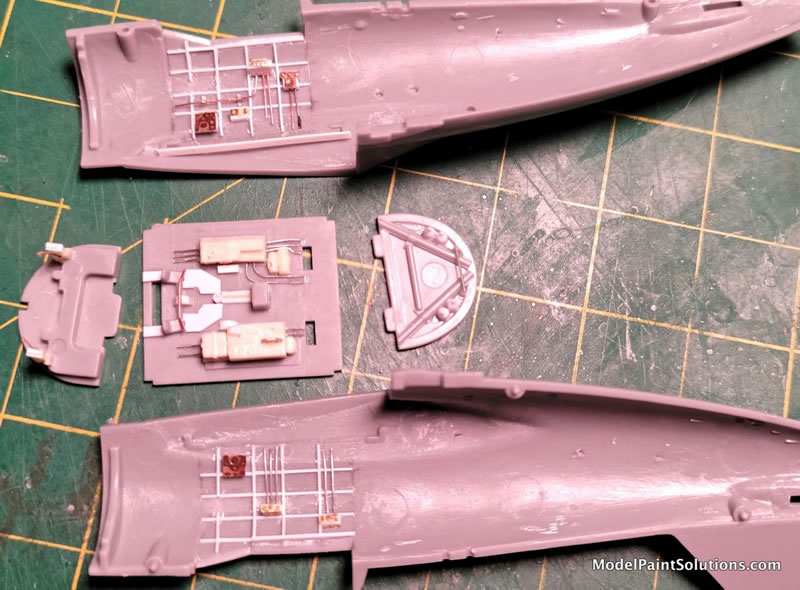
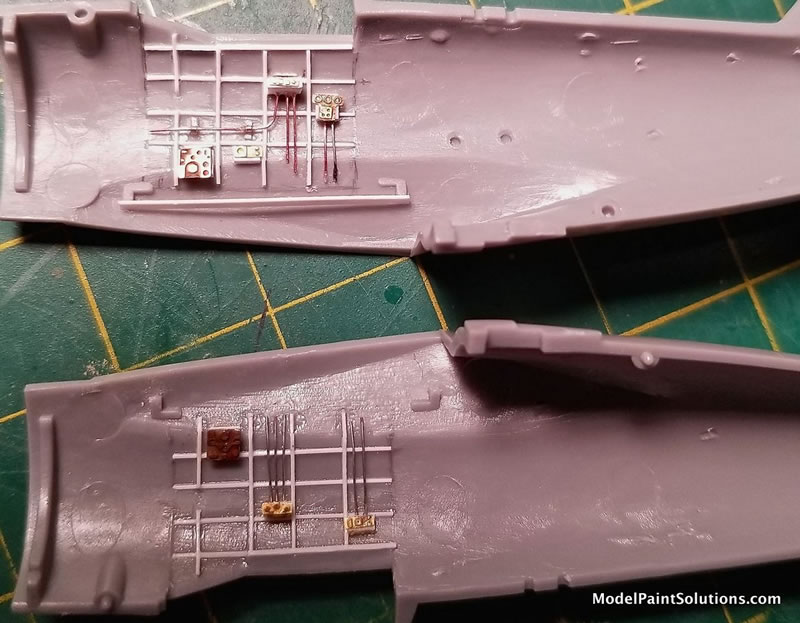
Okay, so let’s start in the cockpit and get those needed materials and aftermarket sets rounded up and examined. Staring with the Kora Models resin interior set #DS7215. I had that squirreled away in the box but had never really closely looked at it before so now was the time. Dumping all those resin bits onto the cutting mat and giving them the once-over under a good light left a real sinking feeling, as these parts were absolutely HORRID! This is one of Kora’s older detail sets, and I think their more recent efforts are MUCH better). The sidewalls, rear bulkhead and floorboard were entirely unusable, being closer to ‘malformed blobs’ rather than sharply cast & detailed resin pieces. So could anything be salvaged from this set? Yeah, the (rear) of the instrument panel, some radio boxes and consoles weren’t too bad and could be razor sawn off the “floorboard” blob, and the gunsight mount looked okay, as did some of the photo-etch parts provided but that was about it. I decided to use the kit’s floorboard and rear bulkhead - heavily modifying those, and scratchbuild the sidewall structure and detail. The Kora Models interior set also contained a rather nice (compared to the resin parts!) photo-etched instrument panel, rudder pedals, and seatbelts, so those were also used. I actually used the Hasegawa kit seat, but only after some judicious sanding to thin it to scale, re-shape a few edges and corners, and then finally drill out the lightening holes to match photos of the real thing – okay, now MUCH better than the Kora provided resin blob! Everything else was scratchbuilt from Evergreen and Plastruct plastic card, strip, rod, and random wire. I ended up with a good representation, I think, given what I needed to start with!
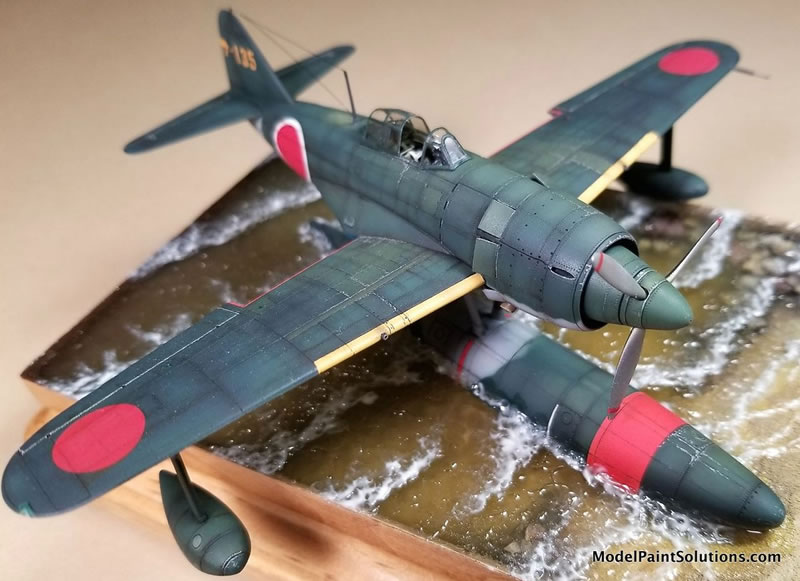
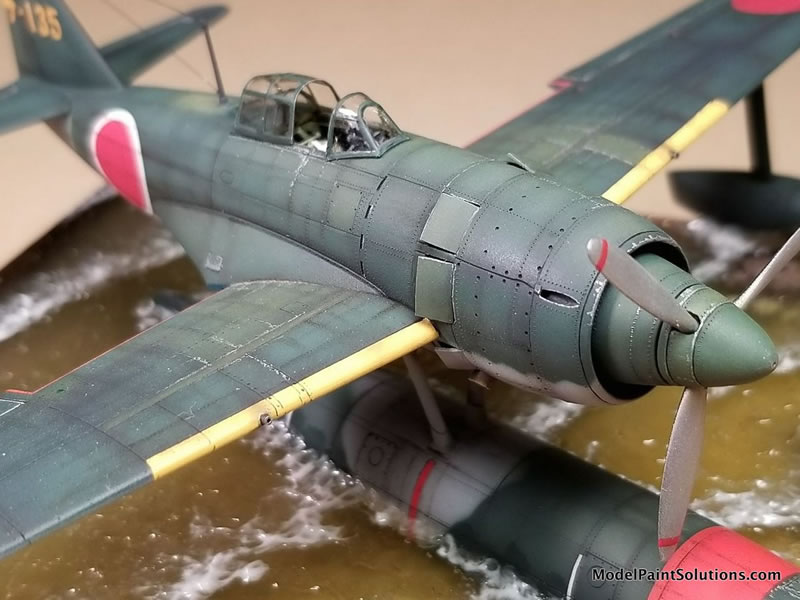
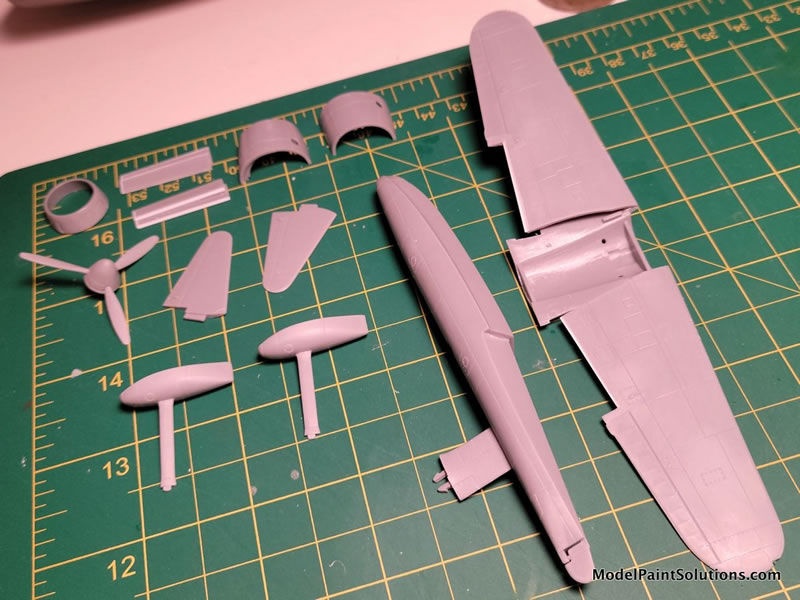
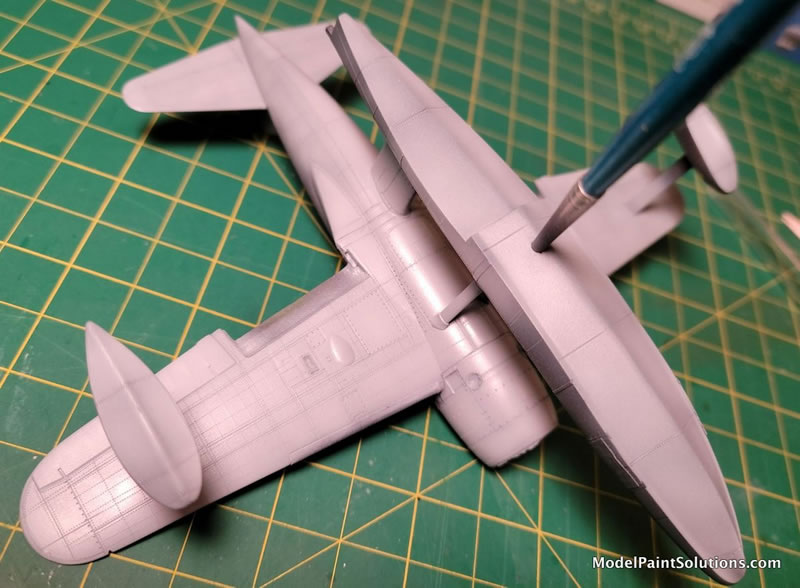
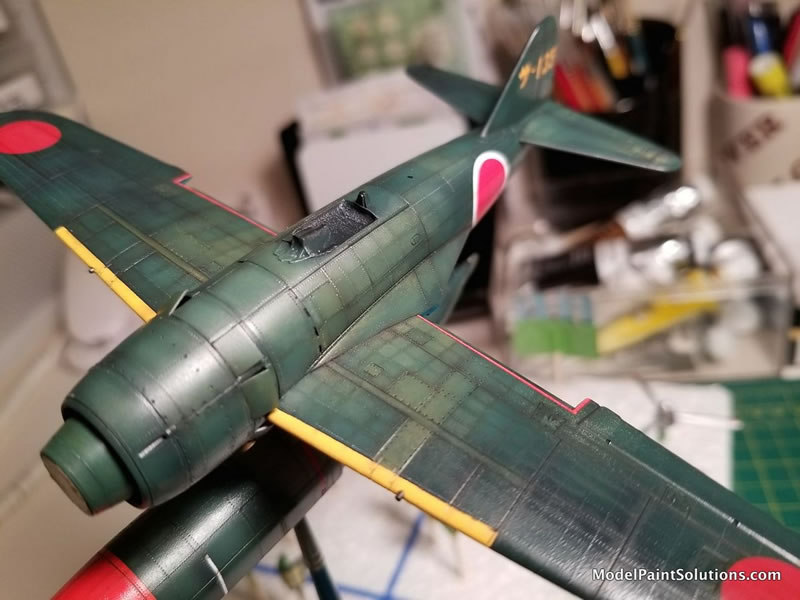
Then I spent some time cleaning up the remaining kit parts and getting the main components put together, sanded out, and re-scribed. Being a floatplane, we don’t need to fool around with any wheel wells or landing gear which is nice! I also wanted to further animate this model by opening up the cowling’s cooling flaps that were molded shut on the kit (of course!). I didn’t know how to do this without wreaking the surfaces around them, so I practiced several techniques on some spare fuselage halves I had, just marking off, and cutting out until I developed a method using (wasting?) several new #11 X-Acto knife blades to cut out around their perimeters carefully and slowly, followed by some careful Dremel work with a tiny grinding bit. This was slow, but effective, so I could now apply it to the actual model with some confidence that it would work, and it did. The new cowl flaps were made from .010” styrene sheet that had been pre-curved over a thick Sharpie’ marker’s body using a candle and the “Heat n’ Smash’ method.
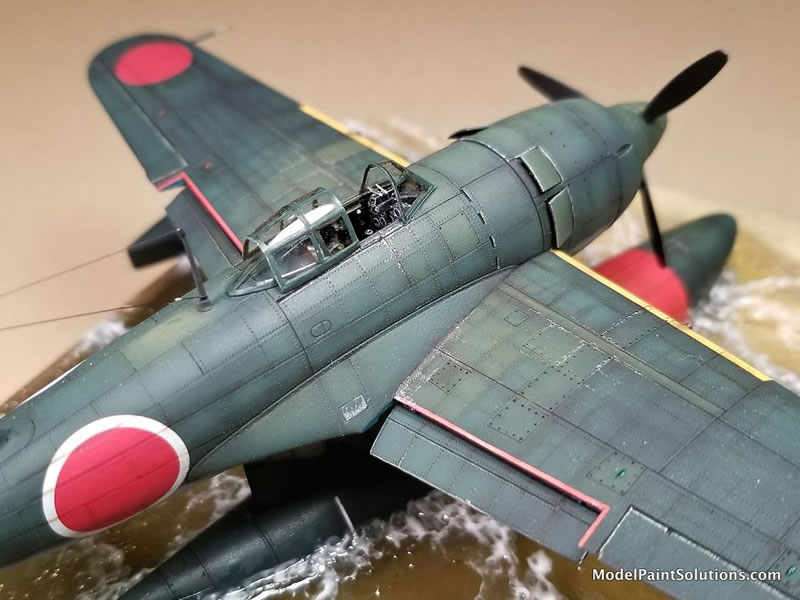
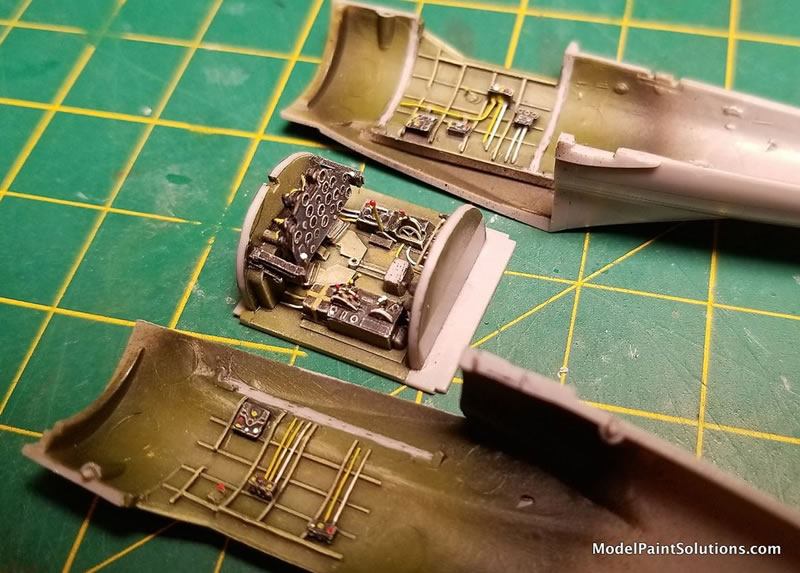
Moving along to painting the cockpit, I sprayed the interior first with Mr. Surfacer 1500/Black - more to create fake shadows than to be used as a primer. This was followed by Mission Models ‘Mitsubishi Interior Green’ sprayed from above such that the black still provided shadows in the lower/under recesses. This step was followed by dry-brushing oil paints atop the sidewall structure and other unmasked raised cockpit areas. This is important because with small scale – and especially with small scale where the cockpit opening is tiny and difficult to see, we need to greatly accentuate highlights and shadows creating artificial contrasts so that the detail can actually be noticed. So don’t be afraid to “overdue” this step here!
I’d masked the radio boxes which remained in the black primer color, then picked out the added wiring and such with more Mission Models acrylics. Some stray spare’s box Eduard photo-etch pieces provided some radio faces and other ‘fussy bits’ to give the cockpit that ‘busy look’. The seat, control stick and other cockpit features were also painted and added at this stage.
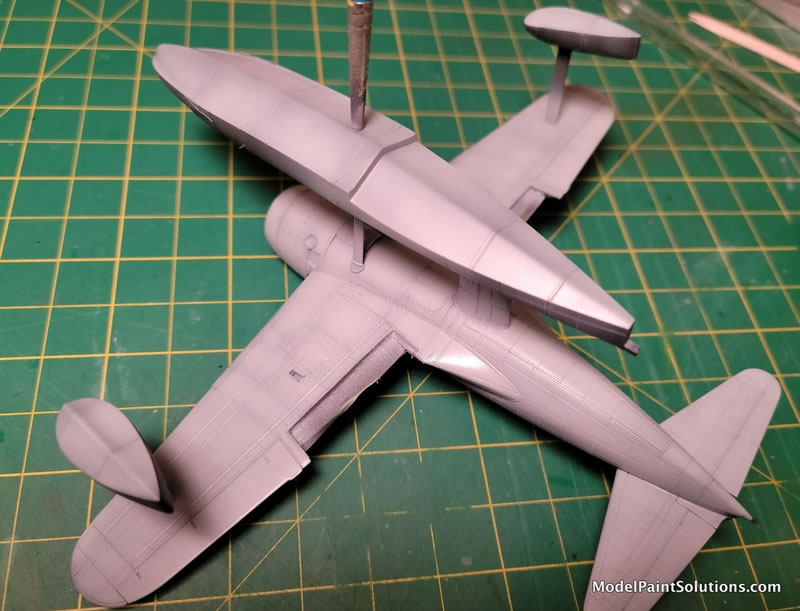
Next up, the fuselage halves were joined, and left to dry (for a couple days because those fuselage seams need to be fully cured and hardened before you sand them out and make them disappear - forever!). Now all main components were together, sanded, and readied for re-scribing. Again, the UMM #3 scriber to the rescue! I’m absolutely sold on this wonderful tool. Using several references (Asahi Journal, Model Art, etc.) I made some panel line corrections and emphasized others. I’d cut away the wing flaps to animate the model more and those were mounted up on toothpicks for painting. It’s at this stage – while the fuselage, floats, and wings were still separate that I riveted the entire airframe with a “Rosie the Riveter” .040” riveting tool (thanks Barry N.!). This isn’t as difficult as it may look, and only requires some practice, patience, and time. The 3mm clear scribing tape is absolutely necessary for this step to guide the riveting wheel when going around fuselages and other curved surfaces. I use a thin flexible clear plastic ruler for guiding straight rivet lines – always marking their locations with a pencil ahead of time, Practice on a ‘mule’ first, as this will give you added confidence and skill before tackling the real deal, and you’ll also be faster and more efficient for having had that practice.
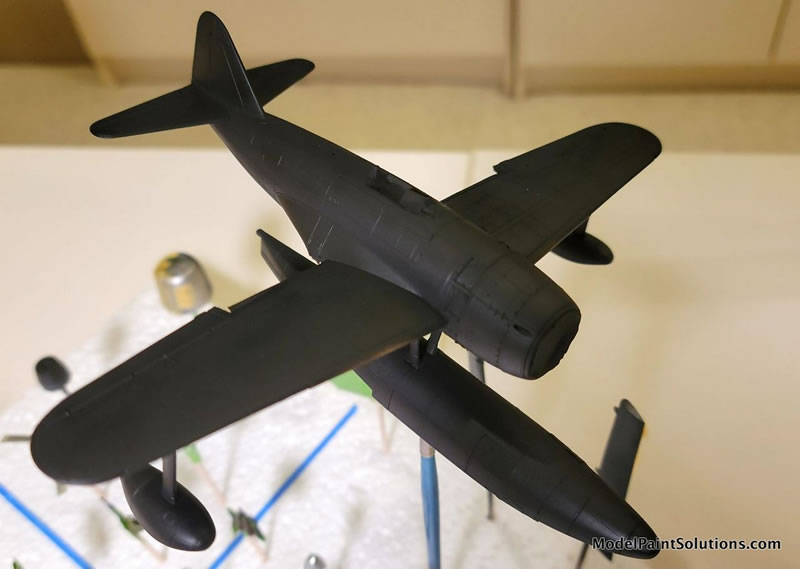
Once the riveting was completed, the fuselage, wings, tailplanes, outrigger floats, and the main floats were all brought together and any necessary touchups to the re-scribing and/or riveting were carried out at this point. Once satisfied that things hadn’t been entirely mucked up by this stage, the whole airframe was given a primer coat of Mr. Surfacer 1500 Black which is necessary for the acrylics to strongly adhere to the plastic given the painting methods that follow.
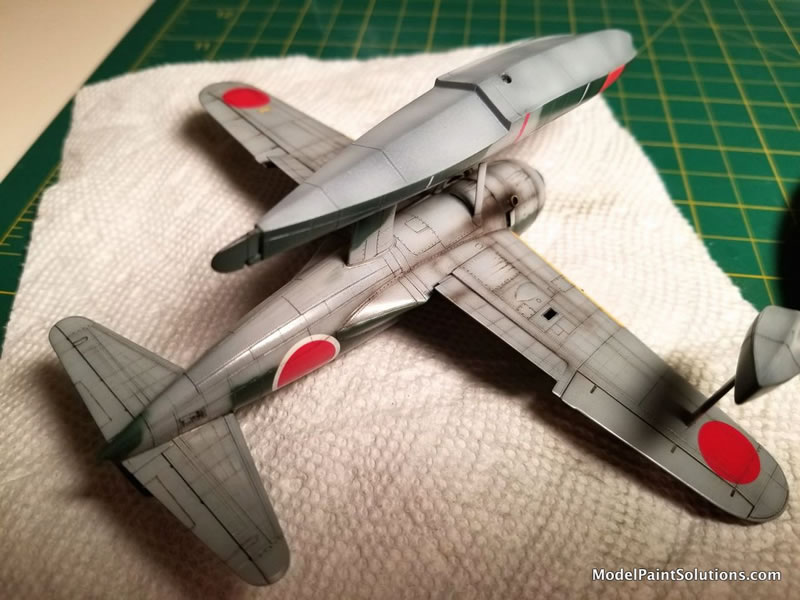
I started with the underside, mixing up two shades (a lighter and darker) version of Gunze Mr. Hobby Aqueous IJN Light Gray (H-61). The darker shade was first airbrushed form the center of panels outward leaving slightly visible shadows around all panel lines and the stronger rivet lines. This was followed by the lighter shade for a subtle color modulation effect. But since I was going to be mounting this model to a water base not much of the final result will be seen on the undersides, but ah well!
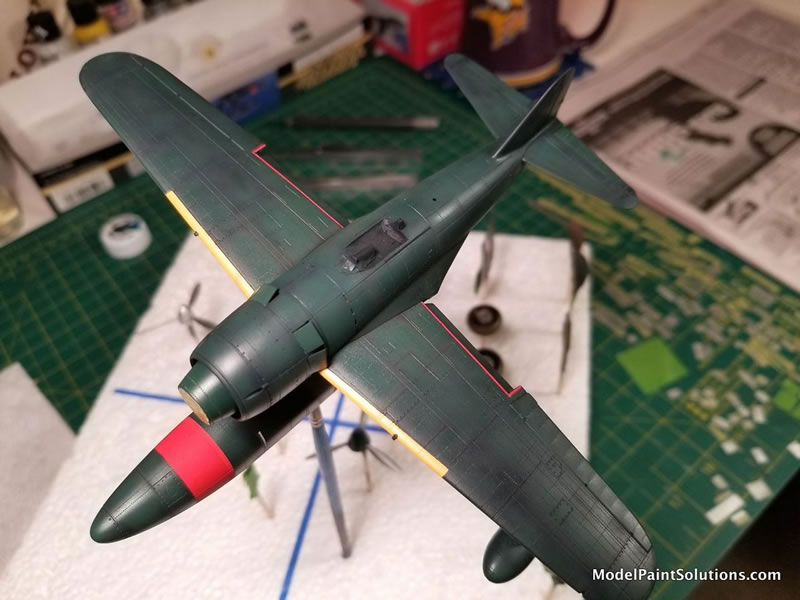
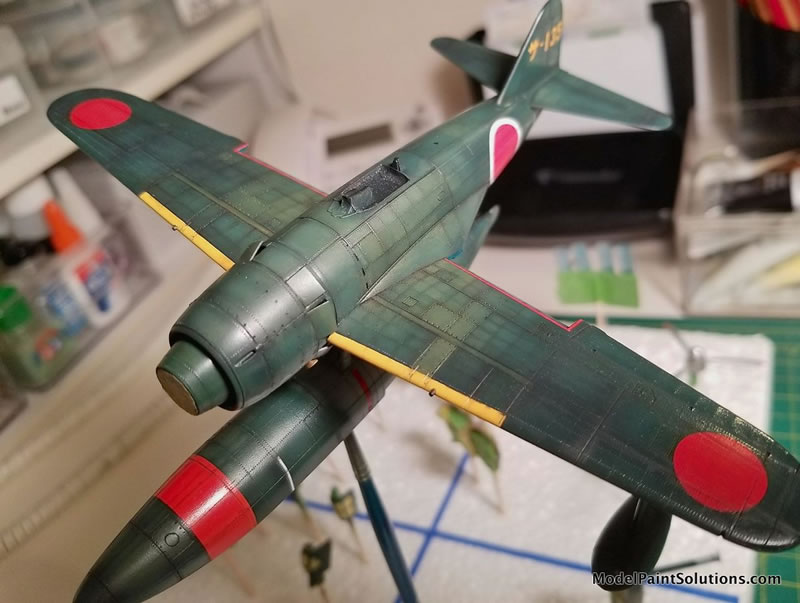
I custom mixed (using Model Paint Solutions mixing Bottles and Pipettes) three shades of the topside dark green color. Now this shade (being a Kawanishi product) was known to be a bit darker and ‘bluer’ that your typical IJN dark green. So again, out comes the MPS mixing bottles and the main/darker shade was created first using Gunze Mr. Hobby Aqueous again – a U.S. Navy Blue (H-54, which is quite dark!), plus a much lighter ‘leafy green’ color (H-6) added to it until I was happy with the multitudes of brushed on samples I experimented with until a good match (in my opinion anyway) appeared. This larger sample was then dispensed into three separate bottles. One was lightened a bit with more of the ‘leafy green’ color added, and another darkened using that very dark Navy Blue shade.
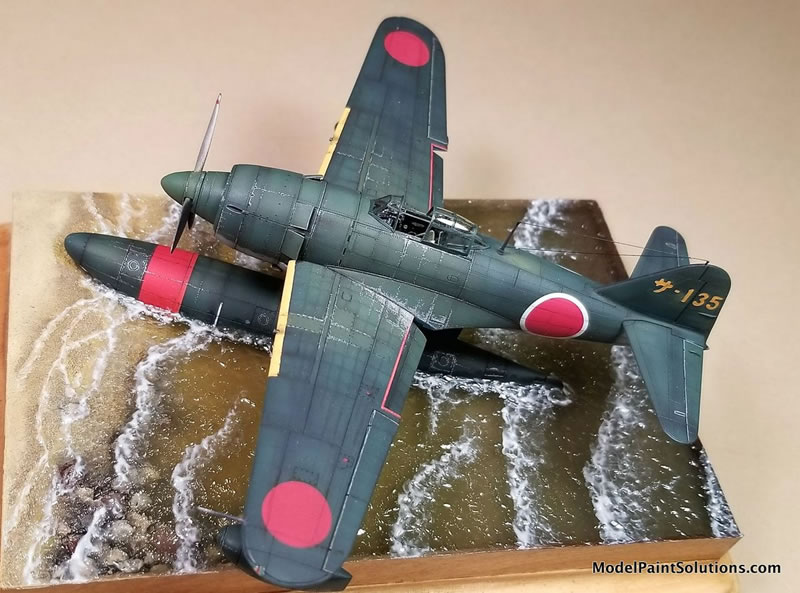
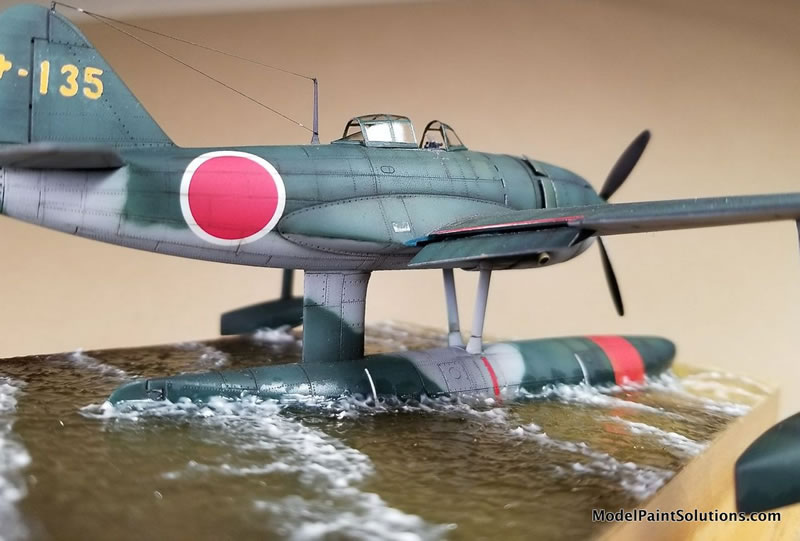
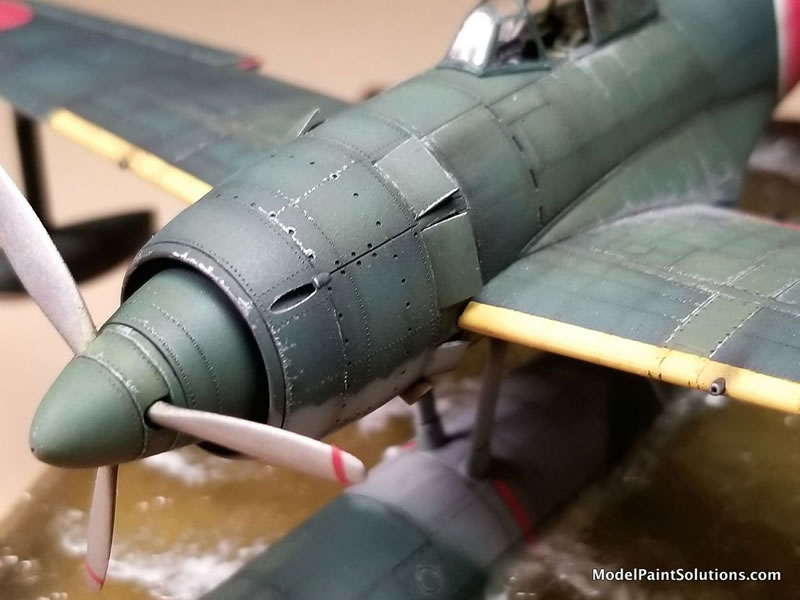
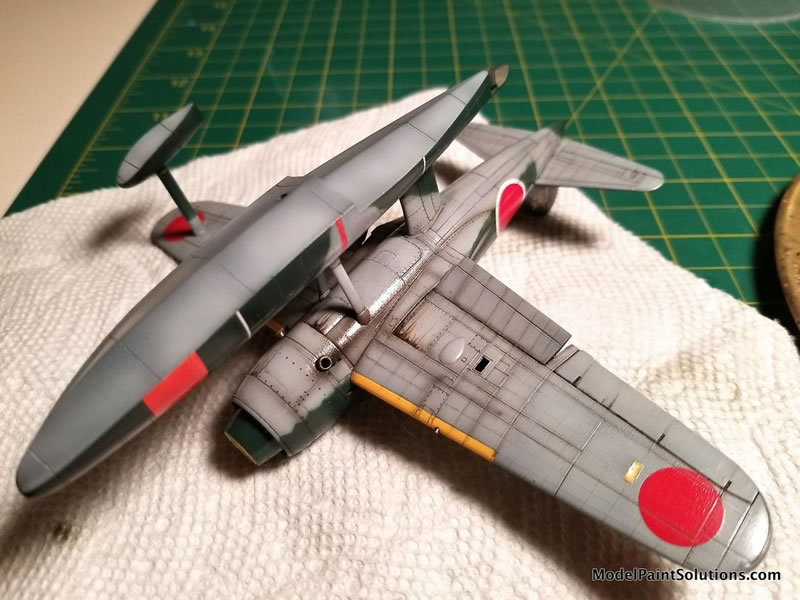
The underside light gray was masked off using Tamiya tape – but the masks for the underside to upper fuselage color, and the color separation on the floats (the main central float especially) were carefully masked off to provide a tight but still soft edge between these two shades by keeping the mask about 2mm above the surface at/along these areas. This was notably more important at the cowling sides because there is a very distinctive scalloped pattern color separation there on the specific aircraft that I’m modeling. The base ‘Kawanishi Dark Green’ color was airbrushed first. That was followed by the lighter shade on the more inboard wing areas and upper fuselage panels, again concentrating the lighter shade at the center of these panels/areas and top of the fuselage areas – leaving the darker color prominent on the wing’s outer surfaces and fuselage sides and lower areas – again, sort of using the armor modeler’s ‘color modulation’ technique. Same for the tailplanes. This was to emphasise wear and fading that would occur more inboard from the pilot & maintenance crews activities, etc. Finally, the last (darkest green shade was selectively and carefully airbrushed using low pressure, highly diluted paint, and a fine tip along most of the outer panel lines and corners, some selected inner panel lines, and lower fuselage areas to differentiate those areas and add further interest. (That ladies and gentlemen is what my 5th grade teacher would have flagged as a classic ‘run-on’ sentence! Got a lot of those “R.O.”s on my papers in those days…).
The underside was also treated with some fine airbrushed panel line attenuations, again concentrating around the fuselage and engine – areas that would get dirty and greasy from engine leaks and filth spread along the airframe by air movement. The (initial) exhaust stains were also airbrushed on at this stage using a mixture of brown & black Gunze Mr. Hobby Aqueous colors.
Next up was decal application, so the model was sprayed with ‘Future’ diluted with Gunze Mr. Color Leveling Thinner in a ratio of two parts Future to one part thinner. These two products play very well together and the flow, settling, and leveling were beautiful, and drying time was sped up a bit too I believe. This mixture yielded a somewhere between a gloss and a satin finish. (When my stock of Future runs out I’ll switch to Gunze Mr. Color GX-100 as I’ve heard great things about that as a clear gloss coat too).
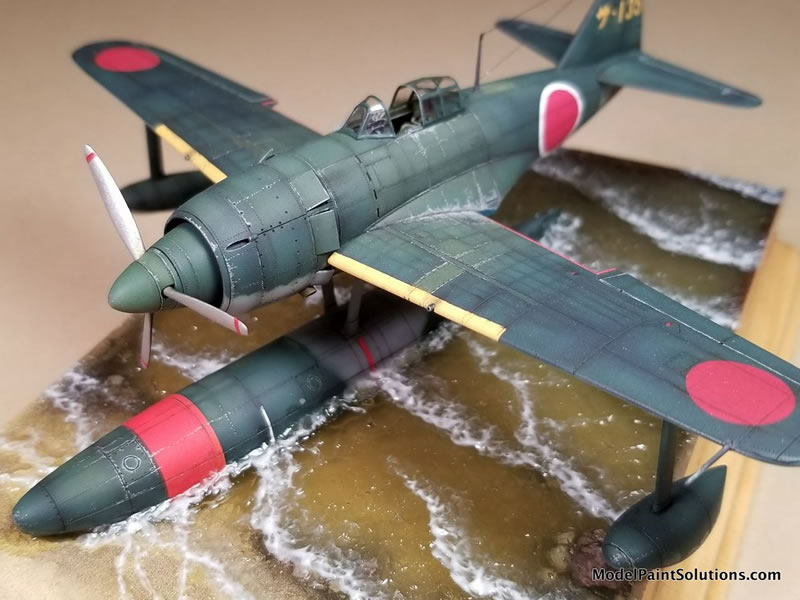
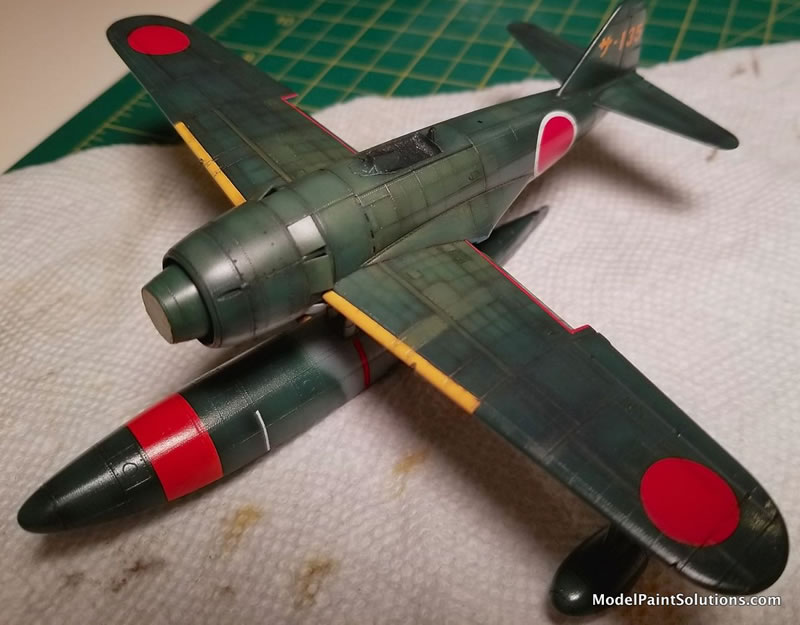
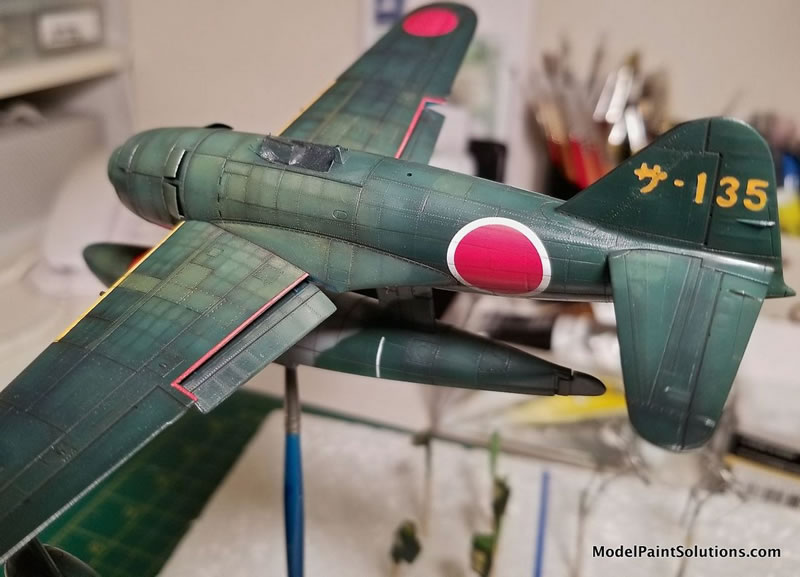
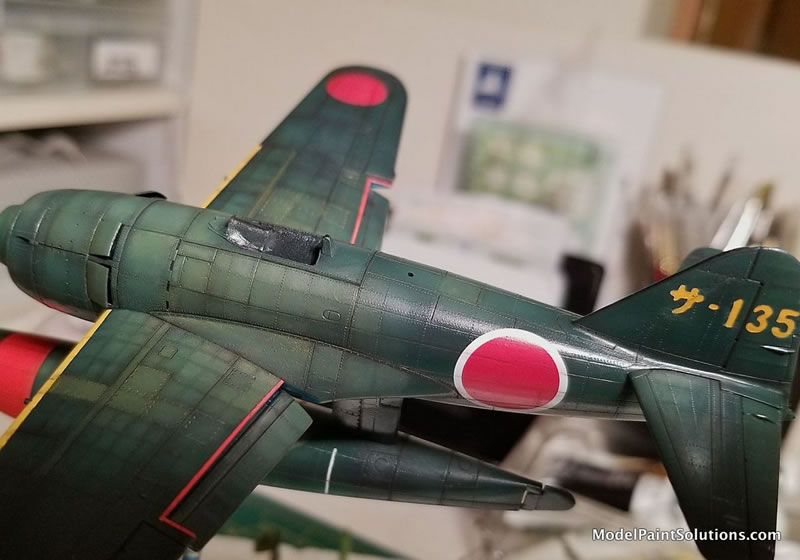
Decals were applied. I used national markings decals from Tecmod sheet No. 72116H, and some stenciling from the Hasegawa kit’s decal sheet. The yellow number & kanji on the vertical stabilizer & rudder I couldn’t source anywhere so are courtesy of a good modeling friend who made a custom vinyl stencil of them for me (thanks Ken S.!). After letting things dry 24 hours and getting a good bath to get rid of any decal setting solutions still lurking about (for the model too!), the decalled areas then received another shot of the Future/Thinner mix to seal them in and get everything ready for the sometimes brutal weathering processes to follow.
My first ‘post-gloss or stain clear coat’ weathering step is typically to apply panel line washes. I exclusively use custom mixed oil paint washes for this as they spread out nicely, are easily controlled, and it’s simple to re-do areas and/or correct mistakes. My second choice might be some of those AK or MIG/Ammo enamel washes (made for armor but also good for universal use as well), but (sorry), I think acrylic washes are garbage... Also applied at this stage I do any engine/oil stains as Japanese WW II engines were famous for leaking a lot of oil! Concentrating this on the underside cowling areas and spread aft along the fuselage. (Sharp-eyed readers will note the missing outrigger that I carelessly broke off, but then decided not to reapply it until the other ‘fiddly bits’ went on at the end – lest I ham-fistedly (is that a word?) bust it off AGAIN!).
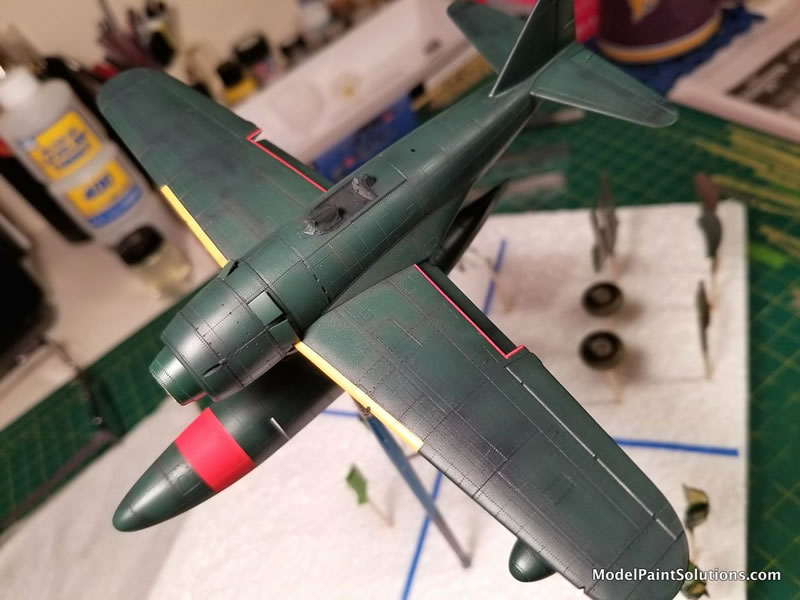
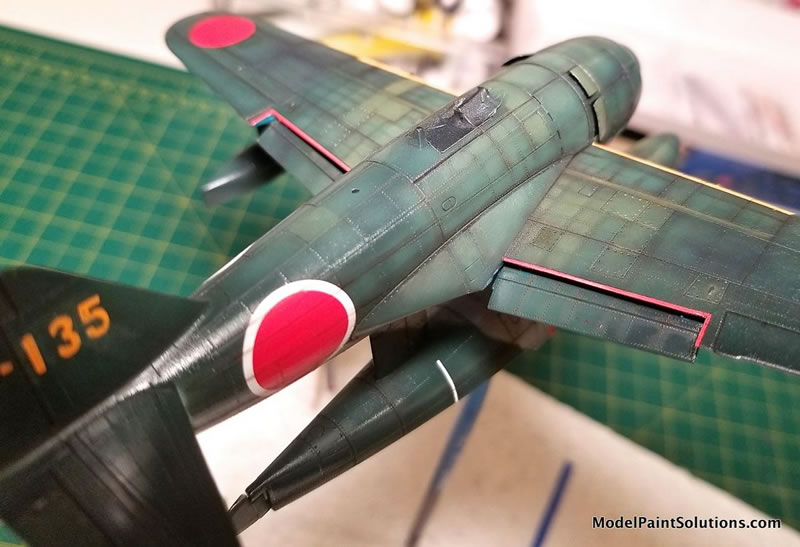
Now comes the fun part! Oil paints were used for weathering panel and rivet lined areas on the fuselage near the main wings and the inner/upper wings where most of the wear might occur. I mixed several shades using Windsor Newton oils on a non-absorbent palate (sounds fancy, but I just use the backsides of old unwanted photographs). I also put a couple of the colors on an absorbent surface (a scrap of corrugated cardboard) when the oil paint tube had an obvious over-abundance of linseed oil in the mix, so needed to be drier.
As mentioned above, I wanted the lighter greens nearer the fuselage, and darker greens more outboard and to the rear. Each individual riveted panel area was treated individually. This is a long, but very satisfying process. So the inner/upper wing surfaces, fuselage around the cockpit and cowling, and upper fuselage spine all got this treatment. I was careful to mix up a very dark green color to apply in the panel/rivet areas between the lightened panels (for contrast again), and then because oils blend so easily and nicely you can get a variety of very cool and convincing effects. Some areas were deliberately toned lighter and some darker this way for interest.
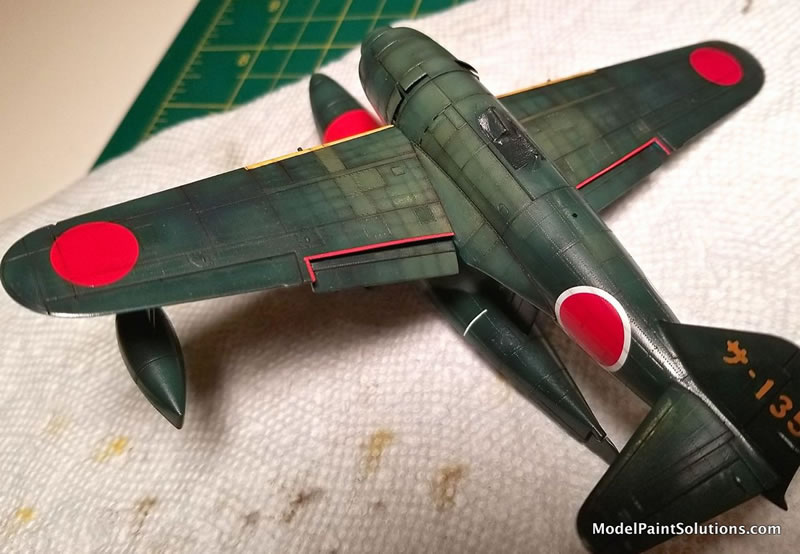
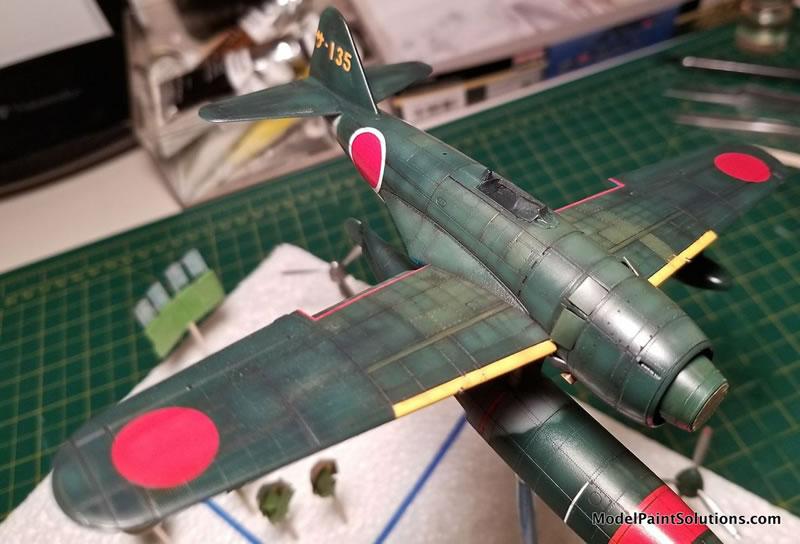
The model was finished with the addition of a Falcon replacement vacuform canopy (a must, as the kit’s canopy was way too thick). I also added the gunsight and it’s reflectors plus the pre-prepared and painted propellor with spinner, flaps, and aerial wires (from stretched sprue). Final touches involved paint chipping around worn wing root areas, cowl flaps, canopy edges, etc. I used a silver Prismacolor pencil for these. I also used light gray and tan Prismacolor pencils to highlight exposed edges for additional contrasts. The last application was the pastels/pigments to accentuate the exhaust stains, fuel spills, and some panel line areas. This was done primarily with MIG Pigments.
The rest of the build involved making the base, Celluclay ‘groundwork’, sandy beach base (made of VERY FINE sand (a railroad ballast product I think?). I used Enviro-Tex Lite two part epoxy resin for the water. This was applied in 3mm layers 24 hours apart with Liquitex Gel Medium applied atop that to build up the ripples & waves. Final step was adding some acrylic flat (in very small amounts!) to some of the gel areas to get that foamy, whitecap look common to rapidly moving wave tops, and where it washes ashore and so on...
This was a fun build of an old and basic kit, but still a nice subject I’ve wanted to add for a long time.
That’s all she wrote on this one folks!
Steve “The Mad Norseman” Hustad
Text and images copyright ©2023 by Steve Hustad.
For more on this build visit Modelpaintsolutions.com
https://modelpaintsol.com/builds/the-1-72nd-hasegawa-kawanishi-n1k1-rex
Text and Images Copyright © 2024 by Steven Hustad
Page Created 16 February, 2024
Last updated
16 February, 2024
Back to HyperScale Main Page
Back to Reviews Page

|
 Home
| What's New |
Features |
Gallery |
Reviews |
Reference |
Forum |
Search
Home
| What's New |
Features |
Gallery |
Reviews |
Reference |
Forum |
Search