Revell 1/24 scale
1970 Ford Mustang Boss 302
1/24 scale
by Brad Huskinson

1/24 Revell 1970 Ford Mustang Boss 302 , # 85-4943
I was a huge fan of the late 1960s and early 1970s Trans-Am series in the US. Camaros, Mustangs, Cougars, Barracudas, Challengers, and Javelins all competed in the series. Engine size was limited to 305 cubic inches.
All of the factories sponsored teams during this period and my father’s Mercury dealership had a Cougar Trans-Am car. But, it’s tough to compete with big money sponsors!
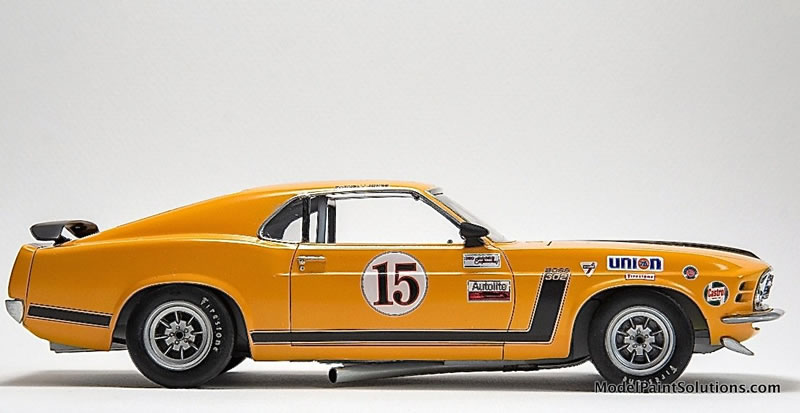
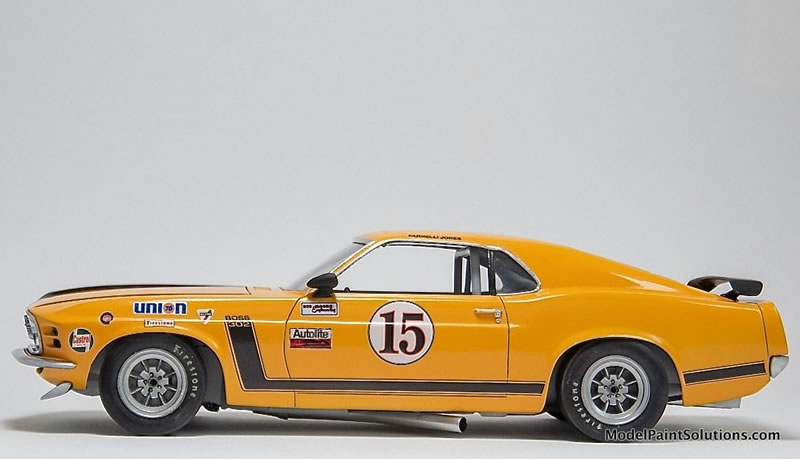
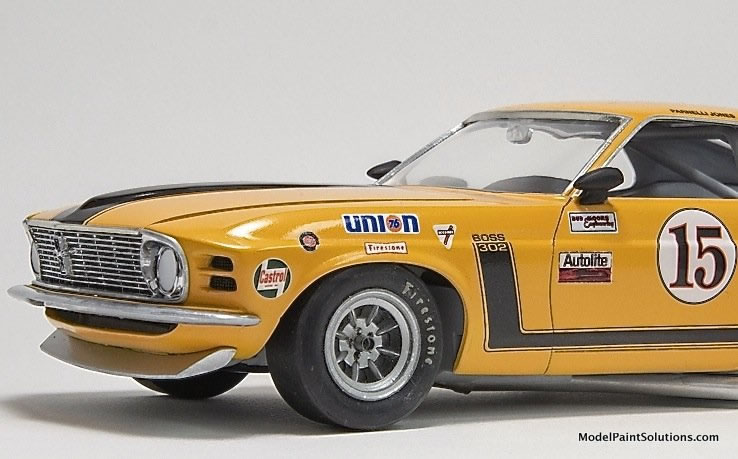
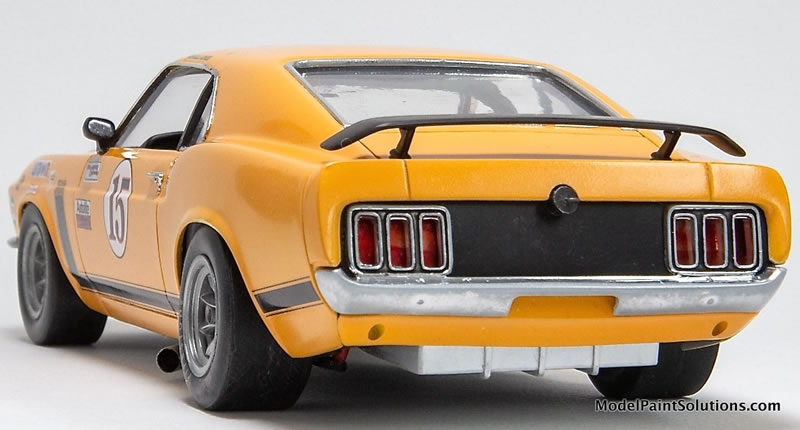
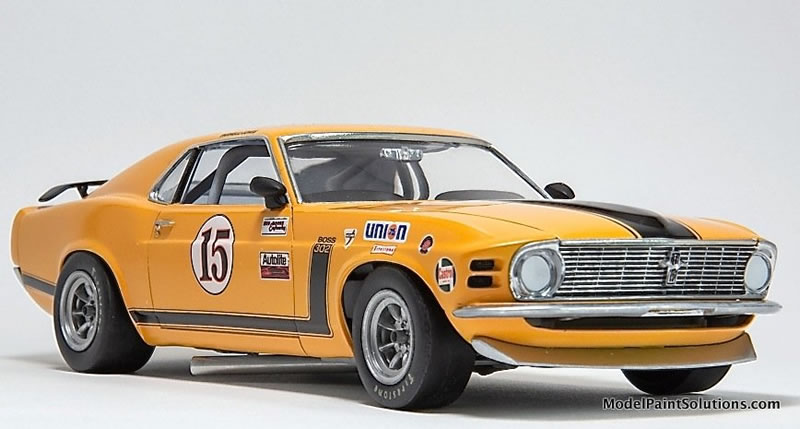
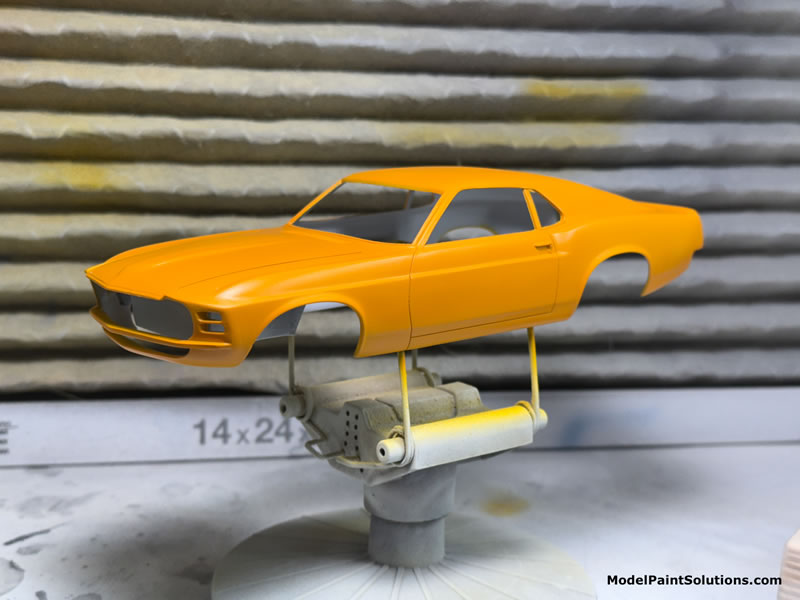
During those years, I spent a lot of time at Pacific Raceways in Kent, Washington where the tour would come through. Mustangs were always a favorite. In 1970, Parnelli Jones, driving a Boss 302 Mustang, won the manufacturers championship for Ford. I loved Parnelli’s aggressive driving style and his beautiful yellow/orange car, #15.
I have wanted to build some of the cars that competed in that series for years. In addition to Parnelli’s #15, will be Mark Donohue’s 1969 Penske Sunoco Camaro. But that’s for later…
To remove parts from the sprues, I use a rather cheap pair of snippers for big sprue cuts and then GodHands for more delicate cuts made close to the part. I soak all plastic parts is a 50/50 bath of original formula Windex and denatured alcohol that specifically calls out ‘Cleans Glass” on the container.
During the build, raw, plastic parts (no paint or primer) were glued together using Tamiya Thin. Depending on whether or not I might need to shift the pieces a little right after joining, I use both standard and fast-setting Tamiya. If parts have been painted or other modifications have been made, I tend toward CA glues of different viscosities and drying times depending on application.
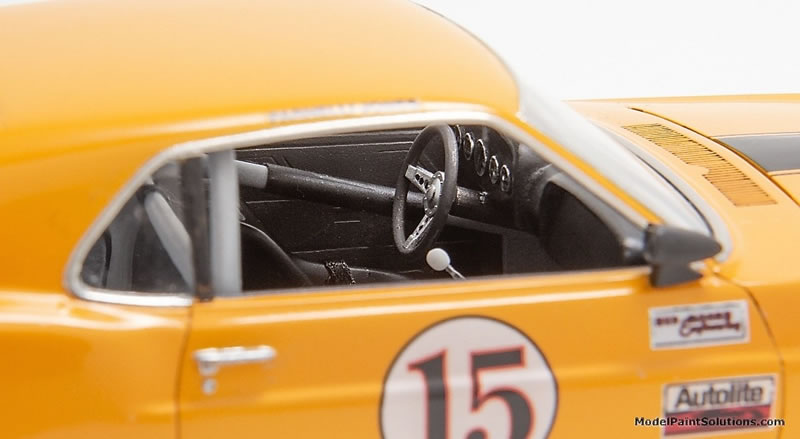
For clear parts I have become a fan of UV-activatable glues; they dry clear and hold well. Once you get your window firmly in place, place spots of glue around the periphery then hit it with the blue, UV light—easy.
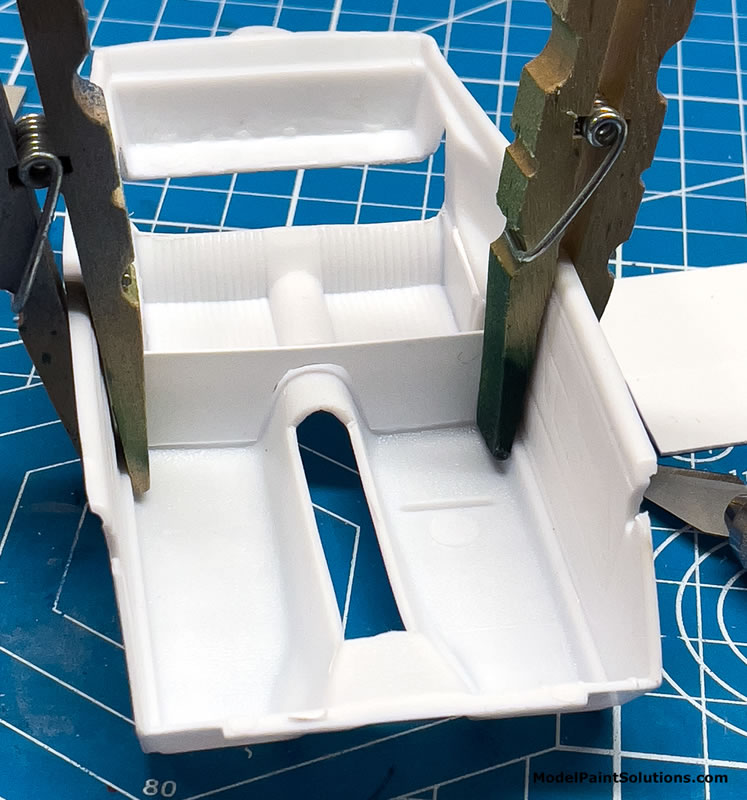
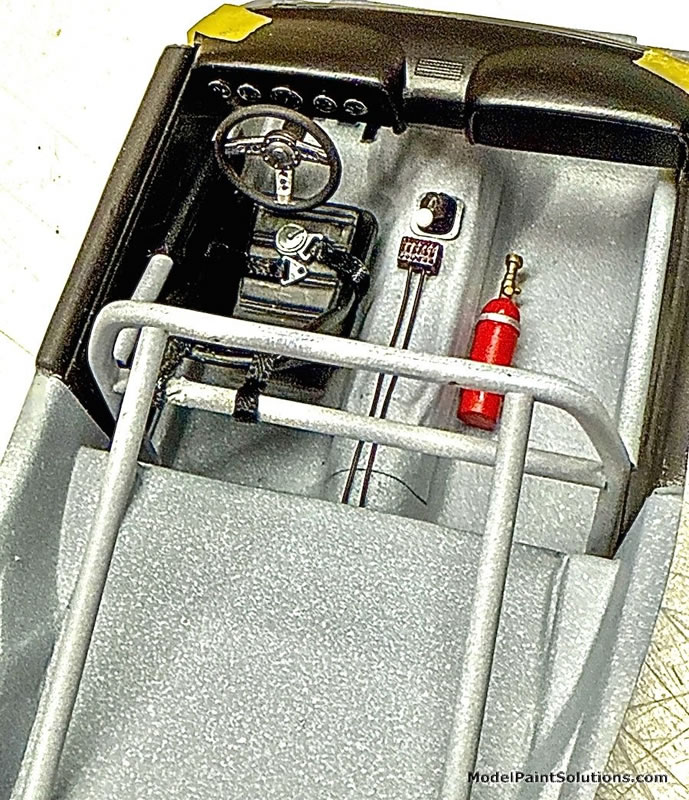
The racing interior was scratch-built including the dash/engine gauge cluster, which was modified from an old Corvette kit. The roll bar system was largely scratched as was the engine exhaust and headers. The wheels, tires, and seat were obtained from Replica’s and Miniatures
The modified interior was primed with Mr. Surfacer 1000 Grey from the rattle can.
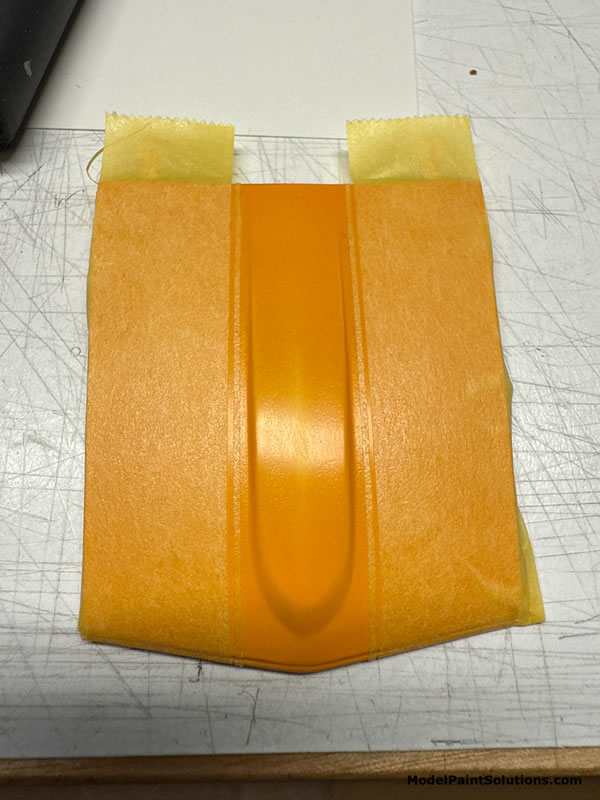
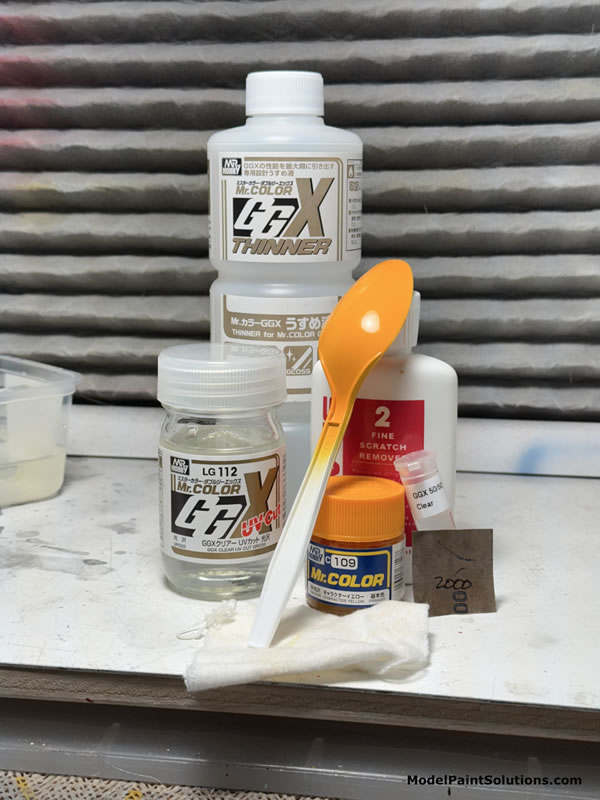
I used Tamiya White Surfacer from a rattle can for the body. I shake it up, heat it in a water bath, shake it again and spray. It dries very smoothly. I’ve had the best luck with this primer for getting the most even yellow paint job.
Yellow can be a real bear. If smaller parts needed priming, I used Tamiya Surface Primer decanted and sprayed at 15-18 psi through an H&S Infinity fitted with a 0.15mm tip. I let the primer dry overnight before handling the model. Prior to painting, I generally wet-sand with 1,000, 2,000 and 4,000 grit paper to remove imperfections, which are virtually impossible to avoid.

The interior was a combination of Mr. Surfacer 1,000 Grey and Tamiya White Surface Primer shot over it at 20psi using an H-S Spatter Cap on an H&S Evolution fitted with a 0.40mm needle. For more information on this technique, see “Using the H-S Splatter Cap” in The Paint Booth.
The body was shot with Mr. Color c109 “Character Yellow” that was diluted to 40% paint with Mr. Color Leveling Thinner. This was applied at 18psi with a Gaahleri Mobius fitted with a 0.30mm tip. Multiple coats of yellow were applied over a couple of days to get the final finish as even as possible. Once dry, the yellow was buffed with NOVUS 2 Fine Scratch Remover. The NOVUS was applied using a circular motion and 3”x3” cotton gun cleaning patches.
I used a combination of kit supplied, aftermarket (sponsors), and some home-made decals. I’ve finally gotten somewhat competent at making my own decals after much experimenting. Micro-Set and -Sol were used on all but my homemade decals.
That was fun!
The basic kit went together without too much fuss, the custom interior turned out better than I’d hoped, and now, I finally have Parnelli’s Boss 302 Mustang in my display cabinet.
Cheers!
Brad
For more on this review visit ModelPaintSolutions.com
https://modelpaintsol.com/builds/revell-mustang-boss-parnelli
Text & Images Copyright © 2025 by Brad Huskinson/Model Paint Solutions
Page Created 12 September, 2025
Last updated
12 September, 2025
Back to HyperScale Main Page
Back to Reviews Page |
 Home
| What's New |
Features |
Gallery |
Reviews |
Reference |
Forum |
Search
Home
| What's New |
Features |
Gallery |
Reviews |
Reference |
Forum |
Search