Franken-Four!
Combining Multiple Kits for an Accurate F4U-4 Corsair
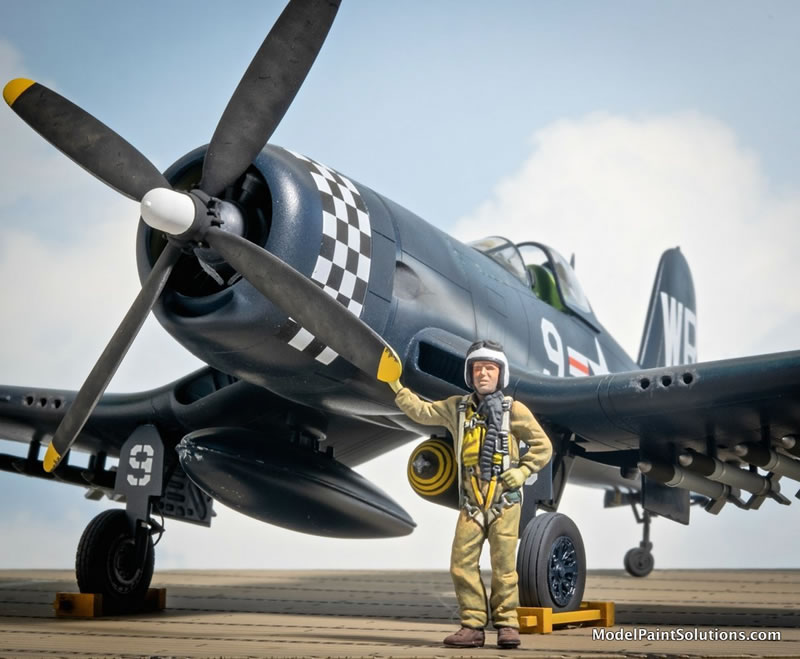
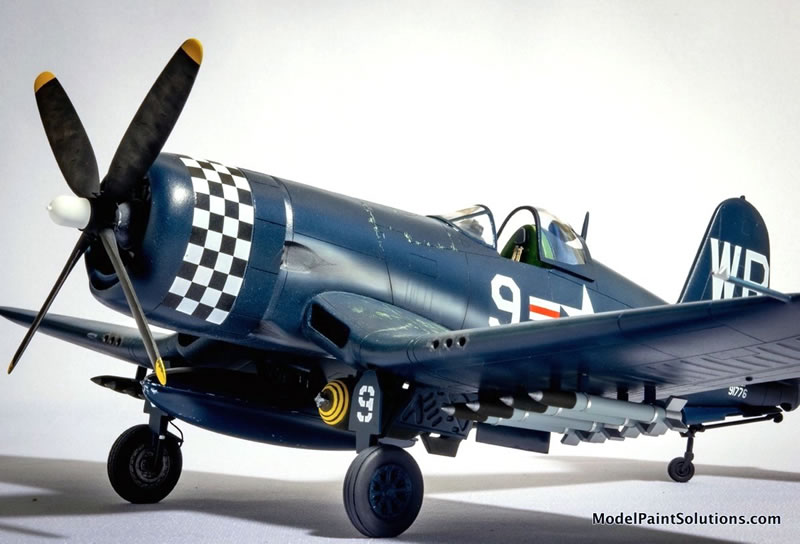
A Marine pilot from VMF-312 poses in front of his bomb and rocket-laden F4U-4 Corsair. It took two kits (Academy, HobbyCraft) and detail pieces from two others (Tamiya, Monogram) to get an accurate representation of the F4U-4 Corsair in 1:48 scale.
Kitbashed, 1/48 scale
by Rafe Morrissey

Building an accurate F4U-4 in 1:48 scale is a real challenge. Existing kits are either inaccurate or have raised panel lines. Rather than re-scribing the Hasegawa kit or fixing the Hobby Boss kit, the Academy and HobbyCraft kits can be combined to provide an accurately shaped F4U-4 with crisp recessed detail. Having accomplished the cuts successfully, the next project will be to combine the Academy kit with Tamiya’s offering to get a folding wing option!
Planning
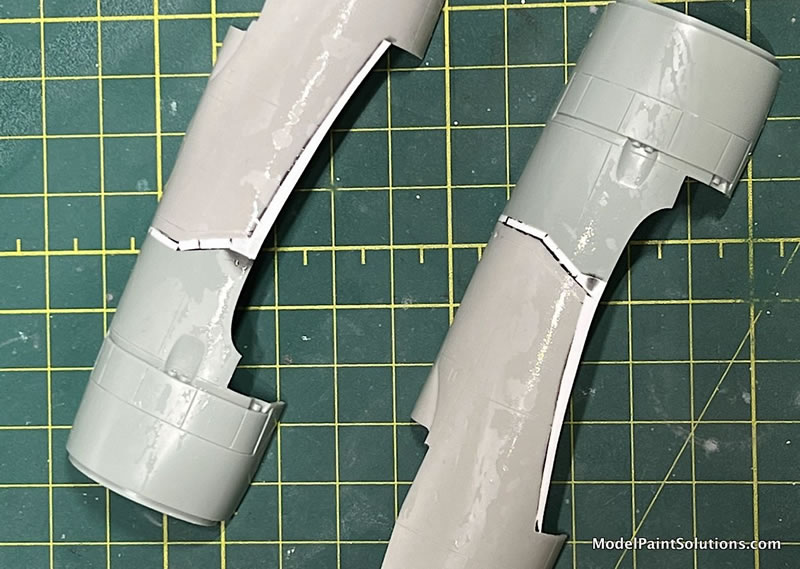
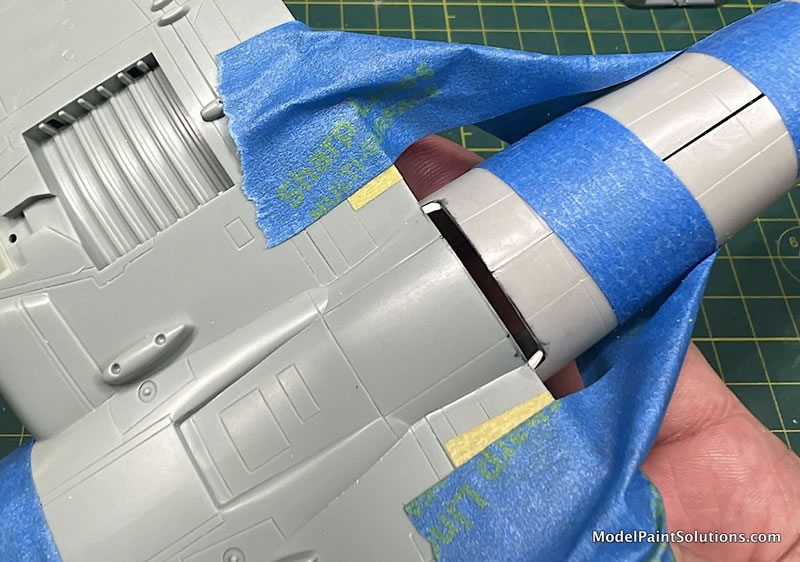
Before you begin assembly of the model, you need to determine what extra parts are needed. The Academy kit has many nice features and the latest release comes with a wide array of ordinance but it is way too wide at the cockpit. The rear fuselage section of the HobbyCraft kit can be used to fix this and the fit is pretty close. Some plastic card and elbow grease are needed but the hybrid results in a much more accurate F4U-4.
The extra canopy in the Tamiya F4U-1A kit and a Monogram prop from their venerable rendition add more accurate details in these areas.
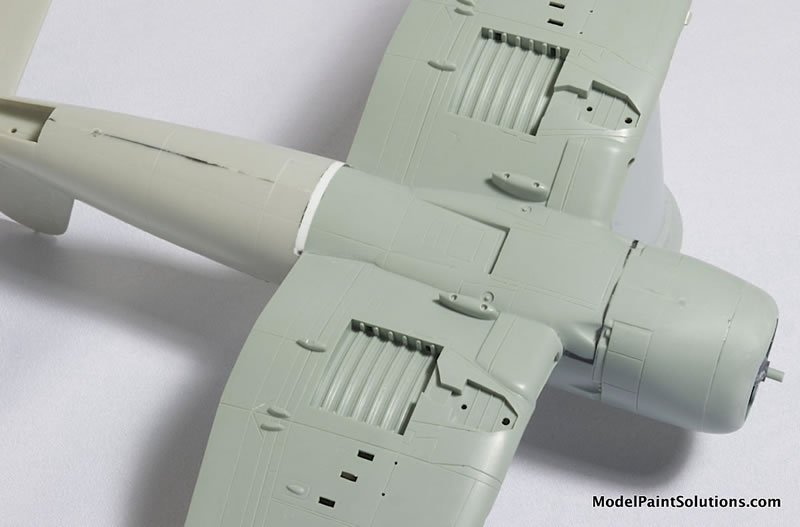
The main elements needed for this project are the forward fuselage and wings of the Academy kit and the rear fuselage and tailplanes from the HobbyCraft kit.
It should be possible to use the Tamiya kit but further modification and cutting will be needed in the center section of the lower wing to use the Tamiya wings.
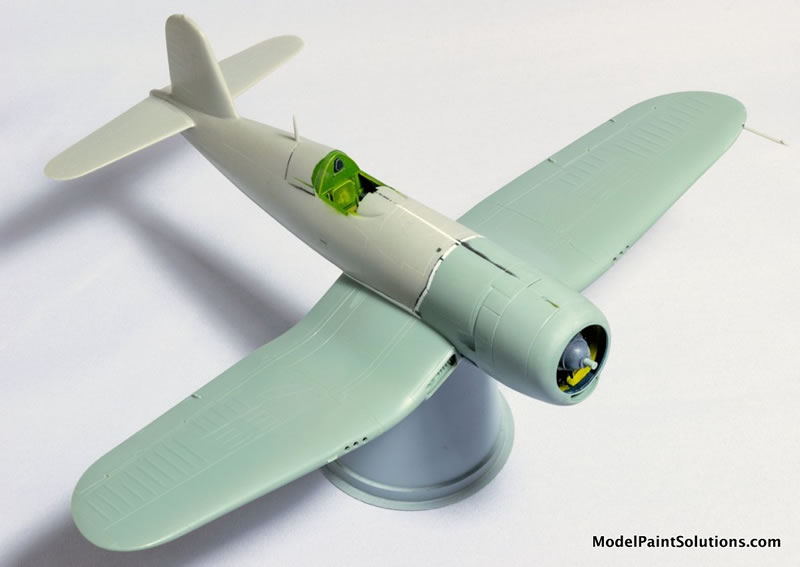
While the fit was generally good, there was a large gap at the rear of the Academy wings where they meet the HobbyCraft lower fuselage. More plastic card trimmed to shape filled the gap.
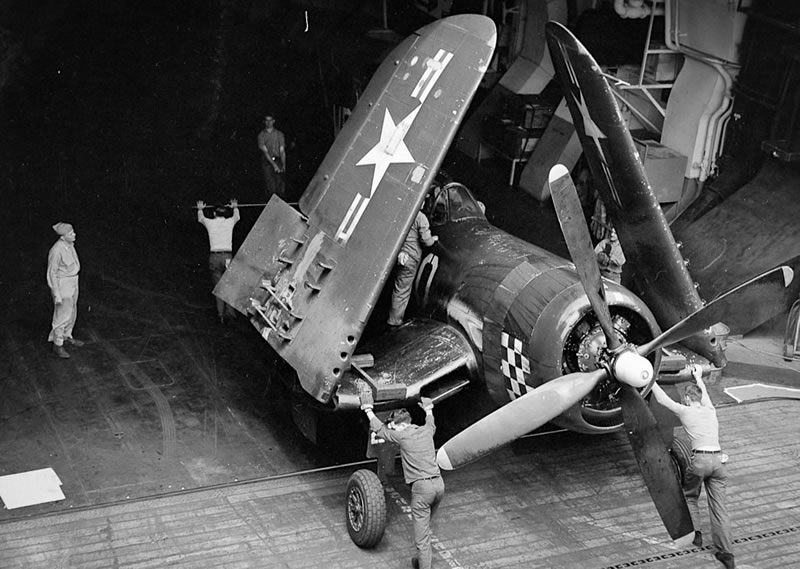
Replicating the beat-up finish of the Korean War Gloss Sea Blue Corsairs was another challenge. Reference photos suggest a combination of extensive paint wear, gunpowder streaks and oil leaks through the gloss blue finish. (Photo 16, Source: NARA).
I consulted with John Miller (aka Dr. Strangebrush) who gave me some useful tips to replicate all this (Thanks, John!). I used hairspray between layers of paint to chip through the finish to reveal the chromate yellow primer coat down to bare metal.
The final effect closely mirrors the reference shot of the real thing
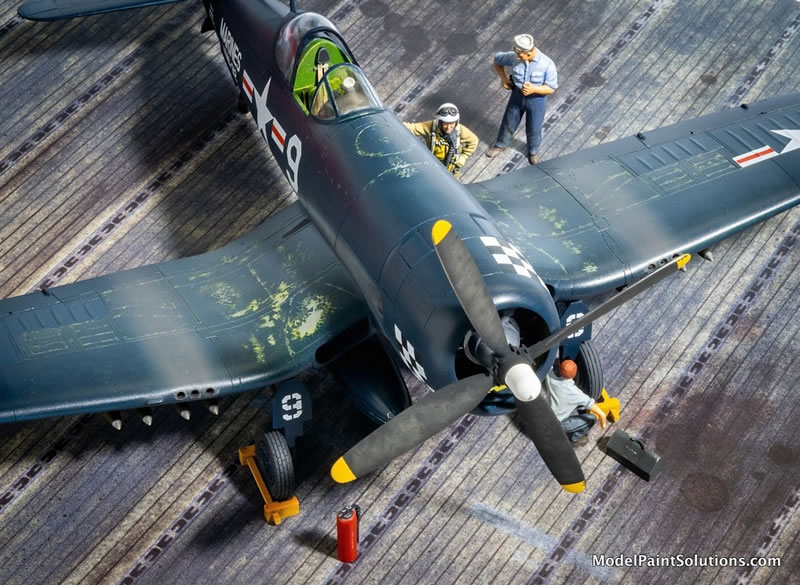
With all the surgery and kit-bashing complete, the “Franken-four” is ready to take off on a mission.
All painting and weathering was applied with my Harder Steenbeck Evolution and Infinity airbrushes.
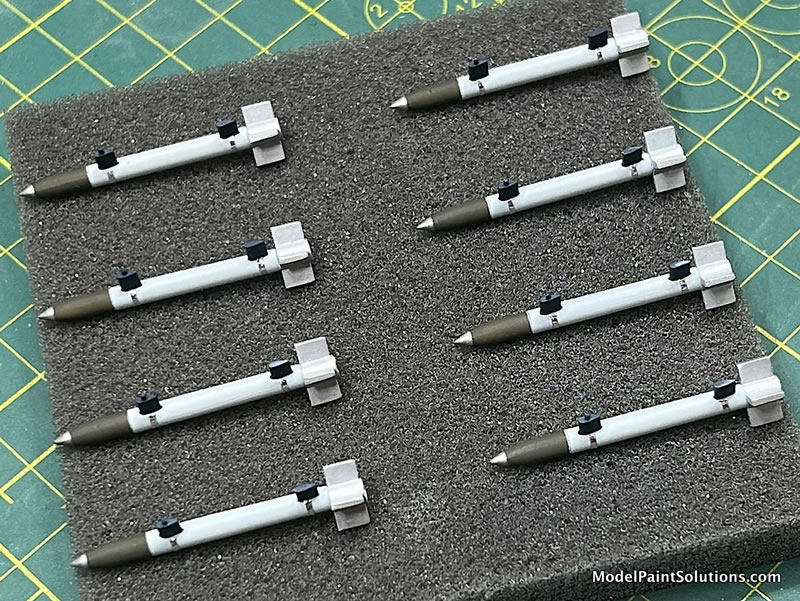
Another challenge is masking the tips of the rockets. They are too small for tape masks. I made a jig from a scrap piece of wood and taped plastic card with holes punched out to the correct size to let the tips of the rockets emerge for painting.
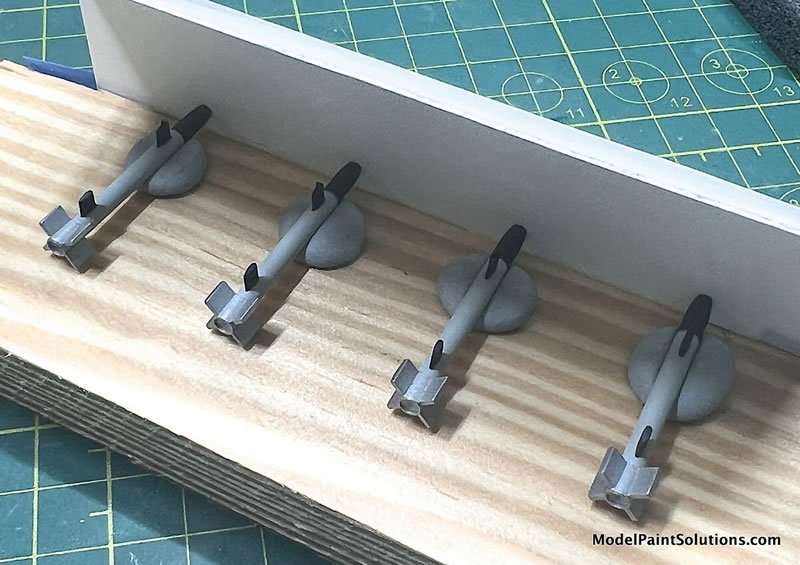
The rockets were held in correct position with wads of Blu-Tak poster putty and the flexibility of the plastic kept the seal tight
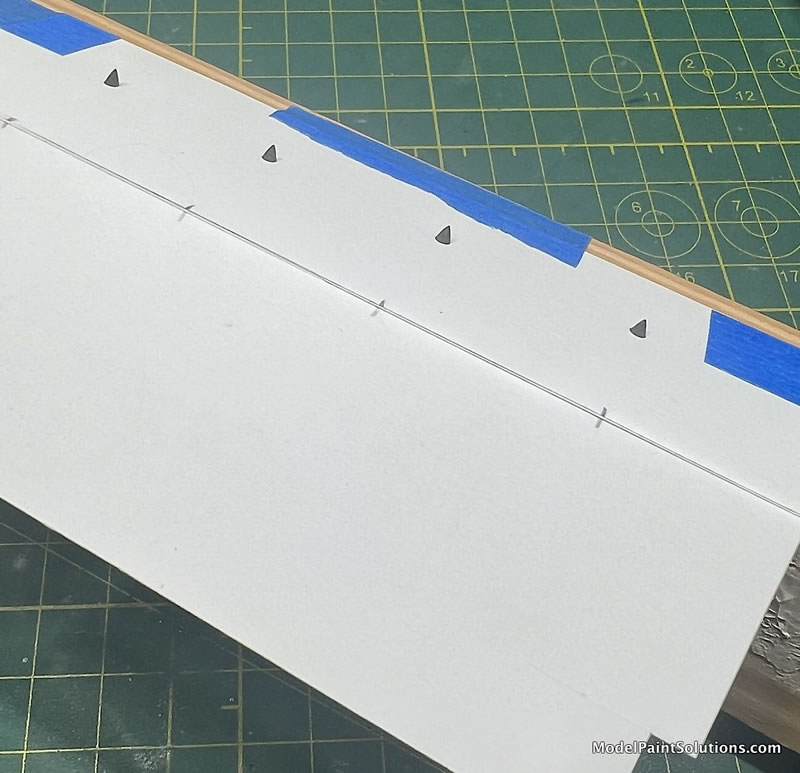
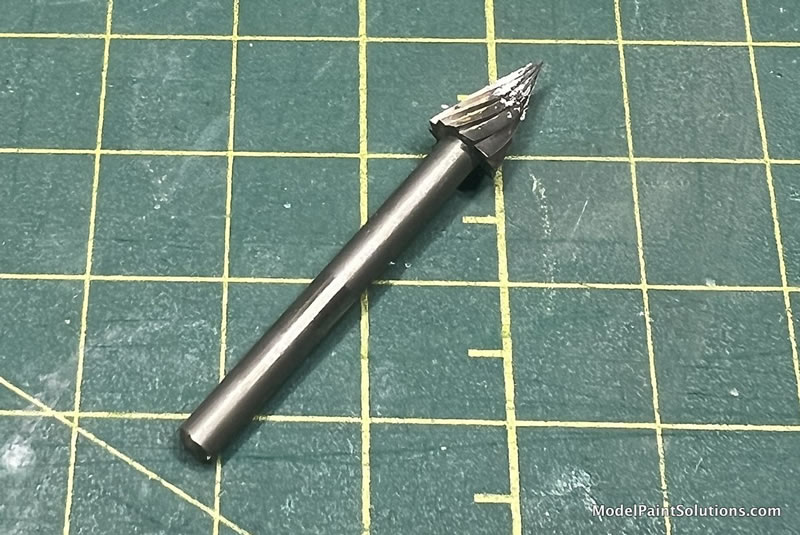
I chamfered the openings with a Dremel bit to taper them to fit tight against the rocket tip
I used two different size holes to create two tones of metal on the tips
Other details used were
• Monogram 1:48 F4U-4 propeller
• Tamiya canopy (an extra frameless canopy is included in their F4U-1A kit)
• Ultracast wheels (reference photos showed mixed block and radial treads, so one of each was used.)
• Academy bomb, drop tank and 5-inch rockets
• Finemolds seatbelts
• The Academy kit seat was cut down
• Scratch built instrument panel over reshaped Academy part patterned from the HobbyCraft panel
• Sheet styrene filler
• Black superglue and talcum powder for filler
• Tamiya and Alclad II paints
• Academy kit decals for VMF-312 (they worked perfectly)
NOTE: Pictures 2, 3, 6, and 10 are beauty shots.
I used a thin mix of Tamiya XF-20 Medium Gray to replicate the distinctive exhaust stains on the fuselage. I used a mix of black and brown pastels to add some soot behind the exhaust stubs and used a black Prismacolor pencil to add streaks and rough up the edges of the stains based on reference photos.
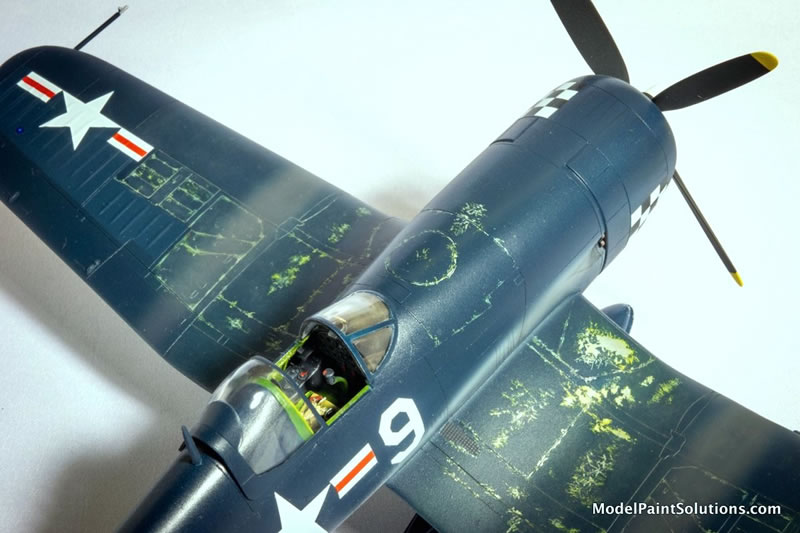
Replicating the weathered finishes on Korean War-era F4U-4s in Gloss Sea Blue finish is also a challenge. The fabric surfaces faded differently and rough use imparted significant chips revealing the chromate-yellow primer. Hairspray was used to accomplish the chipping and heavy staining from the guns applied by airbrush.
The Corsairs from VMF-312 displayed some unique weathering patters with chipped paint, oil stains, mismatched wheel tread and painted-over markings.
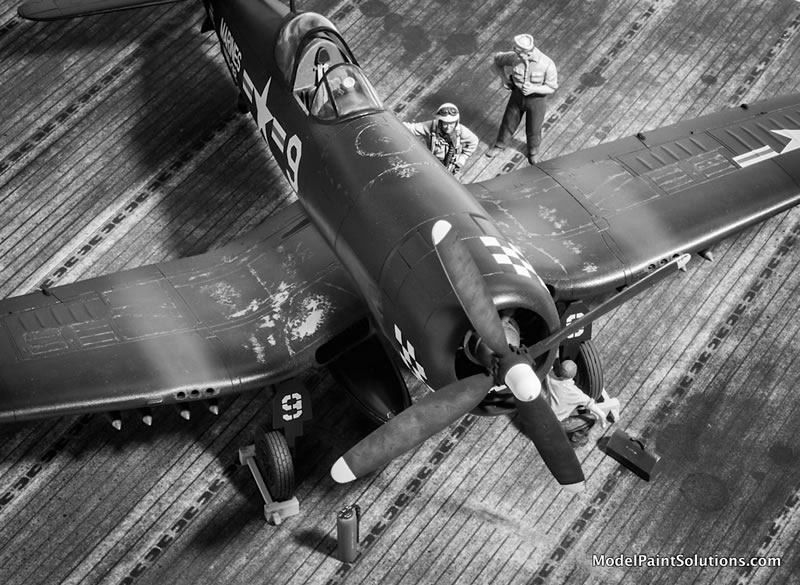
All of this was replicated on the model.

The chipping process began with a layer of Alclad II Aluminum over the primed model. Then a layer of Tresemme hairspray was sprayed over the metalized area. Only use one coat as the paint comes off the Alclad II very easily!
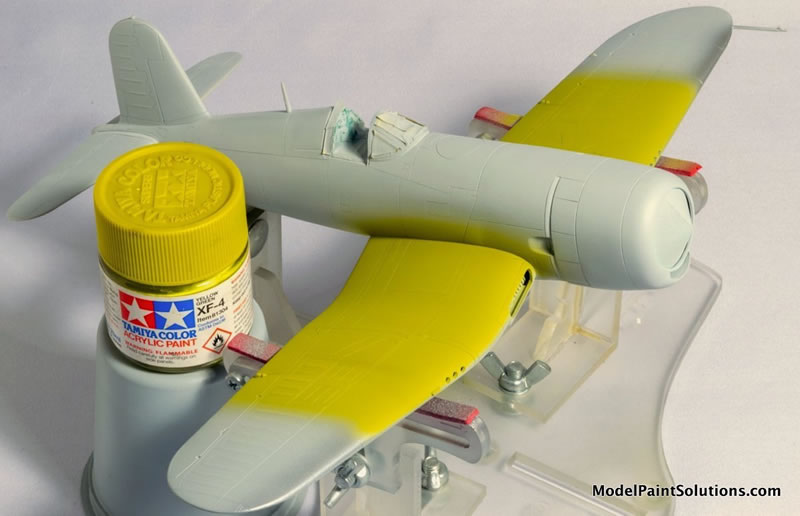
Next, Tamiya XF-4 Yellow Green was sprayed over the area.
Then I brushed on some water and used a toothpick to remove the primer layer to reveal the Alclad II bare metal finish. Take a reference picture so you can see where the chips are after the next coat of hairspray and Gloss Sea Blue are applied.
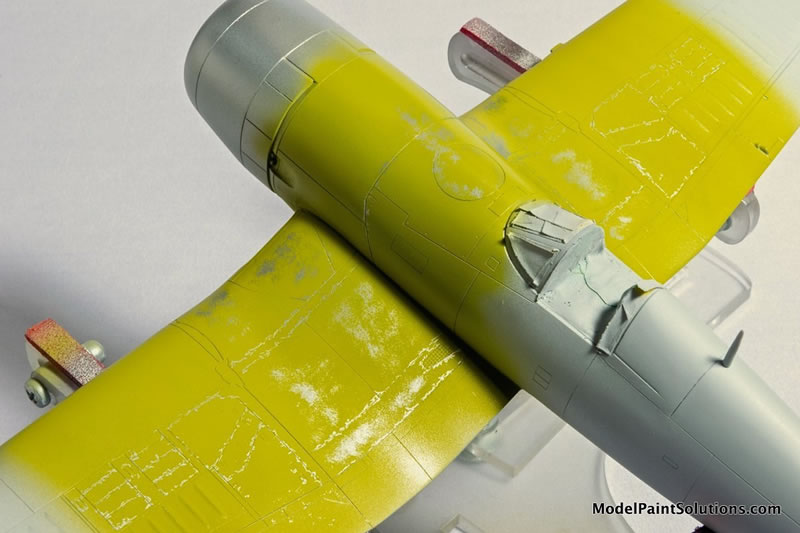
Follow the same process of hairspray followed by the Gloss Sea Blue finish. You will need several coats of hairspray between the yellow primer and the final color. Paint layers adhere to each other much more strongly than to the Alclad II.
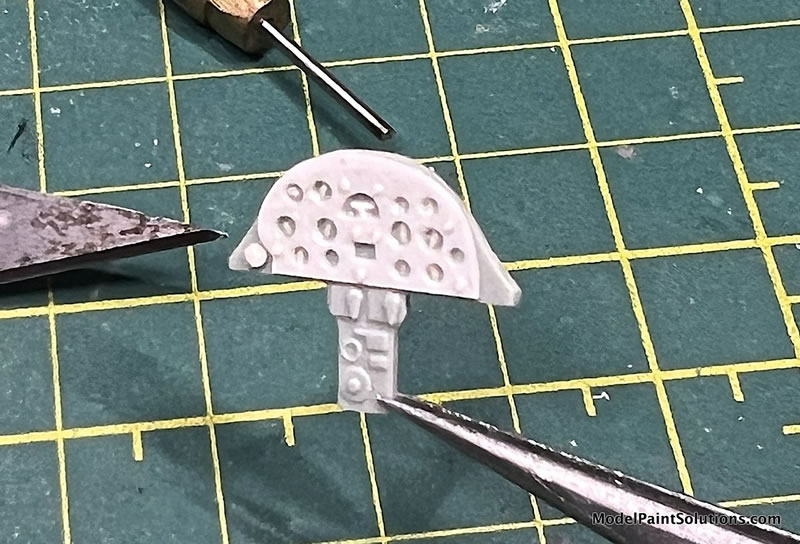
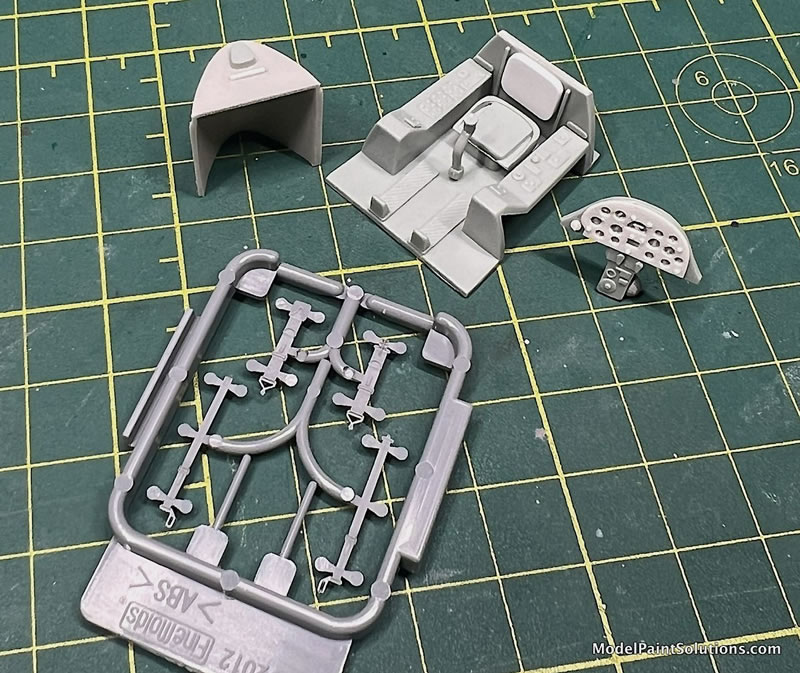
The Academy instrument panel was reshaped by tracing the Hobbycraft instrument panel to fit in the new fuselage. I added a scratch-built overlay from plastic card to better represent the -4 panel. I modified the other cockpit parts from the Academy kit, mainly cutting down the seat and added a set of FineMolds seatbelts.
I hope these tips are useful in getting an accurate -4 Corsair (and that it motivates Magic Factory to release one!)
Happy modeling!
For more on this review visit ModelPaintSolutions.com
Text Copyright © 2026 by Rafe Morrissey/ Model Paint Solutions
Images Copyright © 2026 by Rafe Morrissey / Model Paint Solutions
Page Created 17 April, 2026
Last updated
17 April, 2026
Back to HyperScale Main Page
Back to Reviews Page

|
 Home
| What's New |
Features |
Gallery |
Reviews |
Reference |
Forum |
Search
Home
| What's New |
Features |
Gallery |
Reviews |
Reference |
Forum |
Search