ICM's 1/72 scale
Ki-21 Ib Sally
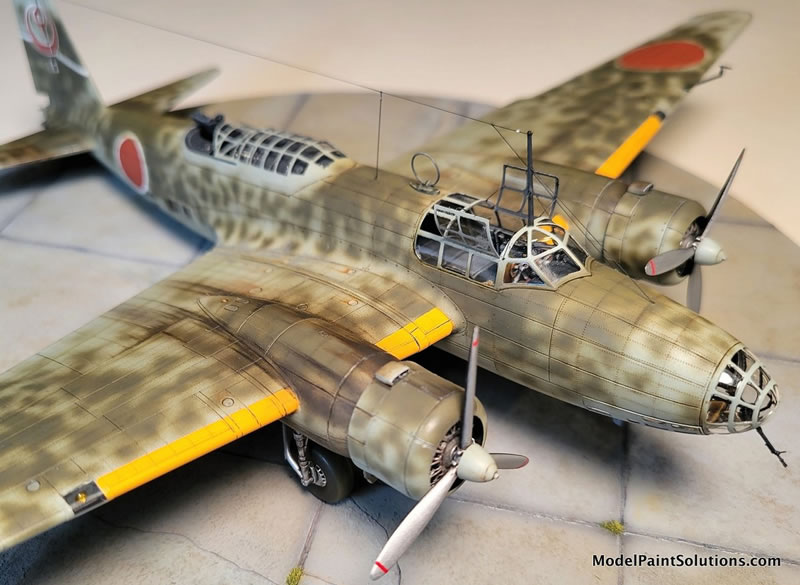
by Steven Hustad

For those of us who are fans of 1/72nd scale WW II Japanese bombers, ICM’s 2022 release of this kit was VERY welcome. Okay sure, we all wanted the type II ‘turreted version’ instead of this early variant, but we’ll take what we can get, right? Up to now all we’ve had is the now very ancient 1975 released Revell kit (that I built probably 35 years ago) and the 2001 MPM Sally (which I had, but sold on eBay because it looked like a very long and difficult build). But, at least those two earlier kits were of the later type II variant, which has far more camouflage scheme options for the modeler than does the early type I.
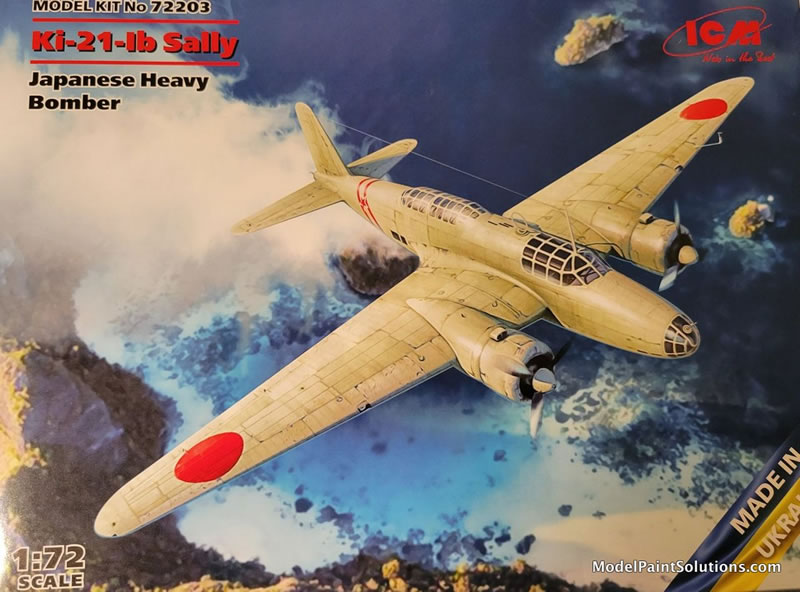
When ICM released this kit I snapped one up immediately because they do great kits with superb fit, good detail and excellent decals. So that, plus the Eduard PE set #73-789 is all I needed to tackle this big girl.
I’d built ICM’s earlier Dornier Do 17Z kit which was also excellent, and this Sally didn’t disappoint either.

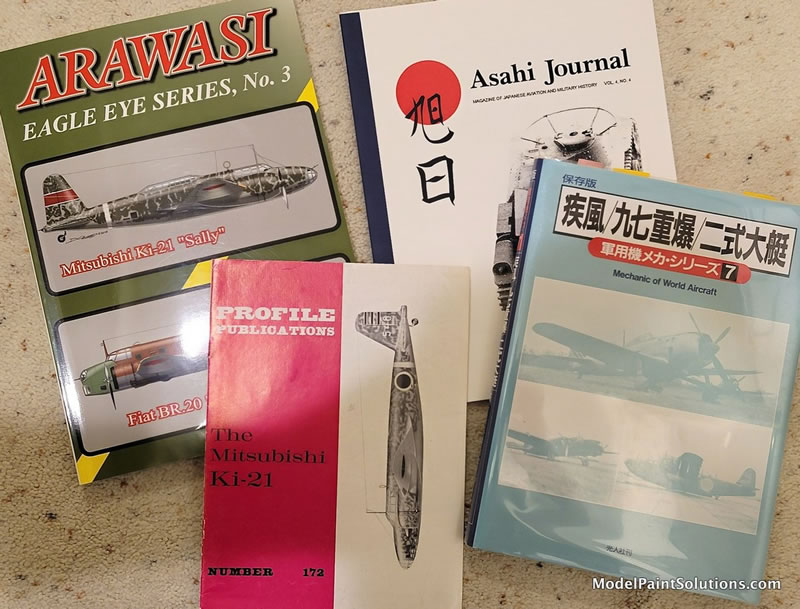
References Used
The newish large Arawasi publication softcover on the Ki-21 Sally (plus oddly the Japanese use of the Italian Br.20) was indispensable. Also, the now very old, Maru Mechanic, is still quite useful. There was a mid-1990’s Asahi Journal with some Sally material as well. Those and the even older Profile Publication make up the sum total of dedicated references. I think there might also be an old Airwar/Aircam softcover and a softcover Shiffer book with terrible grainy pictures on the Sally too. But, the Sally is definitely a neglected aircraft in the book world.
A short run-down of the construction includes:
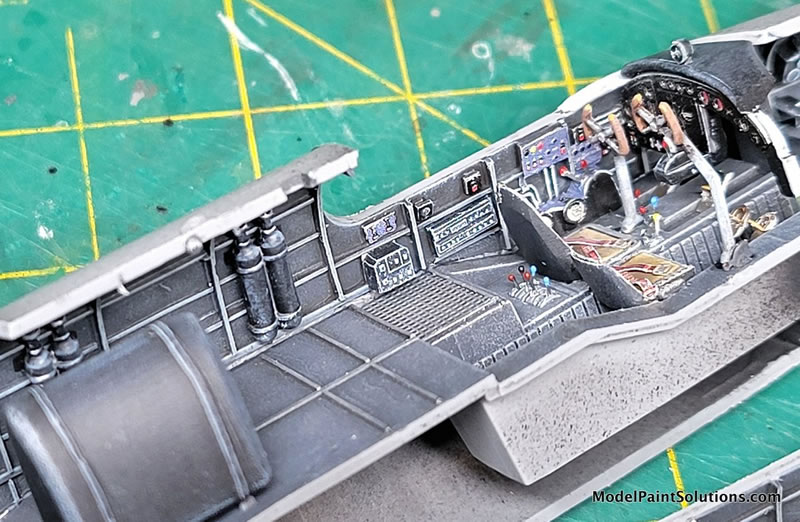
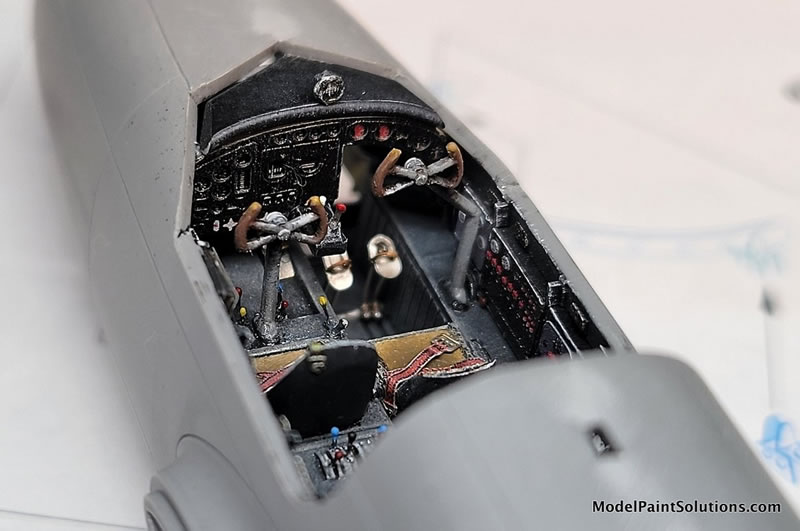
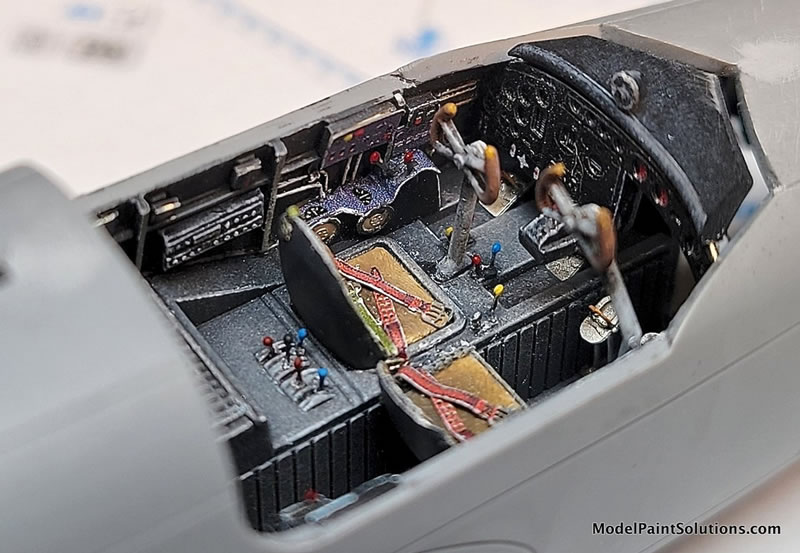
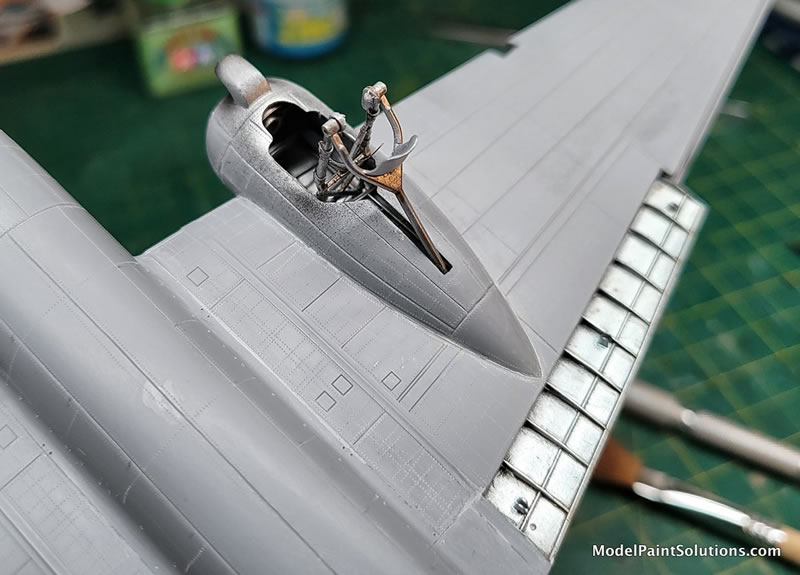
much extra interior detailing using Plastruct styrene, the Eduard PE set and many random bits of wire and misc. PE bits from other sets.
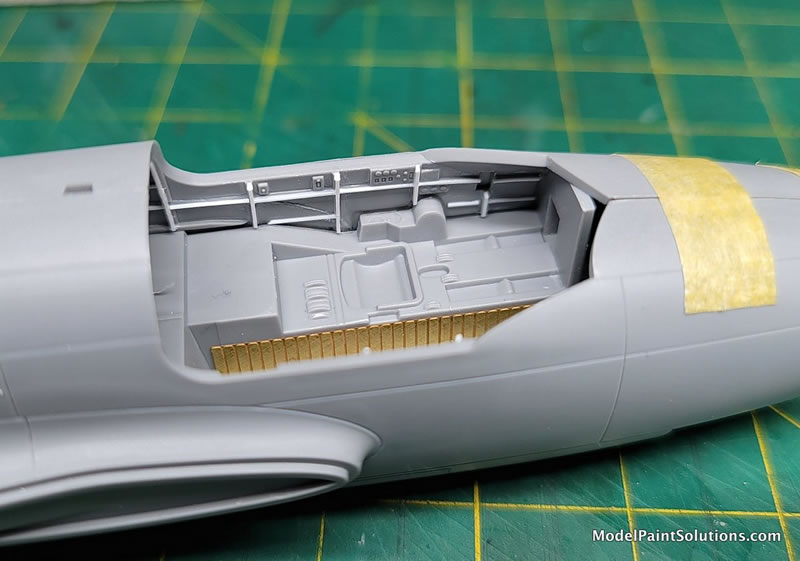
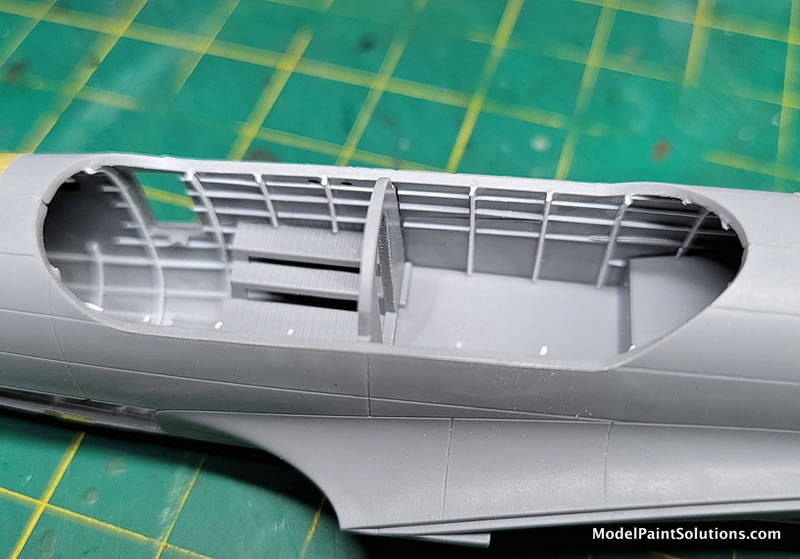
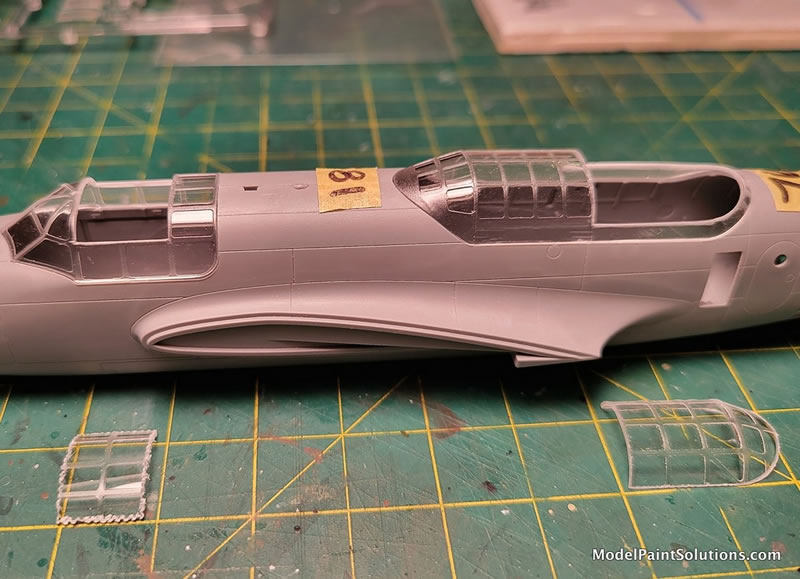
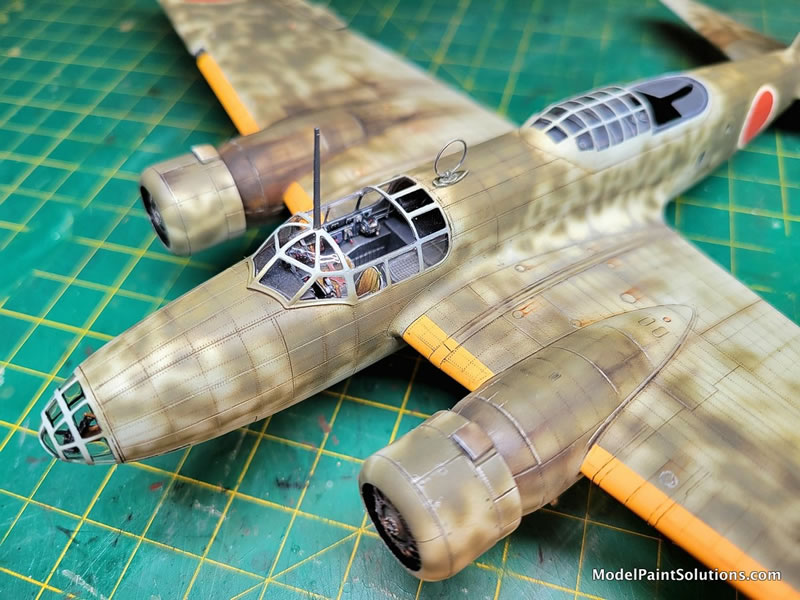
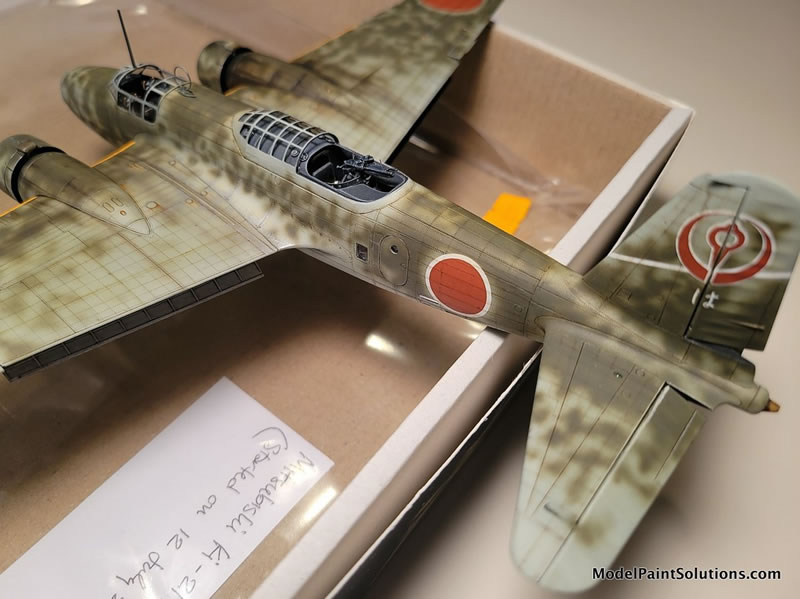
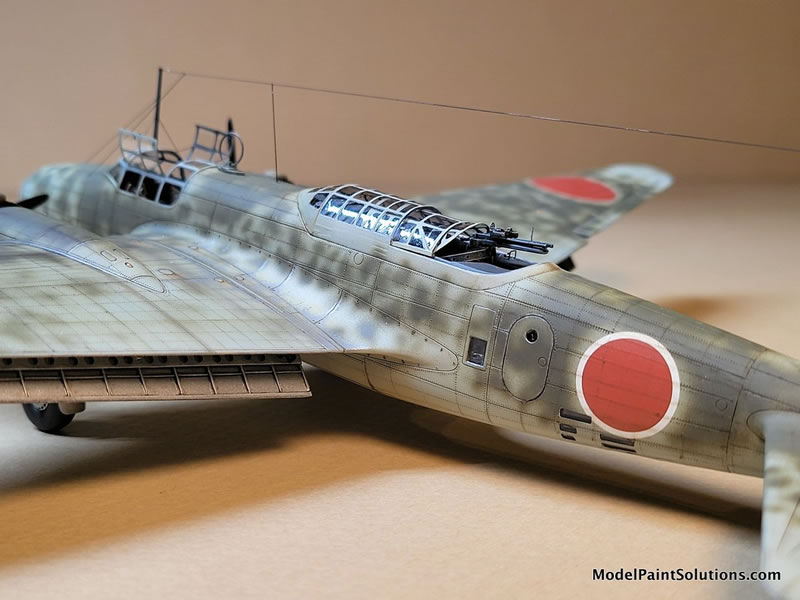
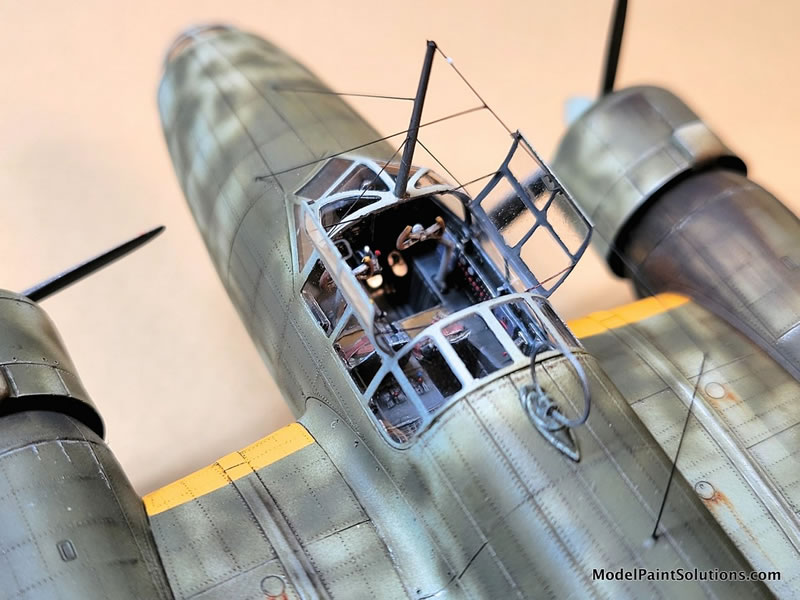
The main cockpit’s double clamshell top hatches were cut out, as was the rear of the fuselage’s long clear part’s glazing. The ‘opened’ portions were scratch-built. “Heat & Smash” items were made from the clear plastic that comes atop greeting card boxes that was heated over a candle and the smashed down over a propped up male mold.
Most Sallys had dark gray interiors instead of the more common olive green, so that’s was used.
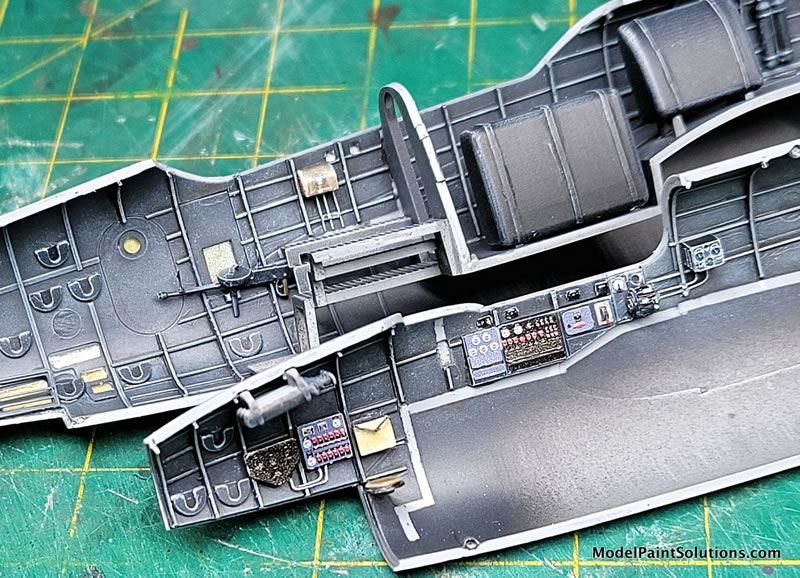

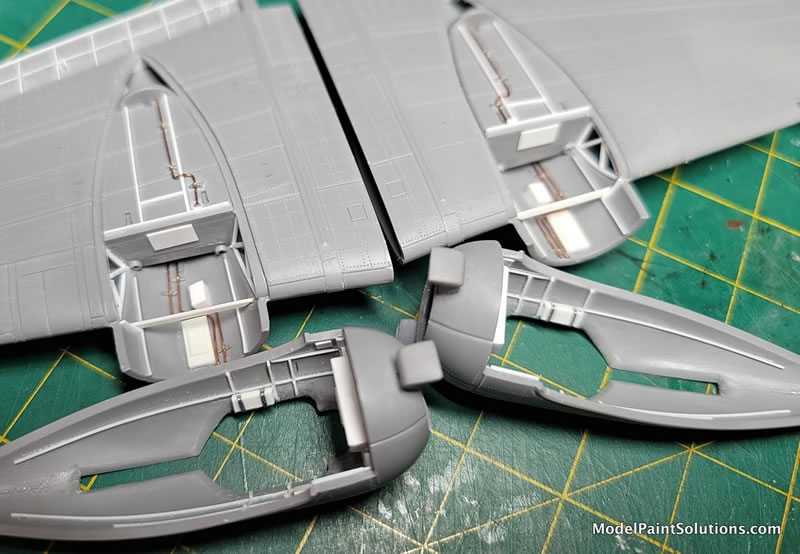
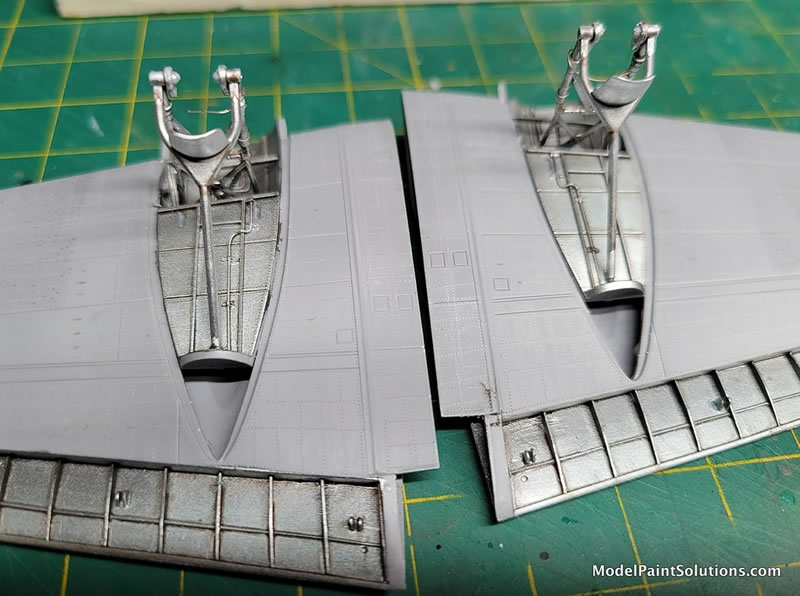
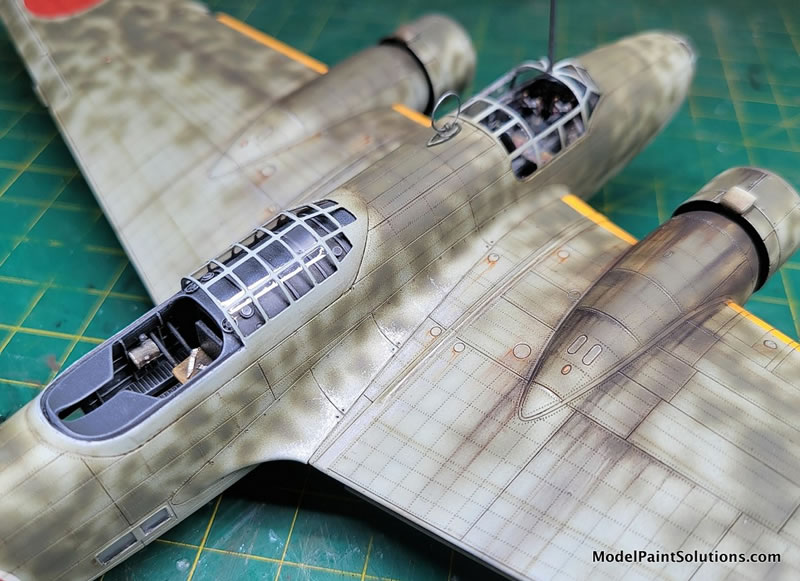
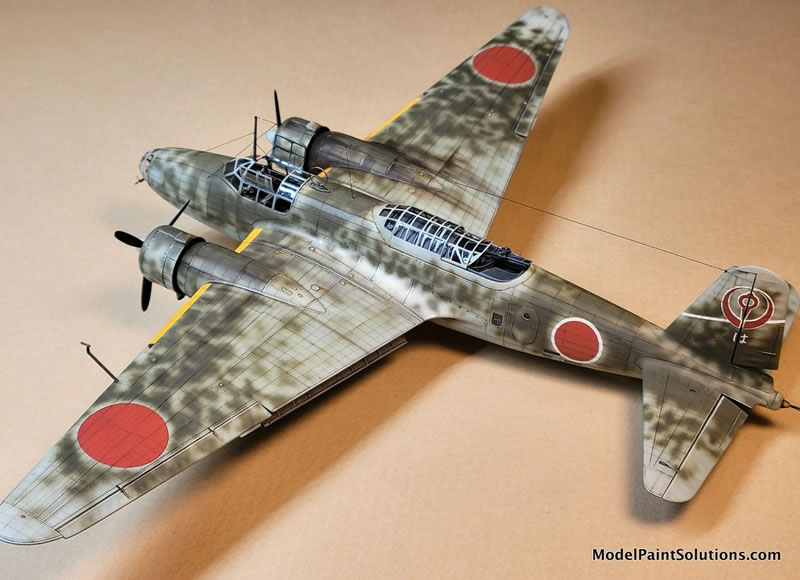
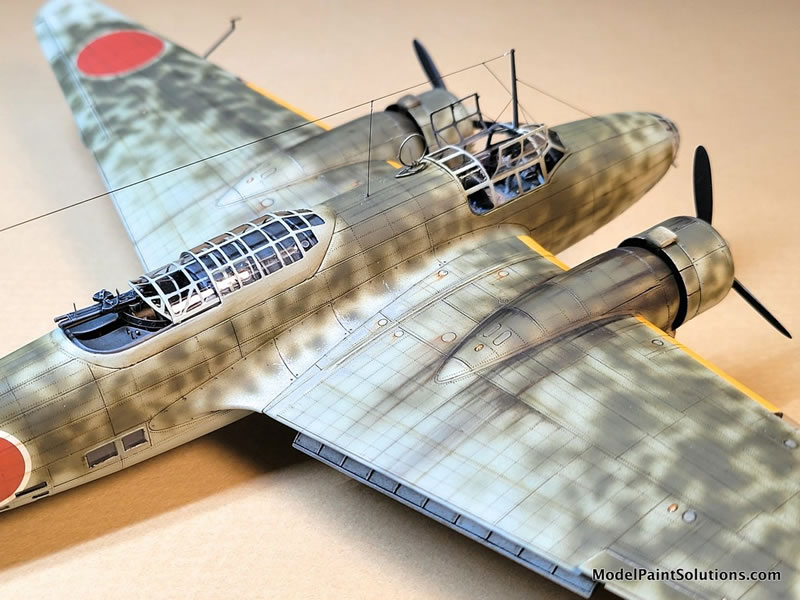
I wanted to create a bit more interest, so I cut away the flaps added scratch-built interiors with styrene strips and modeled them in the dropped position. Yeah, it’s uncommon to see flaps drooped on the ground, but I did find a couple of photos!
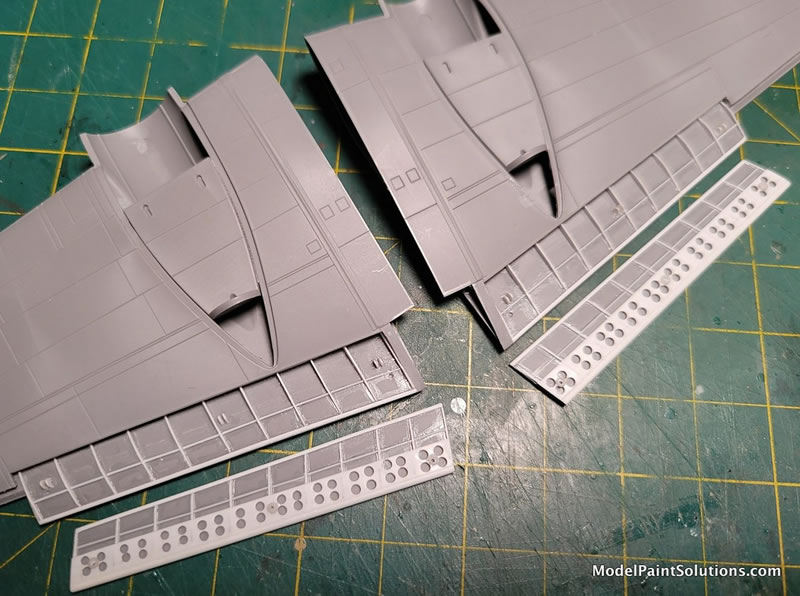
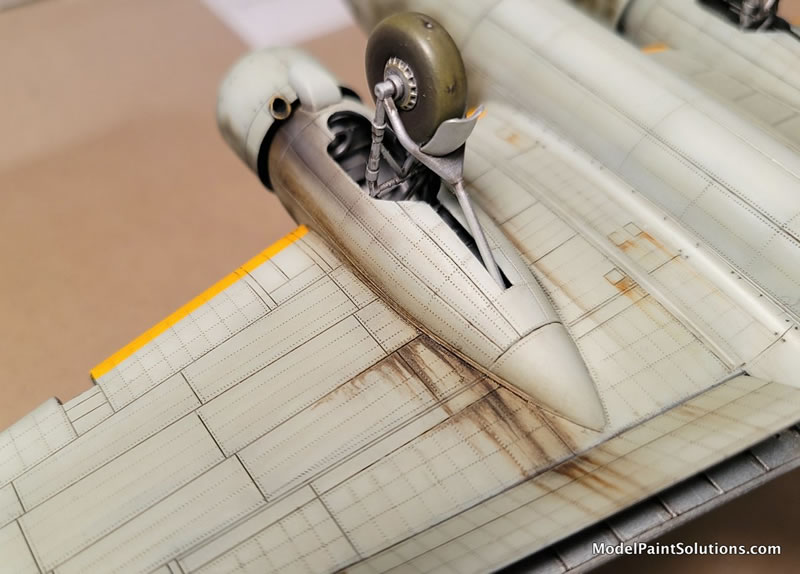
Wheel wells were also boxed in and scratch-built detail was added using the usual materials.
Flap & Wheel well interiors were painted using AK’s Xtreme Metal ‘Aluminum’ color and I misted on a small amount of Mission Models green/blue Aotake translucent preservative color over that trying to maintain a mostly aluminum look. Can’t really tell, but that’s okay, as Japanese IJA (Army) aircraft didn’t use the Aotake protective layer as commonly as IJN (Navy) aircraft did.
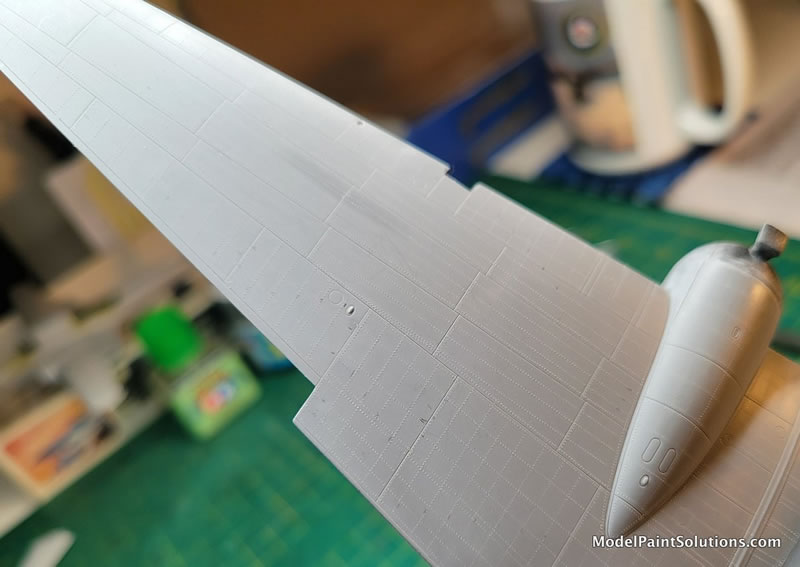
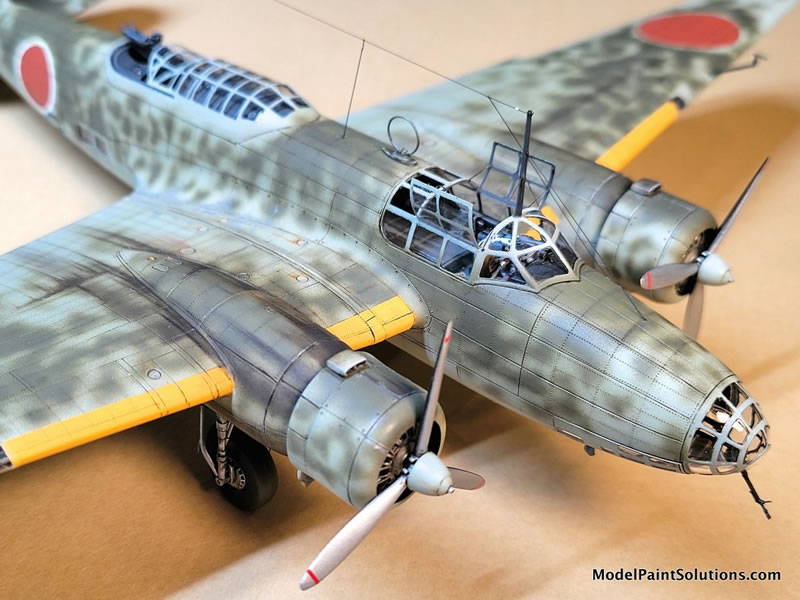
The whole exterior was riveted using a “Rosie the Riveter” rotary tool (0.40 size for 1/72) and following the nice plans in the Arawasi book for placement.
Wingtip lights were replaced with CMK’s red & green colored resin chunks cut from their colored lenses set, super glued into place, then carved and sanded to shape, polished to a gleam and masked using Microscale’s liquid mask.

That’s basically it.
One more note - ICM has you attach the landing gear before the engine nacelles are glued into place. I don’t like doing this because then you have to mask the landing gear, and they’re just hanging out there begging to be broken off. I tried temporarily fitting the nacelles in place to see if they could be added later, but even though the answer is a hesitant ‘yes’, I couldn’t’ be confident enough that all points were attaching securely. So in the end I decided to attach them ahead of time and take the risk. As it turned out, it went okay this way.
Exterior Painting
Eduard’s canopy masking set was used here, and all sections fit perfectly.
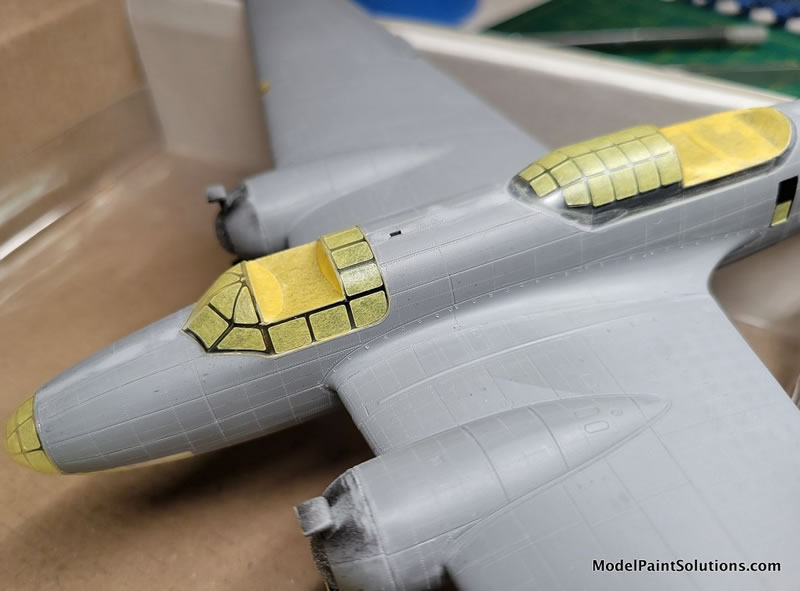
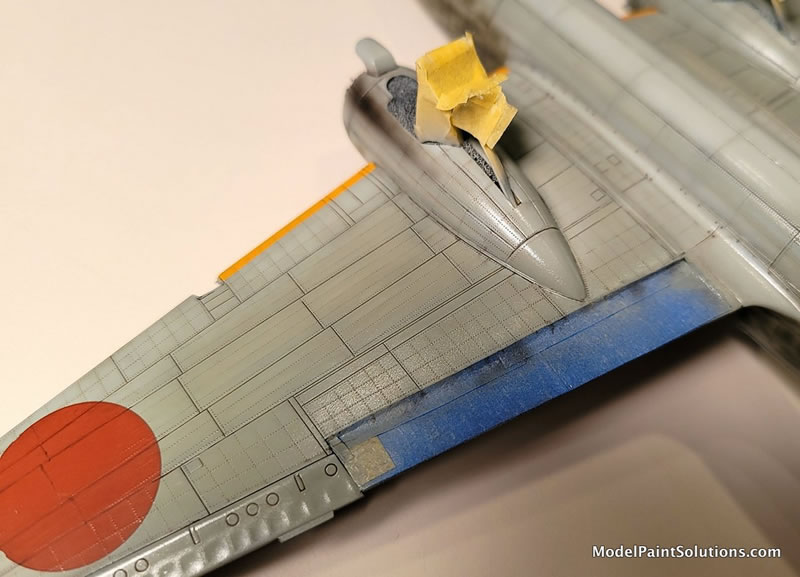
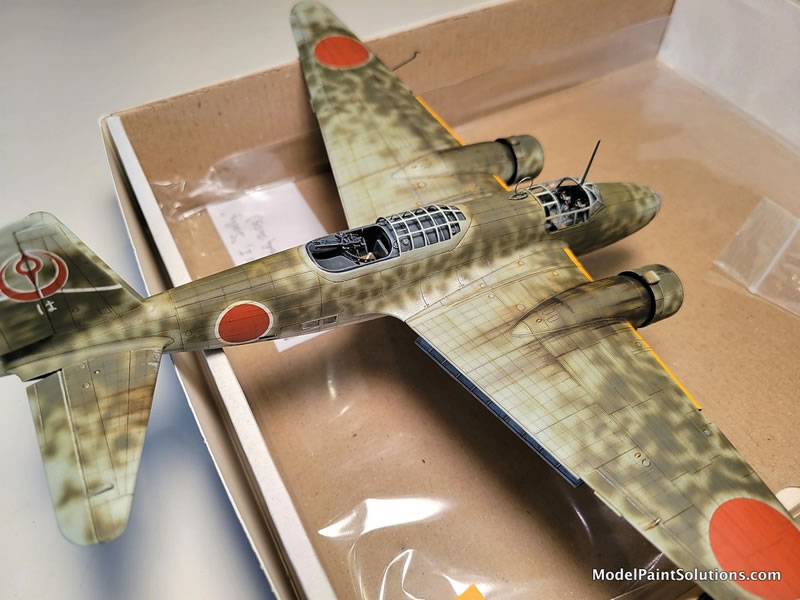
First off, the canopy framing portions received an airbrushed coat of the interior dark gray color as those would be visible later on the inside. Then Tamiya white was airbrushed for the vertical stabilizers thin angled line marking and as an undercoat for the main wing leading edges that were subsequently painted in a deep yellow (Tamiya mix using their XF series of paints).
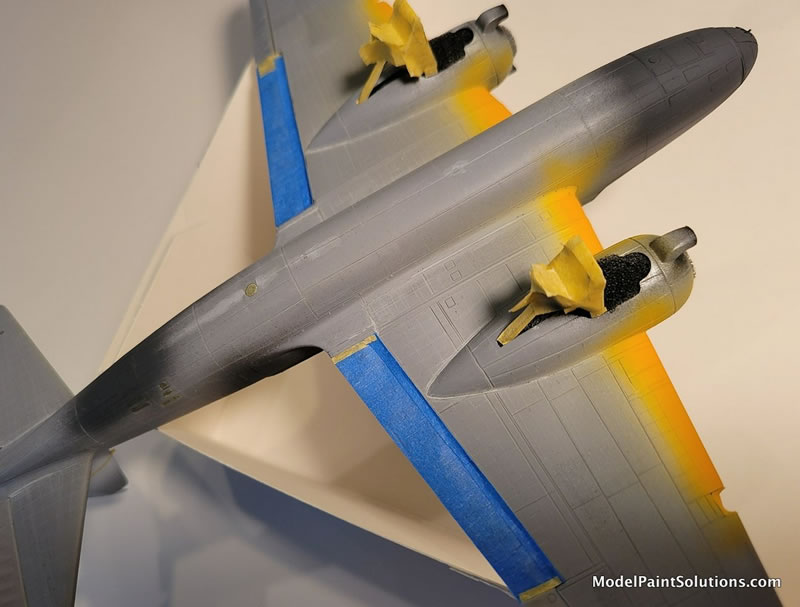
Once those areas were dried and masked, that was followed with an overall pre-shading/priming coat using Gunze’s Mr. Surfacer 1500/Black concentrating on panel & rivet lines as well as various crevices and recessed areas.
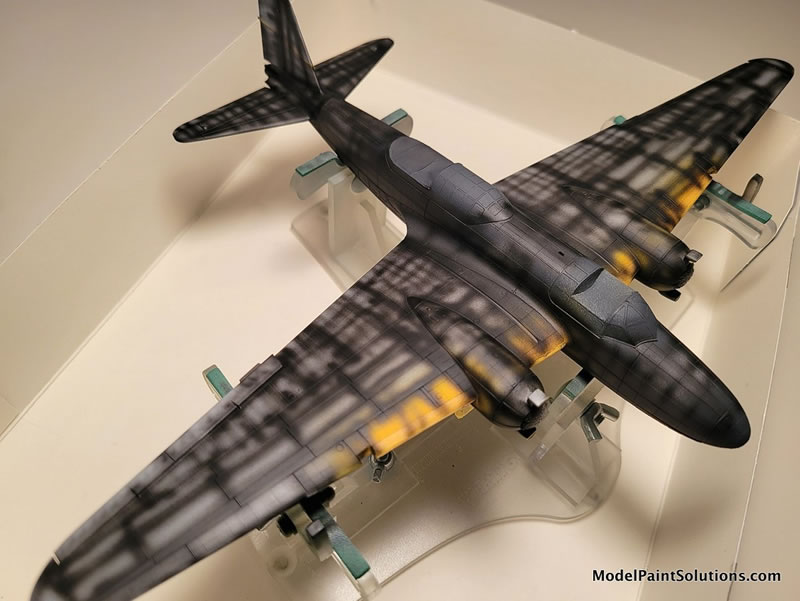
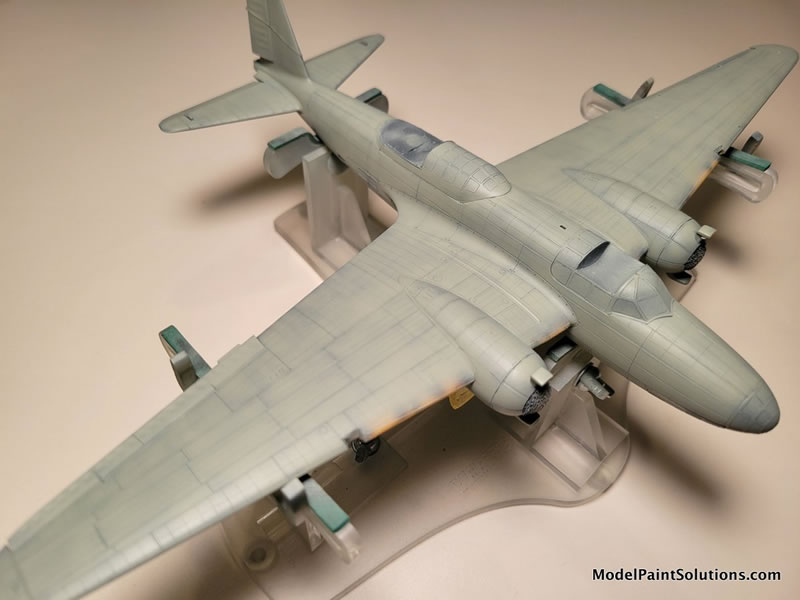
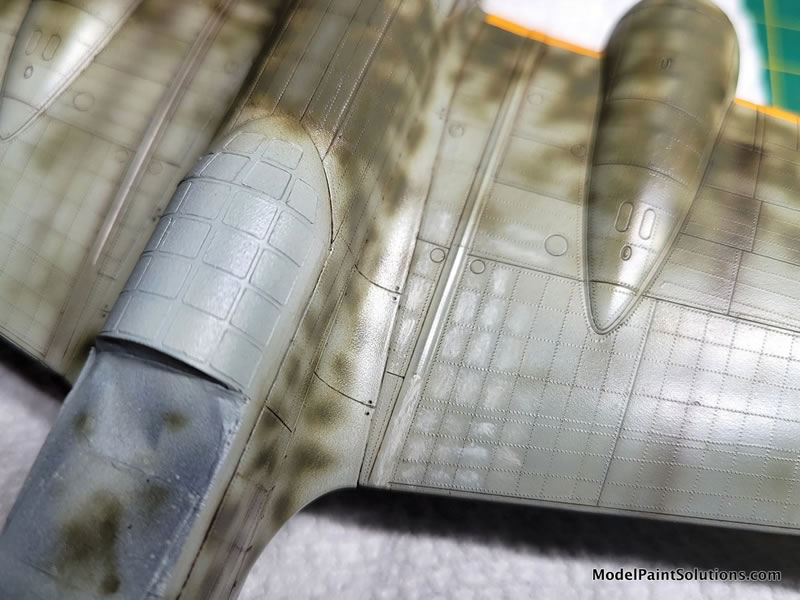
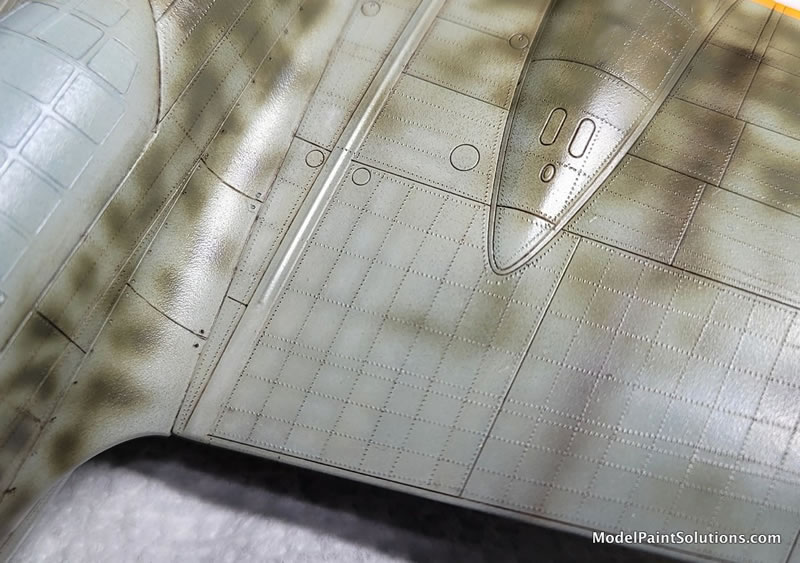
The camouflage colors started with three different shades of Imperial Japanese Army (IJA) Light Gray/Green overall color. Beginning with Vallejo Air’s version (because I had a lot of it, not because it’s a preferred brand or anything). I used the basic color, then another lightened with flat white and another darkened with a bit of Vallejo’s RLM 02 color. Note that Vallejo Air colors need to be used with their own brand of thinner, as they don’t play well with my favorite ‘go-to’ - Mr. Color Leveling Thinner (MCLT). Darker shades near the engine nacelles, wing roots, and bomb bay areas, lighter shades on all raised areas, and the basic color in-between. This gives the beginning finish an additional three dimensionality. Note that this color was airbrushed beginning ‘inside’ of each of the areas black outlined with the Mr. Surfacer Black, working outward while trying to preserve a hint of the underlying darker effect.
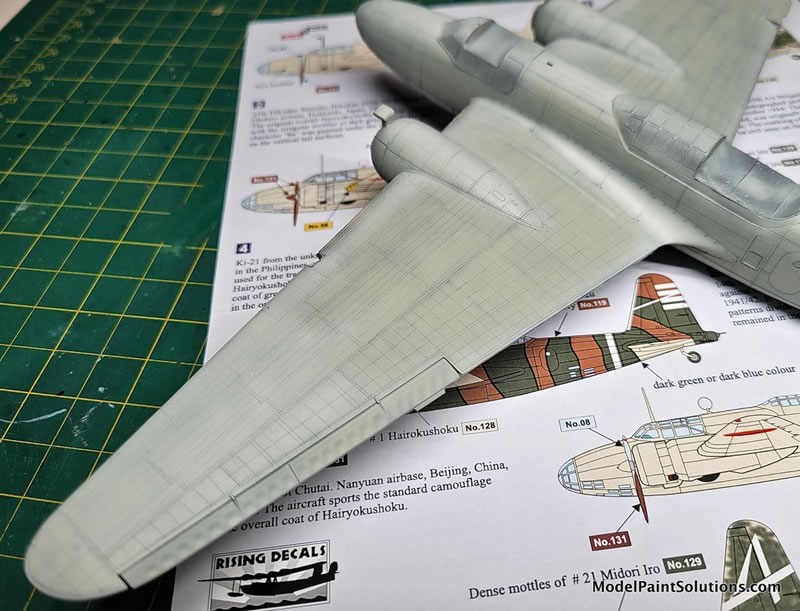
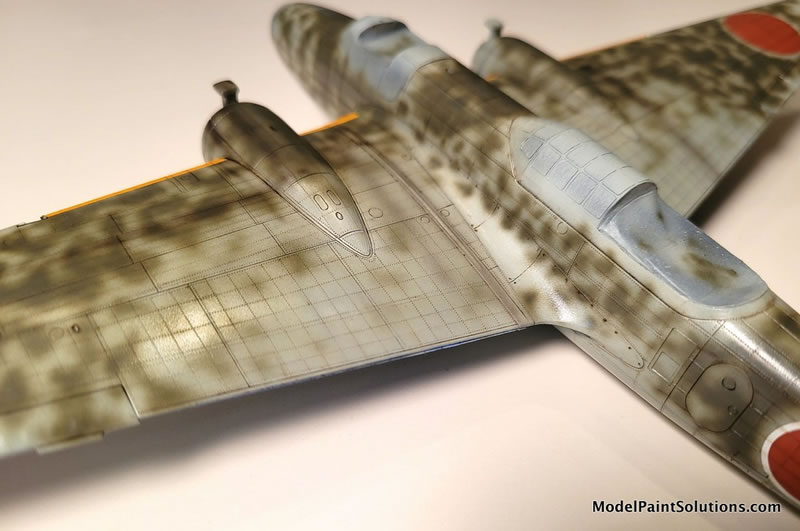
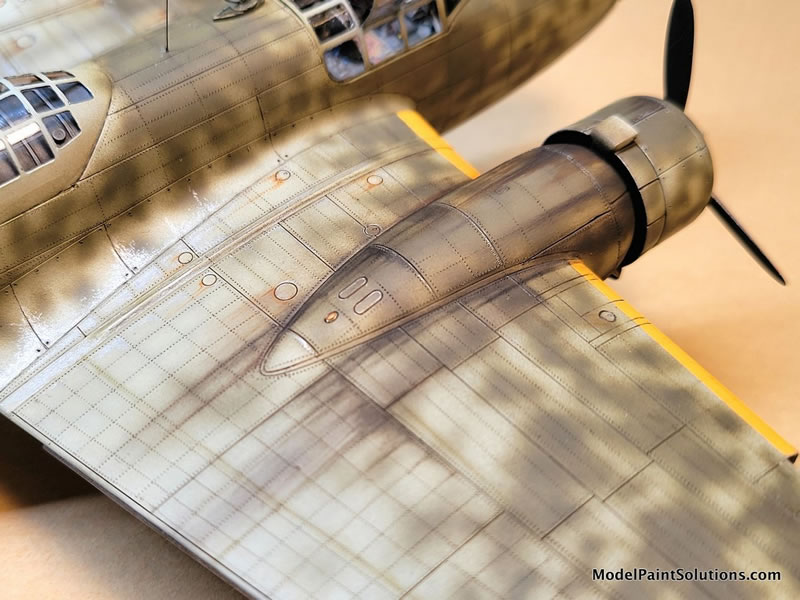
I wanted to do a mottled early Sally, but there really weren’t that many (ICM – PLEASE release a later type II ‘turreted’ version of the Ki-21!). But, I was able to find a few on ‘Rising Decals’ dedicated decal sheet No. RD72105 . The one I chose is of the 25th Air Brigade HQ Flight at Obihiro airfield, Hokkaido, Japan, February 1943 (just before this unit’s assignment to SE Asia). It’s not a complete mottle coverage which also appealed to me, obviously done at the airfield.
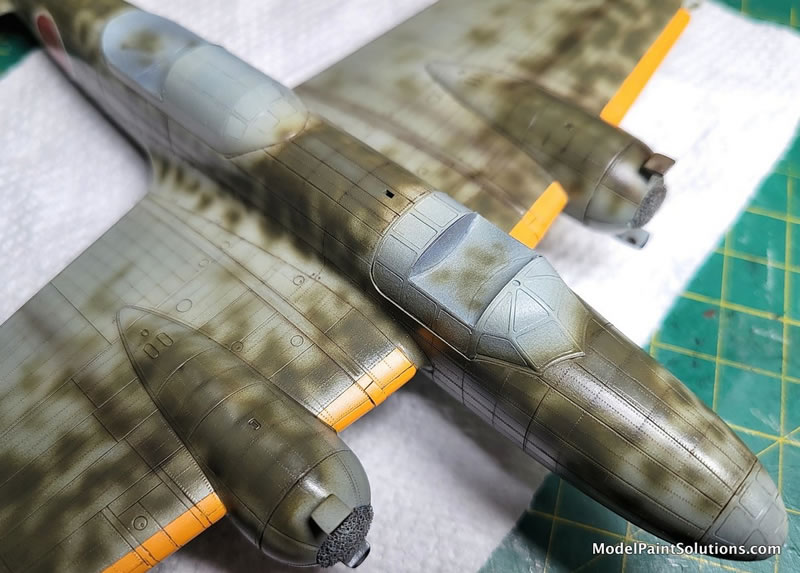
When I mottle I take my friend Barry N’s advice and use Gunze’s Mr. Hobby Aqueous line of paints. These paints seem to have more finely ground pigments, and great coverage too and they spray beautifully using Mr. Color Leveling Thinner (MCLT) with some of Gunze’s ‘Mr. Mild Retarder mixed in. For the IJA dark green this line has a color I felt was far too dark and too ‘green’, but hey! – their Luftwaffe RLM 71 Dark Green looked nearly correct. So, out came Model Paint Solutions mixing bottles and I made my own IJA dark green, using 2 parts RLM 71 and 1 Part IJA dark green (both from Gunze’s Aqueous line).
Mixing was about 20% paint to 80% MCLT (plus a about 5 drops of retarder per color cup). Air pressure was dialed down to around 10psi and a 0.20mm H-S tip fitted in an H-S Evolution-2024 was used. The whole topsides mottling took about an hour. Just get in close, go slow, and have a thinner soaked Q-Tip to wipe clean the needle tip about once every minute.
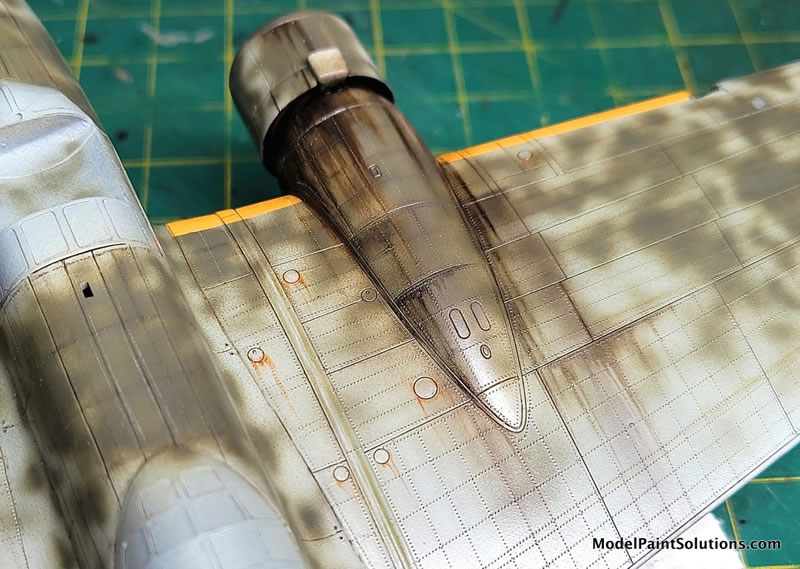
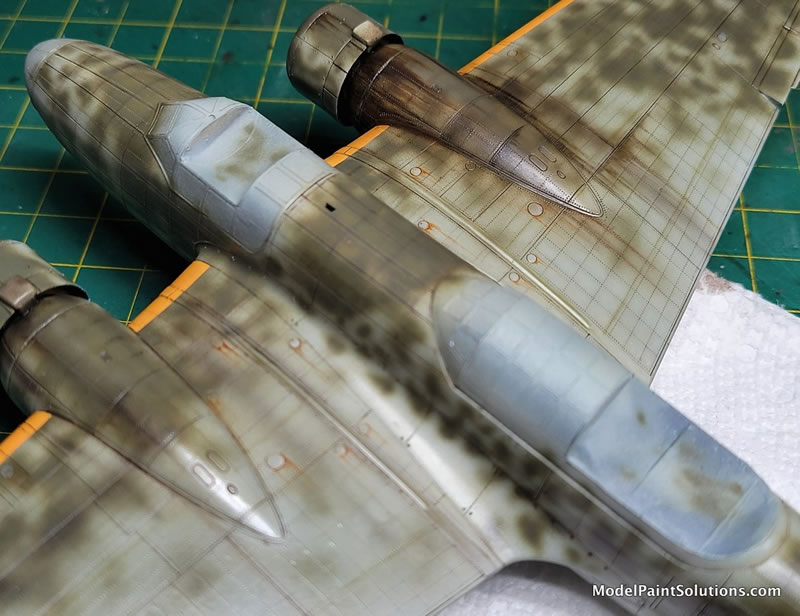
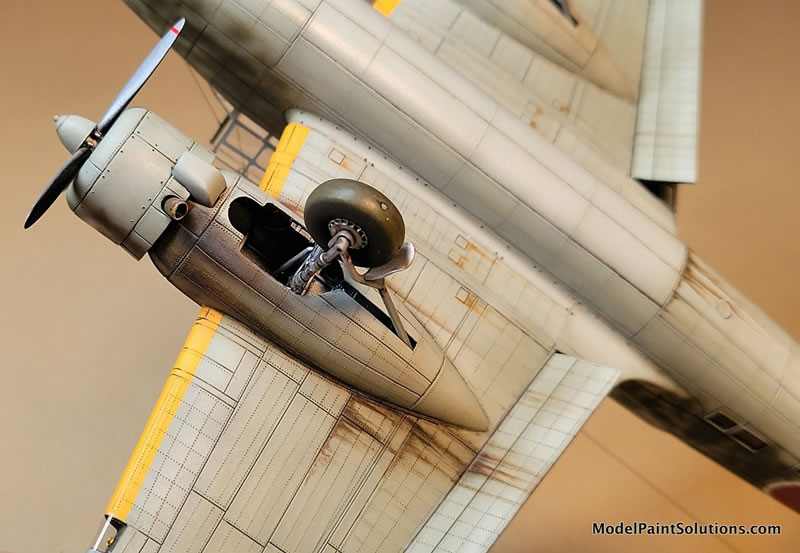
I followed up the camo painting by airbrushing on the exhaust stains with a black & red/brown Aqueous mix, as well as accentuating some panel lines and crevices here and there with a thin spray of that same color. I wanted to show an oil leaking engine too, so masked and sprayed the major portions of that staining on the starboard nacelle/wing.
Pre-Decaling & Decaling
Next up was an overall (Pre-Decaling) gloss coat using Future (By Pledge) diluted about 25% using MCLT. I’ve found that the MCLT with it’s built in leveling agent completely strips Future of its otherwise annoying tendency to ‘bead up’ on some paint finishes. So instead, you get a perfect leveled glossy finish every time.
The ‘Rising Decals’ went down very nicely and conformed well using the standard Microset Set & Sol solutions. I like Rising’s Hinomaru colors because they’re just a bit muted which looks more correct to me – especially in 1/72nd scale. So, why don’t decal manufacturers put out separate national marking sheets of somewhat muted Hinomaru red colors like this? One more comment on Rising Decals; it appears that the clear film is on top, rather than on the bottom of the printed colors – maybe both?!. So when cutting them from the sheet you must be careful not to disturb this top layer clear film, and to resist the temptation to peel it off. I wonder if they’re like Eduard’s more recent decals where the clear film can be peeled off AFTER the decal has dried and conformed to the surface? Haven’t tried that yet, but may experiment with some ‘not to be used’ scheme decals to find out…
Once dried, the model’s decalled areas were washed of any remaining decal solution residues and it was sealed in with another coat of the same Future/MCLT mix in preparation for the sometimes harsh weathering stages to come.
Weathering
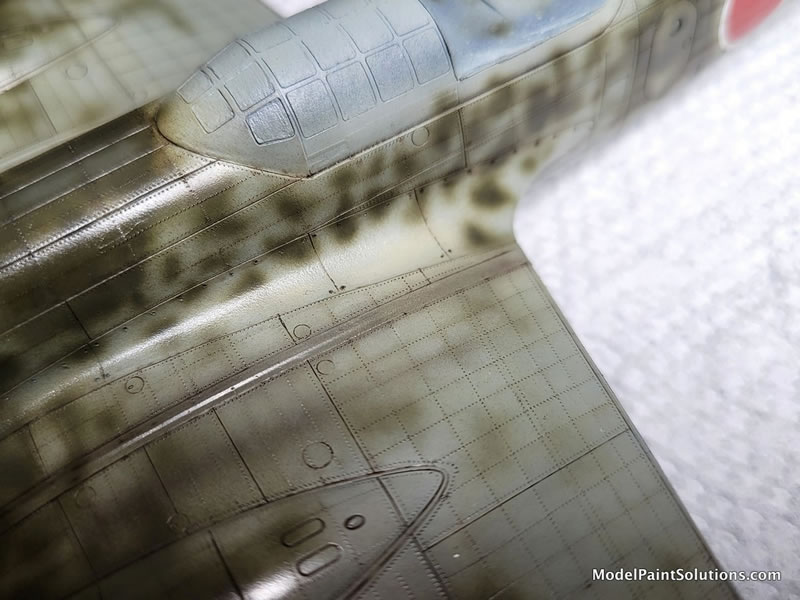
I started the weathering process with a brown/black oil paint pin wash brushed into the panel and rivet lines with a small brush (‘00’ size). Once dried, that was wiped off in the direction of flight using an old piece of fabric from a t-shirt. These can be de-emphasized, or attenuated afterward using the same mixture to achieve the desired look.
This was followed up in the major wing walk maintenance areas with some oil paint filters – brush on, let dry, wipe off leaving a tinted panel area here and there. Brown & ochre were used on the crew-dirtied areas. Then, some limited (because it’s a mottled camo scheme) manipulation of the highlights and shadows with oil paints. The oil paint is brushed on by panel for contrast, then gently brushed with a very soft brush which softens the effect leaving a subtle highlight, or shadow as you decide to add contrast and interest. These areas then need to be left to dry for a couple of days.

Next up was an oil paint application reinforcing some oil and fuel stains - but especially at that starboard engine where I wanted to show that it had a bad oil leak. This was also done with a small brush and diluted (with mineral spirits) black & dark brown oils.
Next up is getting all the ‘fiddley bits’ attached before the final Dullcote application. Wheels, pitot tubes, antenna masts, and so on…best to get these attached now so that any shiny glue areas or touched up paint issues get the same overall finish at the end.
The Flat /Satin Clear Coat
Testors Dullcote was used for the final clear coat – diluted about 30% with regular ‘hardware store’ lacquer thinner which will then yield more of a desired satin finish rather than a dead flat one. After this clear coat is applied, the Prismacolor silver pencil was used to replicate worn areas in the inner wing area where maintenance crew walked or refueled the tanks. It was also for wear on some wing leading edges, openable canopy section edges, etc.
Final Details
Canopy masks were now peeled off (always an anxiety elevating experience because of the possibility of things going wrong that won’t be discovered until now!) But most was all right, and those areas where I did have some ‘bleed-under’ was taken care of with a toothpick with an end cut to a sharp chisel point to gently scrape away any unwanted ‘paint migration’. Some minor paint touch-ups were also carried out at this stage with a small brush.
The canopy opening homemade ‘heat & smashed’ sections were now added. Clear canopy areas were individually brushed with Future gloss – panel by panel, working quickly so as to avoid brush marks. This, in addition to the same previous application on the clear part’s inner surfaces yields a VERY clear canopy part.
Last details added were the leading edge wing lights (AK lenses) with clear shiny 3M Scotch Tape clear coverings. The tape was wrapped around, cut out along the surrounding frame area and the excess peeled off. The resulting “frame” area was brushed with flat clear to blend with the adjacent camo & finish. All antenna wires were added using stretched sprue, painted with very dark gray acrylics. Slap on the propellers and were done!
I later built a generic circular concrete tarmac base, as the photo I have of this aircraft in Japan before it’s deployment showed it sitting on a concrete airfield.
(Insert pictures 82 thru 87 here).
Thanks for reading along!
Steve Hustad
(aka - ‘The Mad Norseman’).
For more on this review visit ModelPaintSolutions.com
Text and Images Copyright © 2026 by Steve Hustad
Page Created 16 January, 2026
Last updated
16 January, 2026
Back to HyperScale Main Page
Back to Reviews Page

|
 Home
| What's New |
Features |
Gallery |
Reviews |
Reference |
Forum |
Search
Home
| What's New |
Features |
Gallery |
Reviews |
Reference |
Forum |
Search