Home
| What's New |
Features |
Gallery |
Reviews |
Reference |
Forum |
Search
Home
| What's New |
Features |
Gallery |
Reviews |
Reference |
Forum |
Search
|
|
|
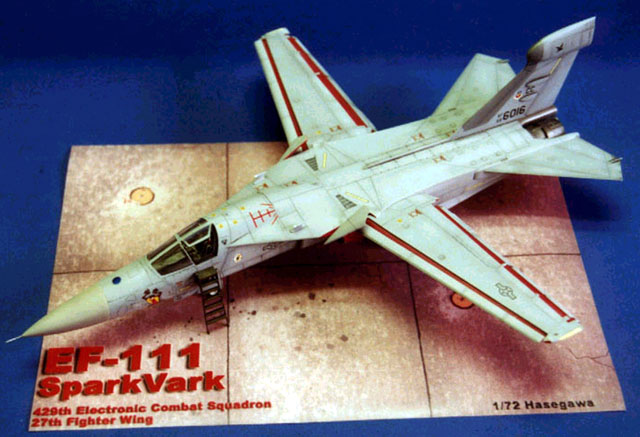
General Dynamics EF-111 Sparkvark by Henry Juarez
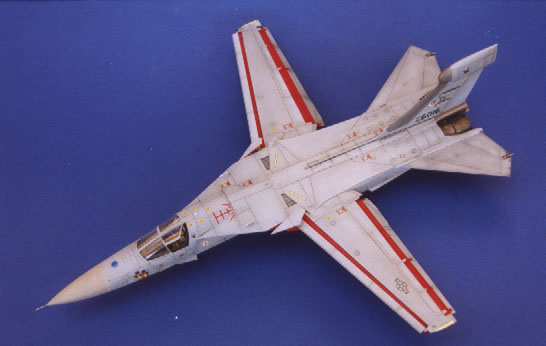
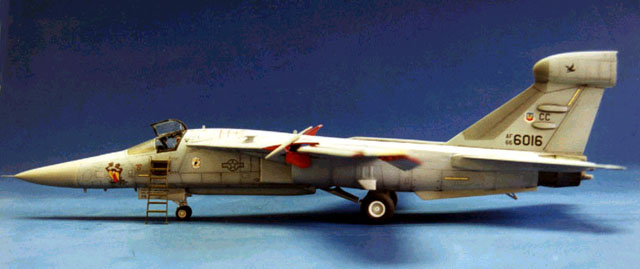
This is the Hasegawa 1/72 scale EF-111 SparkVark (Raven) Kit #KT3, built almost out of the box. In my opinion, this is the best scale version of the F-111 family kits that scale just right for a 1/72 kit. It displays very fine recessed panel lines which are accurately portrayed per General Dynamics specifications. Detail in the cockpit and wheel wells are nicely done and really don't need much modification. But there's always room for improvement.
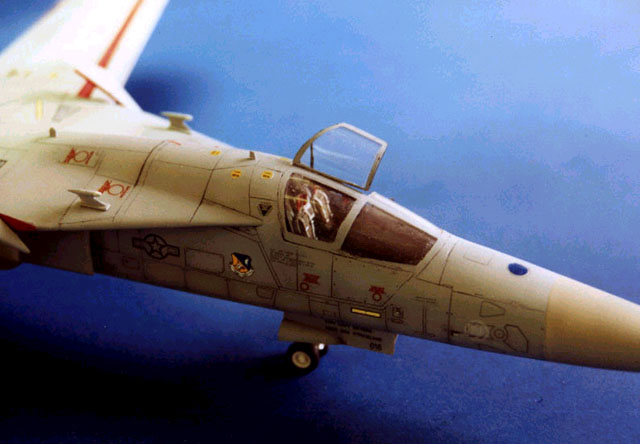
The kit went together pretty well with only a few problems in the forward fuselage and aft fuselage fit. Once the two halves are joined, there is a notable gap along the upper portion of the two halves I filled this with Magic Sculptputty and allowed it to cure for two days. Once cured, I sanded it smoth and rescribed all lost panel detail. The intake trunks also had a small step when glued to the aft fuselage which was filled and completed in the same manner. The cockpit was assembled straight forward with the addition of tape seat belts and a few instrument placard decals. I sawed off one of the cockpit doors and positioned it in the opened position and added a styrene piston actuator.
Once the kit was assembled and all missing panel lines rescribed, I painted all panels lines with flat black. This was followed by an overall light coat of MM Light ghost Gray FS36375. I painted enough to just show a little of the black panel detail to show through. At this point I checked for any imperfections and corrected as needed and repainted.
Once the LGG was applied, I painted the top portion of the aircraft with MM Dark Ghost Gray FS36320. After allowing the model to dry for 24 houra I applied a Future floor wax coat to seal and prepare it for decaling. In my opinion, there is no better or cheaper gloss coat than Future floor wax, straight out of the bottle. The decals are form Cutting Edge #72048 and went on without a problem. They are thin and seat snuggly well along all the detail. They were set with SolvaSet solution. Once the decals dried, I applied one more thin coat of Future. I accented the panel lines with a thin wash of dark gray oil wash from Windsor & Newton. The model was then finished with a coat of dull lacquer.
The pilot is a 1/35 scale Verlinden figure which was scanned and incorporated into the shot just because I thought it looked cool.
Overall, this was a simple kit to construct and finish, resulting in a very impressive and unique subject.
I just purchased the Academy EF-111 in 1/48 scale and look forward to this next project. If it looks anything like the Hasegawa 1/72 kit, I know I wont be disappointed.
Models, Text, Photography and Composition Copyright © 2000 by
Henry Juarez
|