Home
| What's New |
Features |
Gallery |
Reviews |
Reference |
Forum |
Search
Home
| What's New |
Features |
Gallery |
Reviews |
Reference |
Forum |
Search
|
|
OV-10D+
Bronco by David W. Aungst
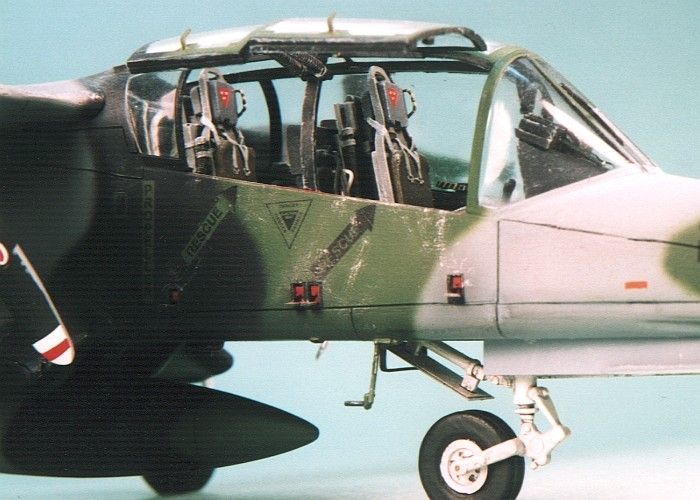
This is part 2 of my OV-10 Bronco, Then and Now project. I used the Hawk/Italeri/Testors kit, combined with the Paragon Designs conversion set for the OV-10D (stock #48091). For a discussion of the short comings of the Hawk/Italeri/Testors kit and the greatness of the Paragon Designs set, see part 1 of this project, the OV-10A Bronco. The Paragon Designs OV-10D conversion set is mostly identical to the OV-10A update set. One sprue in the set is swapped to provide OV-10D details in place of OV-10A details (like different rear instrument panels and engine exhausts). Also, one new piece is present -- the OV-10D nose. Everything else is the same including the new wing and tail and the same identical etchings set. All of this is great, except for the replacement engine exhausts.
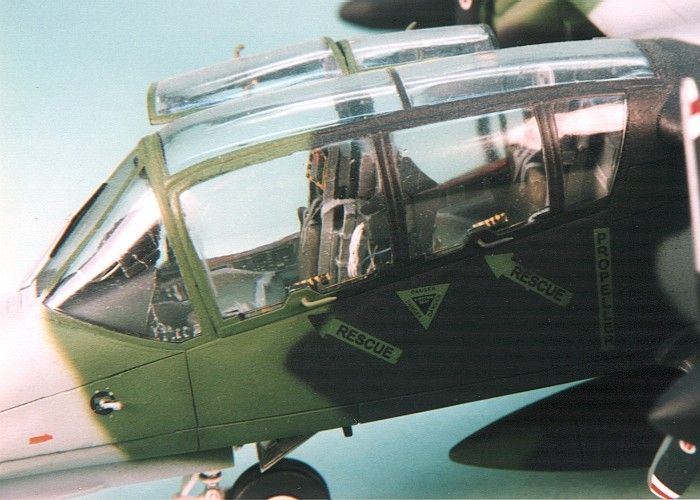
For the exhausts, the Paragon Designs pieces are just plain wrong. Paragon Designs was apparently using the Famous Aircraft of the World, #45 on the OV-10 Bronco. The scale drawing in this book draw the exhausts wrong, making them look like small jet engines attached to the sides of the tail booms. The Paragon Designs pieces are identical to the drawings in the book. I needed to scratch build new exhausts to fix this error. I had several close-up pictures of these exhausts that I had taken at air shows to help me identify Paragon Designs error and allow me to get them correct. To scratch build my own exhausts, I started with the Hawk/Italeri/Testors kit provided pieces. These are actually about the right size and shape for the OV-10A. The OV-10D exhausts are the same piping as the OV-10A with an IR suppression kit laminated onto them. I created my exhausts the same way. I started with the Hawk/Italeri/Testors kit OV-10A exhausts and added the round intake onto the front of the exhausts using some styrene tube stock. Then, I rolled and attached some .005" sheet styrene to rough out the exhaust shape. After this was dry, I applied gobs of super glue and accelerator to better define the exhaust shape. A touch with an X-acto file then smoothed and shaped the super glue to finalize the shape of the exhausts. The last thing was to hollow out the rear of the exhausts using my Dremel and add the splitters using thin sheet styrene. Besides incorporating the Paragon Designs conversion set into the kit, like on the OV-10A, I also did a lot of extra detailing of my own. In fact, everything I did to the OV-10A was also done to the OV-10D (where appropriate), including opening the cockpit entries. A few things were unique to the OV-10D, though. These were as follows.
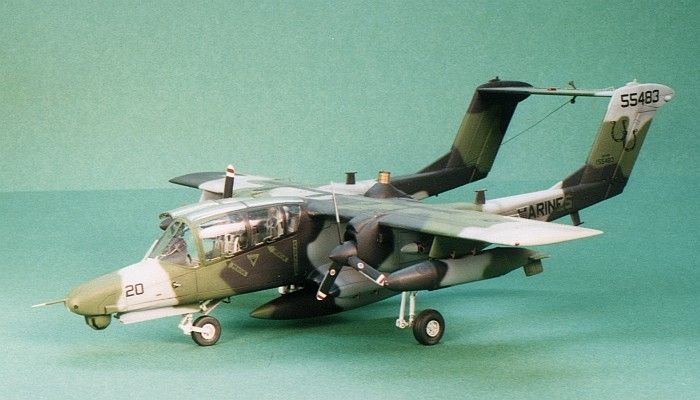
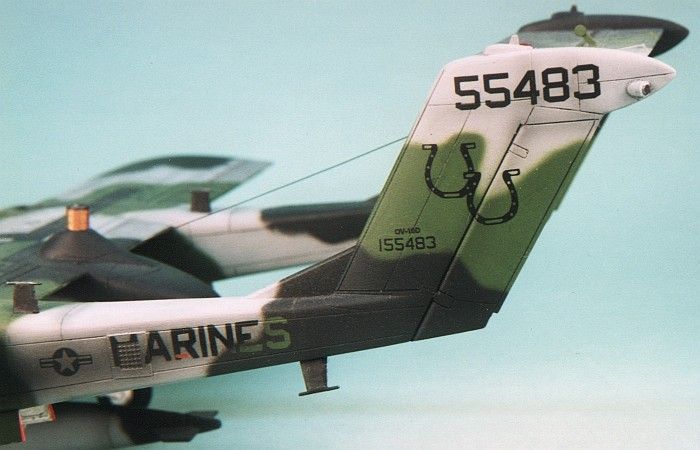
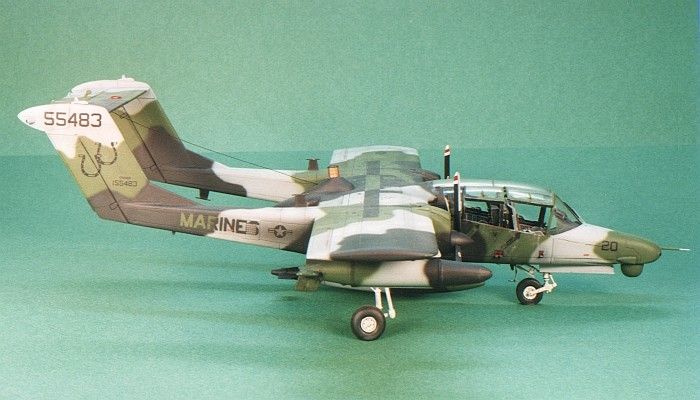
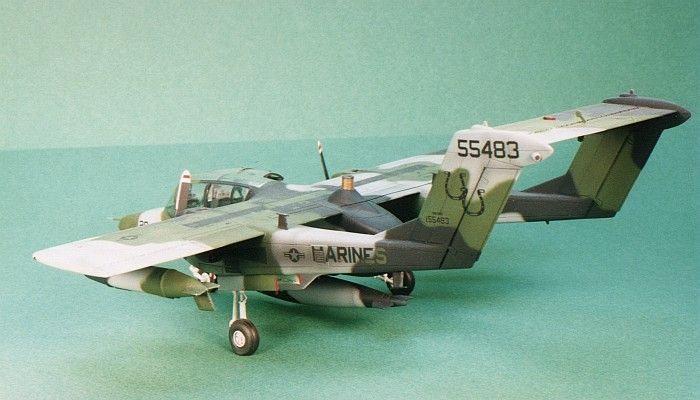
I used all Testors Model Master enamel paints on the model. It is finished in the three tone camouflage of Marine Green (F.S.34097), Dark Ghost Gray (F.S.36320), and Flat Black (F.S.37038).
The markings on the model come from various sources. It is interesting to note that there are two versions of markings on this camouflage. The first has gray markings on the black areas and black markings everywhere else. The second uses green markings on the black areas, but still uses black markings everywhere else. I have built the second of these. The majority of the decals come from the SuperScale decal sheet #48-364 with data markings taken from the Testors kit decals. A few of the data markings are custom printed decals I made on my PC and laser printer. Some of the markings were masked and painted to create the positive / negative appearance needed for things like the "MARINES" markings on the tail booms. The model represents an aircraft from VMO-2 based at MCAS Camp Pendleton in 1992. Weathering is done like on the OV-10A with thinned down enamel paint washes and air brushing to highlight the panel lines and show general wear and tear on the airframe. A final pass with silver dry-brushing rounds out the weathering.
Go to Part One - OV-10A Bronco
Click the thumbnails below to
view images full-sized.
Models, Description and Images Copyright ©
2000 by David Aungst
| ||||||||||||||||||||||