Home
| What's New |
Features |
Gallery |
Reviews |
Reference |
Forum |
Search
Home
| What's New |
Features |
Gallery |
Reviews |
Reference |
Forum |
Search
|
|
|
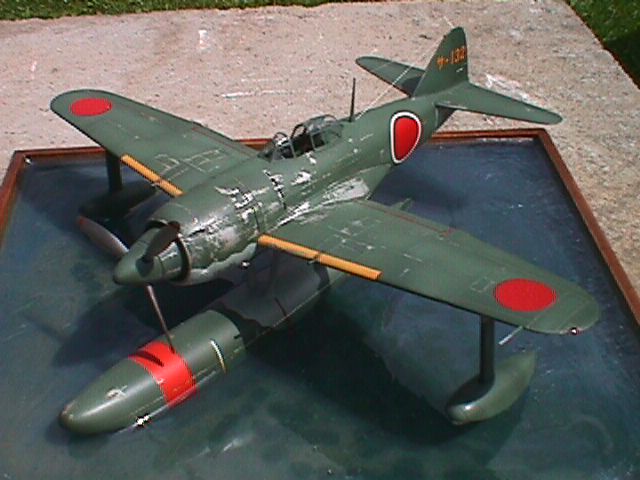
Kawanishi N1K1 Kyofu (Rex) by Roy Caunce
The Kyofu was conceived as an air superiority fighter to support Japanese amphibious landing forces when airstrips were no available. It entered service in 1943 but had already been given the official allied code of `Rex` due to captured Japanese documents giving away its planned existence and purpose.
In the end it entered service too late to perform its intended role and took on a role defending Japanese island outposts from Allied attack. It is probably unique in that it was originally designed as a floatplane fighter and then redesigned as a conventional land based fighter as the N1K1-J Shinden (George) Interceptor Fighter, then again to the N1K2-J Shinden-Kai, which according to sources was the best Japanese fighter of WW2, (no doubt this opinion differs from varying sources).
Tamiya issued this kit a few years ago. At the time it was great suprise to me as it was one aircraft I had wanted to build for some time in 1/48th scale. This is my third "Rex", built around 1997 straight from the box. I had built another straight from the box earlier, but this was butchered for spares when I converted a second into a prototype (having a slight disaster - future article in preparation).
Assembly was straightforward (typical Tamiya) and doesn't really warrant a detailed build - I`m sure you don't want to hear the repeated drooling on Tamiya quality! Supplied in the kit is metal bar which is used for ballast weight in the forward portion of the main float. This is only needed if you are going to use the beaching trolly (supplied) to display the model. To me however a floatplane needs to be in its natural environment "water". More on this later.
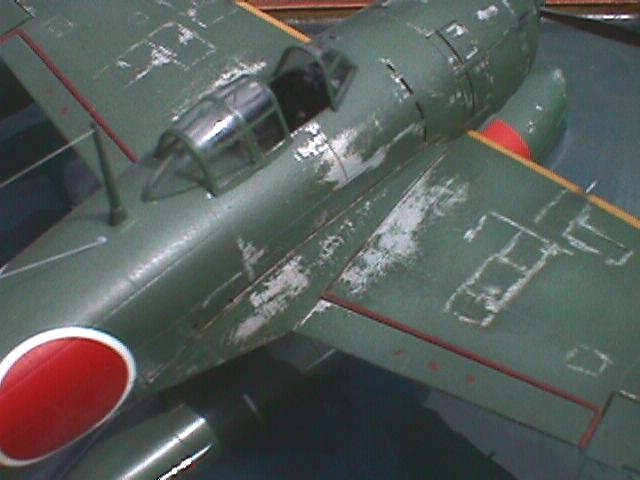
The cockpit interior colour was an olive green. I used Humbrol 105 (FS34151, based on information from my own library at the time) this was then given a burnt humber wash and finally dry-brushed to highlight the detail. Harnesses were added, made from lead foil, a single shoulder strap as was common on Japanese aircraft at the time. Prior to painting the exterior, a coat of "Alclad" aluminium was applied to the cowl, fuselage, wing root, and gun access panel areas. This solvent paint needs to be applied before any enamel paint, but once it is on you can use whatever paint you like - it is totally impervious to anything.
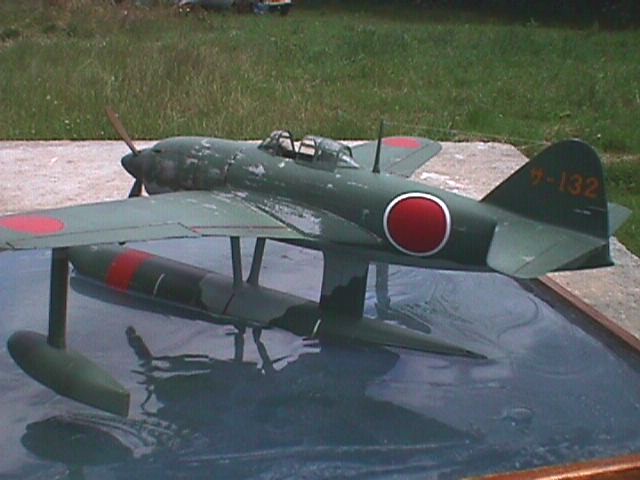
The underside was painted in Xtracolor X354 (Japanese Navy Grey). The uppersurface is Xtracolor X353 (Japanese Navy Green) as a basecoat. To add depth, this needs to be toned to replicate fading. My own method for "fading" a paint job works well with slow drying enamel paint. It may work with acrylic but I`ve never tried it.
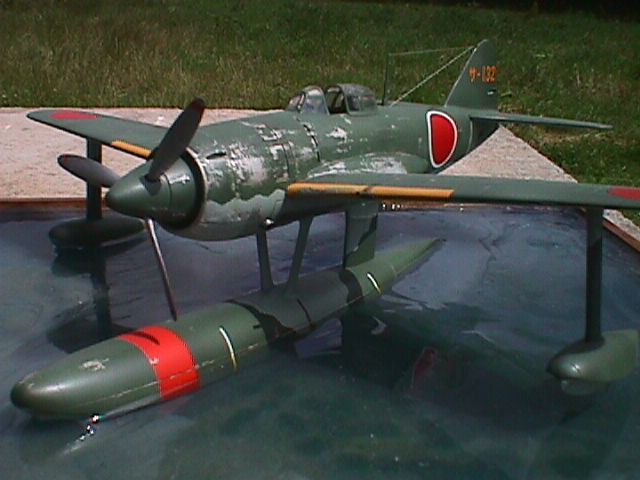
Once the main colour was dry the yellow leading edge ID strip was applied by masking and spraying a base coat of white before the yellow to aid cover, the same with the red prop warning panel on the main float, using red of course.
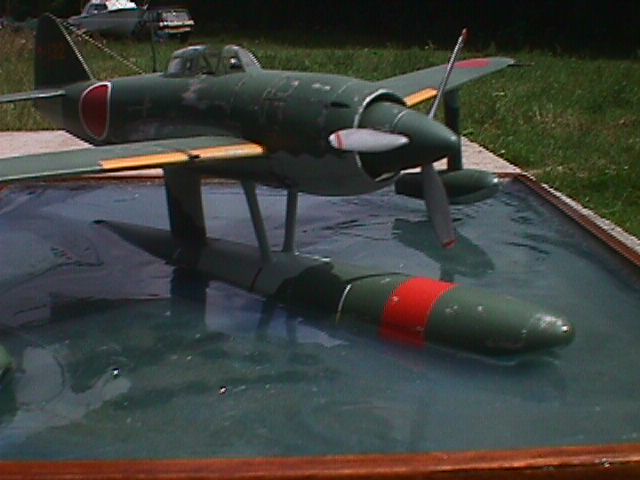
When the paint is dry the chipping can commence. This is done by sanding, scraping, scrubbing away at the green to get down to the Alclad. Small chips are applied using the edge of a knife around access panels etc. The whole effect needs a little practice try it out on an old scrap model first if you not sure.
Next the decals were applied, I used the kit decals as the main Meatballs are a little thin therefor when applied over the darker green the red is slightly dulled, adding to the weathering effect. A coat of varnish was applied, I use a Matt with a touch of Gloss added to give a slight sheen to the model, I always think this looks better than a totally matt finish.
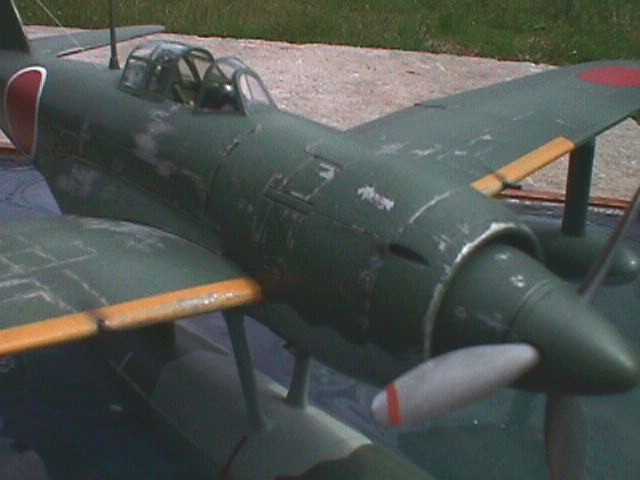
Prop blades are bare metal (Alclad) with a Red-Brown anti glare paint coat to the backside. Oh! I forgot to mention the Floats were all left off until after painting to ease masking. For final assembly, all floats are now attached, prop & spinner fitted and canopy secured in place, aerial wire is a fine lycra thread (fine elasticated thread). Exhaust stains are applied using pastels.
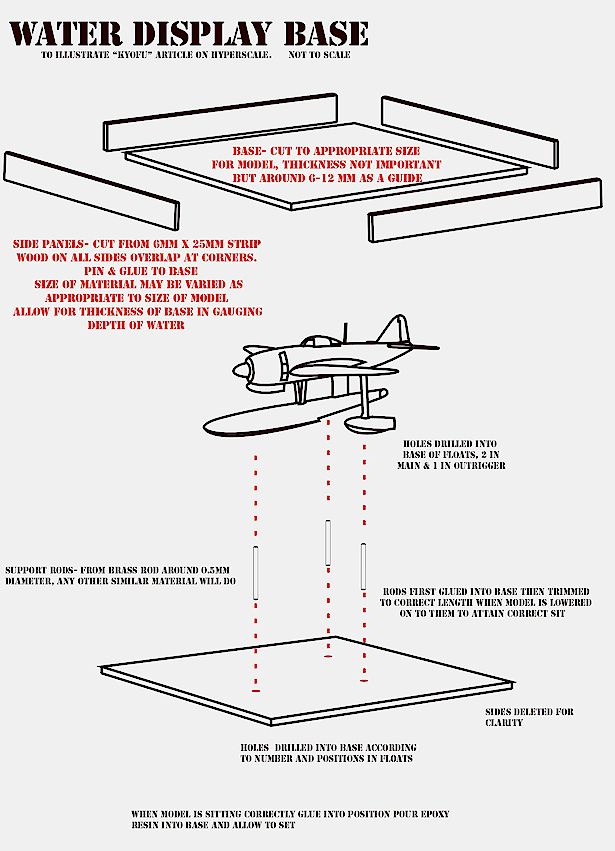
As I said earlier "land planes on land, seaplanes on sea" (lagoon, lake, whatever). First I made a wooden base using 1/4inch plywood 9 inches x 10 inches, this is framed in 1 inch deep strip wood to make up the sides. The bottom was coated with sand, glued in place with white glue to simulate a shallow lagoon bottom. The model now needs to be mounted in place. This is done by drilling three holes into the bottom of the floats - two in the main front and rear - and one in the outrigger which is lower in the water. About 1mm diameter is enough. Now the tricky bit - three holes need to be made in the base to correspond with the models floats. These don't have to be 100% accurate but the closer the better. Once drilled, glue three short lengths of rod (less than 1mm dia.) - brass, steel or plastic will do even wood. Carefully lower the model onto the rods locating into the holes in the floats until the rod rest on the inner top of the float. Use the edges of the base as a guide to work out the best position for the subject to sit in the water, and trim the rods accordingly until the best sit is achieved, look at photos to judge the best angle, when happy, epoxy the model in place.
Next the best bit - the water. I use an epoxy base laminating resin. This is a clear two part mix which pours well and is slow setting (two - four hours). Although it is not cheap, it does not attack the plastic. There is a cheaper option which is Polyester resin but this eats plastic like acid - not recommended - although if using a resin kit (floats at least) you can get away with it, but use with caution. The epoxy resin is mixed according to the manufacturers mix rate. Use your best judgement to gauge the amount. I added a little blue & green enamel to the mix to colour slightly but don't add to much. Position the base on a flat level surface in a well ventilated area. Carefully pour the resin into the base around the model. Don't put to much in at one go, let it flow around the floats and settle into position then add more until the desired level is achieved, When happy, leave until resin sets totally, overnight, beware of the fumes given off and don't smoke anywhere near it. The resin will give off some heat whilst curing but I`ve never melted a model yet!!! The finished effect should be transparent blue-green water with a sand bottom, you could add seaweed, fish etc before the resin pour to add greater realism. Anyway that's it! I hope some of this is useful to anyone reading this who is fed up with floatplanes on wobbly beaching trolleys. The diorama possibilities are endless, but remember once you pride and joy is set is resin its there forever!
Model, Text and Images Copyright © 2000 by Roy
Caunce
|