Home
| What's New |
Features |
Gallery |
Reviews |
Reference |
Forum |
Search
Home
| What's New |
Features |
Gallery |
Reviews |
Reference |
Forum |
Search
|
|
|
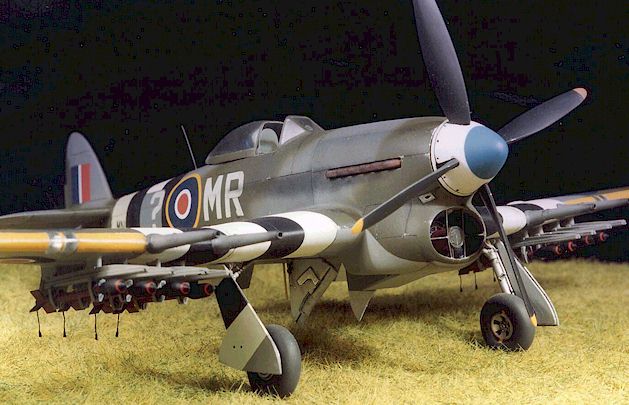
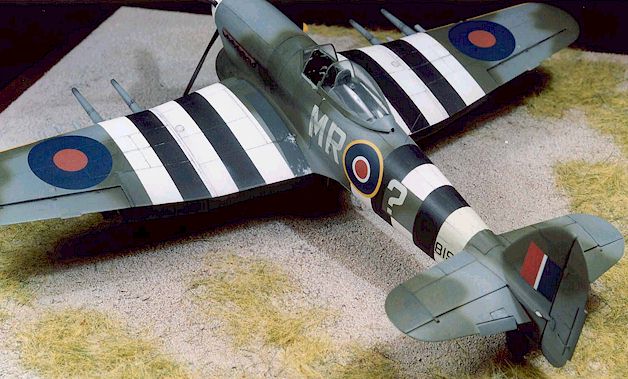
Hawker Typhoon Mk. Ib by Phil Ludolph
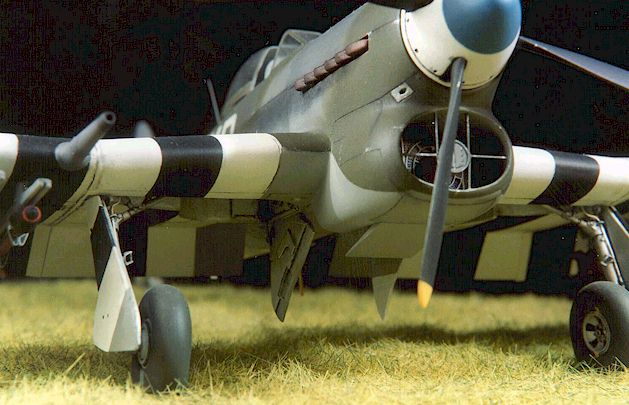
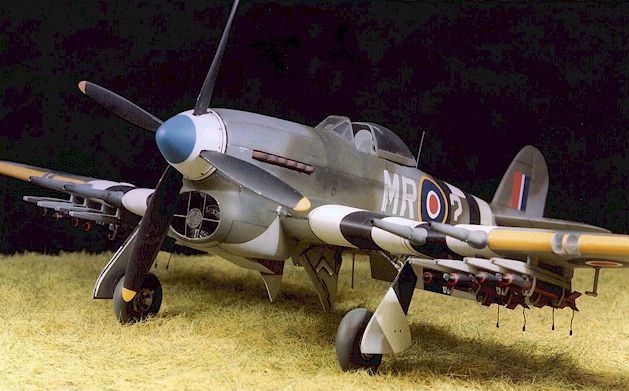
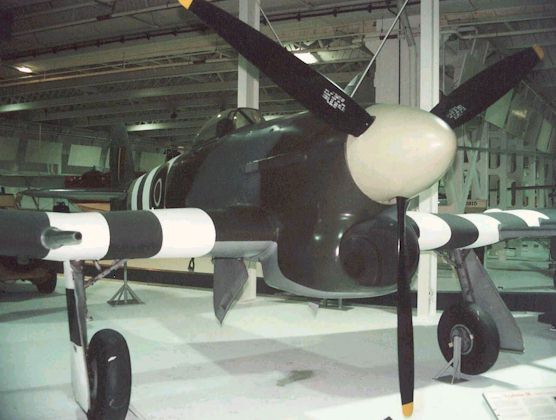
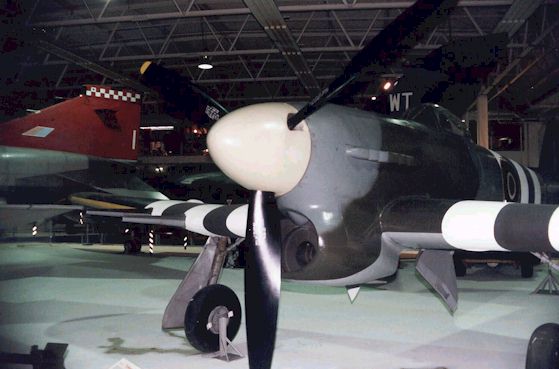
Phil's article includes six images of his models and six additional thumbnailed reference photos at the bottom of this page of the Typhoon at Hendon in the United Kingdom.
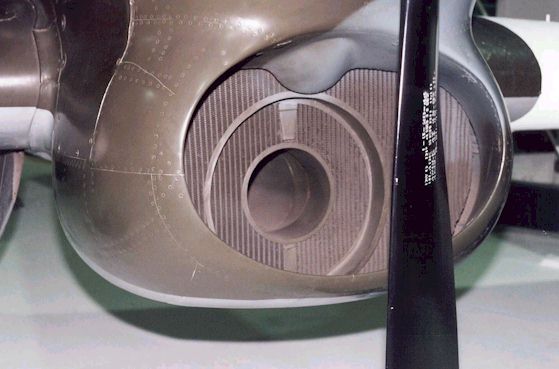
During my research phase for this project, I found that the Hawker Typhoon was originally designed as an interceptor; not as the ground pounder we all know. Hawker’s design, although innovative, regrettably did not perform well at altitude. This might have been the end of the story, but some people (Roland Beamont) thought that it might fill a need within the RAF. At the time, the RAF was having trouble with the frequent Fw190's low level hit & run raids and one of the few aircraft in the then RAF inventory able to catch the Fw190's in level flight was the new Typhoon! It's role as an interceptor was some what ratified and it was quickly put to the task. Yet, it's thick wing allowing generous space for its gun mechanisms was one of the major contributing factors in its poor high altitude performance. According to some of my research the wing was originally designed to take 40mm cannon (but I have not been able to confirm it). The future design corrections on the Typhoon airframe design led to the Tempest. The 'Tiffy, 'as its crews called it, was designed around the monster 2000hp Napier Sabre I engine. This engine, although powerful, was notorious for catching fire due to poor oil cooling and cam problems. Later Sabre II engines along with other engine mod's tried to fix the problems but it remained a high maintenance aircraft. Before flight ops a crewman was often standing by with a fire extinguisher when engine starting took place. Some Typhoons did not even get into the air. The explosive cartridge starters used to turn the engine over were originally designed for the RR Merlin (Rated at around 1800hp) and thus were not always able to always turn the monster engine over (20 to 40 cartridge starts on average). The cold weather in Europe may also have contributed to the problems as well. I guess the mechanics were also not happy with the low air hours of the Sabre engine. According to accounts, it was only 20 flight hours before the engine needed a major overhaul. When researching my model I found many photos of the aircraft with engine panels off (Mr. Verlinden). In hindsight, although fast (400mph) I guess this engine had a lot of initial problems.
Another disconcerting problem for the pilot was its tail falling off during flights. The airframes exposed to G's for some reason the tail would suffer major structural damage. The RAF fitted metal fish plates around the weak points which seemed to solve the problem. I guess when the Tempest came along many maintenance people were glad to see the end of the poor old Typhoon. This might explain why of the 3.300 examples there is only one incomplete example around at RAF Hendon museum. One of the other research anomalies I found was the use of 3 blade or 4 blade propellers. The story goes, due to the severe engine vibration problems, a quick fix was a 4 -blade prop. This action seemed to solve those nagging engine vibration problems. But, along with any quick fix longitudinal and directional stability complications were encountered. Thus, a Tempest tail plane was fitted which only solved the longitudinal problems while the directional problems never were solved. Regrettably, during operational service the engine vibration problems again returned and the 3 blade prop was then fitted; and it goes on! So, The only way to successfully portray your Typhoon is to have a photograph of it with the appropriate prop and tail combination. BUT! The Typhoon as a stable platform came into it's own as a ground attack aircraft. With its low altitude performance, 4x 20mm cannon and 8x rockets under the wing any average pilot could hit a target; many a German Panzer commanders was forced to take cover! According to some people, a full rocket salvo from a rocket firing Tiffy had a punch like a WWII RN Destroyer firing a broadside. One of the best sources of info for the Typhoon that I had found was the old November 1975 - SCALE MODELS magazine, with the magnificent Bentley plans on the Typhoon.
At the time, the only respectable kit on the market was the old Monogram 1/48 scale kit. Then, good old KMC came to the rescue with their resin detail set. Aeromaster decals followed up with sheet 48-282 "Storms in the Sky- part 2" which set the tone for my effort. With this help, and along with a little time and scratch building one can turn this old but accurate (in outline) kit into one that can stand up to the level of any Tamiya or Hasegawa Kit. Alternatively, Mr. Hasegawa now offers a 1/48 Scale Hawker Typhoon, early car door and bubble top versions, which were not available at the time of my project. In fact my Typhoon won the KMC award and an honorable mention at the '98' US IPMS Nat's, so I'm happy.
Fuselage At the start of the project I rescribed the whole kit. This was completed with the Squadron scribing tool and labelling tape. Then the kit exhausts were removed and KMC items installed. Next after removal of the old side wall detail was completed so as to fit the KMC cockpit to the Monogram fuselage halves, which went well. Some people were saying that the seat was wrong, but I did not have a choice at the time, so! Once painted with interior gray green and dry brushed I then had to work on the area immediately behind the seat head rest so as to build it up to meet the contours of the rear fuselage. This action also helped with the proper mounting of the Vac Canopy. Don't forget to add the camera gun to the nose of the aircraft. Always check if the aircraft you are modelling had one as not all did!
Propeller The Typhoon had this massive air thrashing propeller out front and it's going to be the first thing most people are attracted to when viewing the model; so it had to be right! The KMC propeller blades are far too wide. Tamiya tape template was fashioned from the Bentley plans and stuck to the resin blades trimmed appropriately. They were mounted to the resin spinner with brass wire pegs. The propeller type for the subject aircraft was either a 3-blade or 4-blade version depending on which colour plate or drawing you look at. However, clarifying the issue, the serial number according to the '75' SM article indicates that this particular aircraft was at least delivered with the bubble canopy, 4-blade prop, anti-shimmy tail wheel and Tempest tail. So that's what it was going to be.
Wings I wanted to build a Tiffy with the flaps down. The limited kit flap detail was removed with a razor saw. I like to get the hard parts done first and at this time the plastic card flaps were built from10thou card. KMC did provide them, but I thought my scratch built ones were a little better. This action also helped in reducing the thick trailing edge found on this kit.
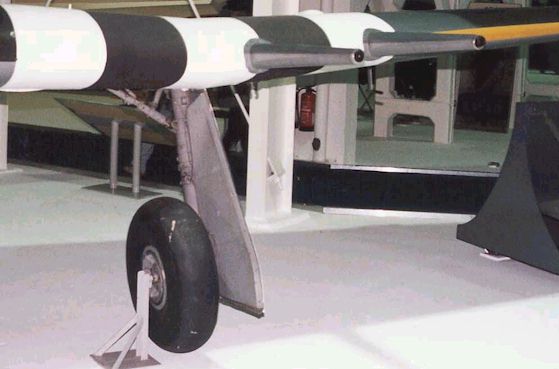
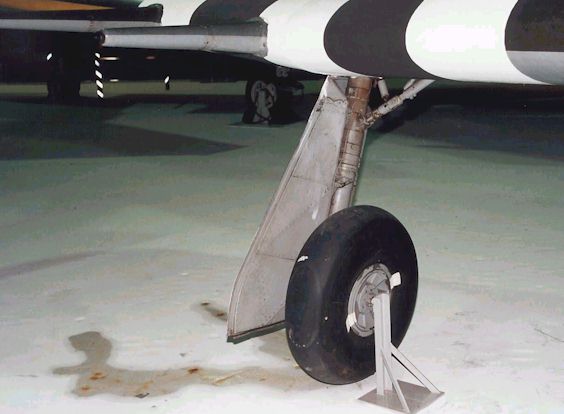
Next, the wheel wells need improvement, so the roof of the wheel well was removed with a grinding tool and a sheet roof of plastic installed. Then, detail was added to the well form one of the few pictures of a Tiffy Wheel well that I had found. Reference Photos were found in Famous Airplanes of the world book and the Typhoon/Tempest at war series. I later was able to get a copy of the excellent Warpaint Series book on the Hawker Typhoon by Chris Thomas which also has a wheel well shot. This area was painted the usual silver/aluminium primer paint. Then the resin cannons from KMC had to be fitted. Care had to be taken when removing the kit cannons as some of the mounting ring detail on the wing is needed for the KMC cannons. Mounting, tubes were fitted to the rear of each resin cannon so when fitted to the main wing they went in straight.
Tail and Rudder Now to the rudder, Tempest horizontal stabilizer and elevators were scratch built from laminated plastic card. The excellent Bentley plans were my main reference for that task. I believe KMC offered at one time the Tempest tail for the Typhoon but it may be hard to find now since their recent demise.
Rockets and Rails The kit rockets show their age; they had to go! The only thing to do was cast the things out of resin. This is not a difficult as it sounds! I've found the DOW III pink rubber to flow well around the master. One trick is if a throw away paint brush or tooth pick is used to poke the air bubbles all the detail of the master will come out. The tricky part is the resin pour. You can use any of the 2 part resin products but I've found Alumlite (Spelling?) to be the best. Be careful and use adequate protective clothing, face respirator and gloves. And most important pour in a well ventilated room. You must be prepared to have a number of unsuccessful pours as this method is not perfect. Sometimes a tooth pick again, to poke around the mould chasing air bubbles also helps the resin flow. But these shapes are simple and one should be successful most of the time. Only the 60lbs rocket heads and the Mk. I rocket rails were resin, the rocket body and tail was plastic rod and card fins. Later, fine copper wire, along with plastic discs were used to represent the rocket starter cables. Now, I believe a number aftermarket companies have resin rockets or the Hasegawa bubble top kit has these rockets within.
Undercarriage The simple kit undercarriage was modified and rebuilt to the dimensions and detail of the Bentley plans. Also, KMC provided the wheels but again I found the True Details to be of better detail so I had them and they were used. All, undercarriage doors were built from plastic card with the main ones laminated to the kit's doors. The tail wheel was scratch built from plastic to represent the anti-shimmy type of the latter design Typhoons.
The Typhoon that I wanted to model was the personal mount for Squadron leader Jack Collins, of 245 Squadron based at Holmsely So., 1944 (See SAM 20, 12). These markings are available in the Aeromaster range sheet 48-282. Again, the 3-blade or 4-blade prop issue came up again but it's serial number MH819, according to the '75' SM article, indicates a Tempest tail and 4-blade prop, so that's what it will be. The paints that I selected for used were Polyscale as this stuff when fully dry can be sanded and is a water clean up. This however was my first effort at the use of this type of paint, so I made some errors. When I built this kit I had no compressor but I was lucky enough to have a good friend Mike Johnson, who lent me his. Thanks Mike! But one needed to get accustomed to the operation of ones painting system regrettably I did not have the time. Thus, the camouflage demarcation between the ocean grey & dark green was a little soft. Not normally this is not an important point but it was going to the Nat's. I guess the RAF used rubber mats to help mark out the camouflage pattern so there is a hard edge between the colours. Alternatively, in the field I guess one may have had no time for niceties, may be it was just sprayed on using the skill of the operator. After all, D-Day stripes on some aircraft were painted on using a floor broom. The debate goes on, but I get off the track a bit! Bottom line, your Brit. Camouflage needs to have a very fine/sharp demarcation line between the top colours.
After the paint has dried it was hit with a coat of Future and then allowed to dry 48 hours. Then artist black oil paint was used to pick out the panel lines. Oil pastels were then used to highlight some panels so as to represent an operational aircraft. A word of warning always use photo reference when doing weathering on an aircraft as it is easy to get carried away. Metal chips were applied with silver enamel paint. Then again Future was sprayed onto the model. Then when dry Polyscale flat finish was applied, according to the manufacture, this finish will not go yellow with age. Yet sadly many clear finishing products do however. Pastel chalk was then applied to simulate the exhaust stains on the side of the aircraft.
This heavy British fighter has always been a favourite with me. It's tank busting tasks during WWII are impressive. The project tested every one of my modelling skills. The time taken by me was long and tedious and was the first kit finished in 6 years. With the latest Hasegawa offerings out there I would not recommend a repeat of this project, unless one is willing to give it a go for the challenge. There is limited scratch building out there now days. But, I hope as a result I now have a Typhoon to add to my limited 1/48 British Collection.
- Scale Models - November 1975 – - Warpaint series No.5 Hawker Typhoon - By Chris Thomas. – - Scale Models International - August 1997 – - Scale Aviation Modeller International - Volume 3 issue 8. - Scale Aircraft Modeling - Volume 20 Number 12. - Famous Aircraft of the World- No. 63 Hawker Typhoon / Tempest. - Mosquito, Typhoon & Tempest - By Chaz Bowyer, Authur Reed and Roland Beamont. - Squadron in Action - Typhoon & Tempest - RAF Camouflage & Markings 1936 to 1945 - by DoubleDay Publishing. - Fighting colours RAF fighter camouflage and markings 1937-1975 - By Michael J F Bowyer. - Aeroplane Monthly -May 1994 - 'From Kenley to Schleswig' by Fred Hislop. - Aeroplane Monthly - "Victory in the air" 50th anniversary souvenir D-Day "The Secret Years" Flight testing at Boscombe Down 1939-1945 - By Tim Mason.
Click on the thumbnails below to
view the images full size.
Models, Description and Images Copyright © 1999 by
Phil Ludolph
|