Home
| What's New |
Features |
Gallery |
Reviews |
Reference |
Forum |
Search
Home
| What's New |
Features |
Gallery |
Reviews |
Reference |
Forum |
Search
|
|
|
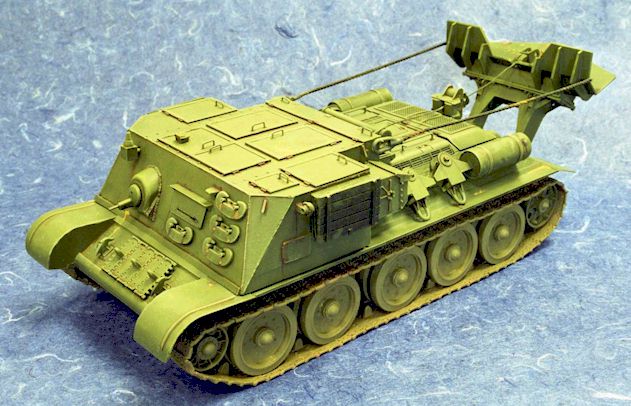
VT-34 Czech ARV by Valentin E. Bueno
Once again, I have a T-34 based Armored Recovery Vehicle. This time it is a Czech conversion of the venerable Russian vehicle. What bothers me is the amount of WW II German style tools that are in evidence all over the hull, the spade at the hull rear, the "C" hooks on the front hull, and the winch. If I had an opportunity to take a look inside, I'll bet I'll find the same winch used on the Berge Panther. Of course all this is speculation, as I haven't had the opportunity to do so. But it does make for an interesting vehicle.
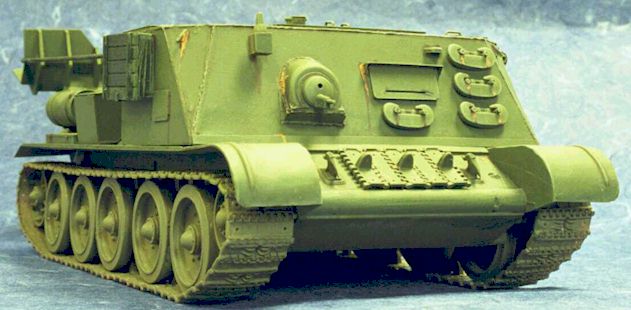
This model was based on Tamiya's old T-34/76 kit. Notice the round front fenders, earmarks of the early hull style. The Aries Conversion, MB Models white metal early dished style wheels and Modelkasten Model 1942 tracks round the cast of characters.
As always, I start from the ground up. What good is building something if it doesn't have a good foundation to stand on? First, make sure all of the inaccessible areas are given a coat of flat earth. This includes the lower hull behind the wheels, between the wheels, and the fender undersides. Holes of the proper size were drilled into the white metal MB Models wheels. These were then glued to the swing arms with a generous amount of CA type glue. The Model 1942 Modelkasten tracks are a joy to work with. Snap, click, click click. They really help the model look like a tank. At least these don't curve around the drive sprocket like the old vinyl tracks did. At this point the model seems to be reaching a scale weight. I didn't pick up the model that much after this in fear of dropping it.
The Aries winch house (as I came to calling it) was a one-piece casting in resin. All the hatches were molded shut. Accurate armour just released their version of this vehicle (October 1999). Theirs has a full interior and open hatches. Anyway, back to the Aries conversion. The inside edges of the house were ground down to allow the casting to sit properly onto the T-34 hull. Portions of the hull were also ground out to this end. This was glued (again with CA) to the hull once I was happy with the fit. All the hatch handles were made from wire solder formed over a plastic form and sliced. One side was cut longer than the other was. The long end would go into a hole drilled into the hatch. The short, uniformly cut side was used to keep all the handles uniform in height over the hatch.
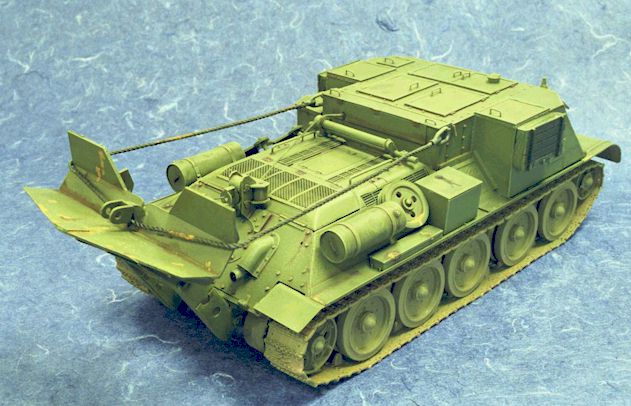
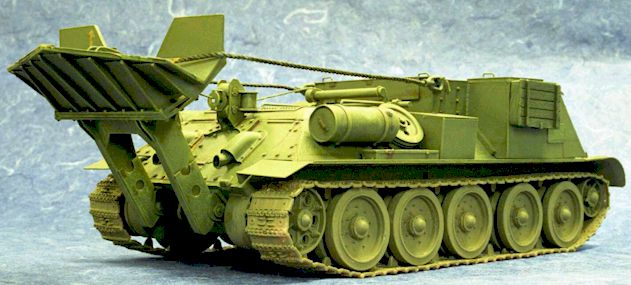
The "C" hooks were glued directly to the front glacis plate. Plastic rods were heated until the ends started to mushroom a little. These were then cut to a uniform length and inserted in to the "C" hooks to appear like retainers. Neat Huh? The wooden boxes on the upper sides came from a Tamiya T-34/85 kit. The box like thingamajig on the left side behind the winch house was built straight from the box and added. This "box" has quite a bit of photoetched parts to it and was a trifle difficult to build. The photoetched parts are quite thick and hard to bend, even after annealing it with a lighter flame. The photoetched storage box on the right side and the snatch and tackles on the left were easier to build. The cable guides on the back of the winch house were built next without any problems. The cable guide on the rear of the engine deck wasn't as easy. It took a little carving and bending to get it to fit and look all right. The main problem was the photoetched parts not fitting the resin parts. The exterior fuel tanks are from the kit with all the seams sanded and welded up. The rear engine deck screen was drilled out and replaced with photoetch from the Aries conversion. Louvers were added under the opening to hide the fact that there ain't a damn thing in there. The side vents also had photoetch added.
The rest of the hull was assembled according to the instructions. Not much else was added or problematic. The spade was next. This is a two piece casting, the spade itself and the two support arms. The tip of the spade was broken on my kit, but I didn't bother fixing it as I figured the real thing probably broke off a few times as well. The mounting bracket on one side was positioned and glued. After this side had set up hard, I hinged the remaining bracket to the support arm and the support arm to the attached bracket. This method locates the second bracket accurately without having to measure it (I'm a lazy bugger). I had planned to attach the brackets and then remove the spade, but my hinge pin didn't want to come out after it was in, so I glued the bracket in the up position. A nylon string was threaded through a hole in the rear of the winch house, over the roller guides, through the roller guides and glued to the appropriate spot on the spade. They use the winch to raise and lower the spade.
This vehicle was built at the same time as the T-34T. The vehicle was brush painted with Russian Green. Next was a wash of burnt umber oil paint on the running gear, and black oil paint on the upper hull and superstructure, then drybrush with white/green oil paint. Pastels were added to the running gear and lower hull for dust effects.
I added a bit of rust here and there and made chipped paint with silver Prismacolor pencil. I added a few extra links to the front of the vehicle. I feel like I should have added more tools and whatnot, but the photos I have seen don't show any. Besides, there isn't much space to put extra equipment.
This model took about three months to complete. I was working on the T-34T East German Recovery vehicle at the same time, which slowed me down a bit. Overall a pleasant conversion from Aries. I hope they continue to put out these simple yet different conversions.
Model, Images and Article Copyright
© 2000 by Valentin E. Bueno Back to HyperScale Main Page Back to Features Page |