Home
| What's New |
Features |
Gallery |
Reviews |
Reference |
Forum |
Search
Home
| What's New |
Features |
Gallery |
Reviews |
Reference |
Forum |
Search
|
|
|
Fiat CR.42 by William Marshall
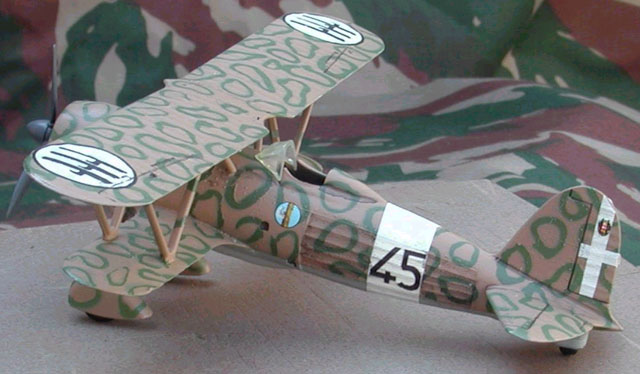
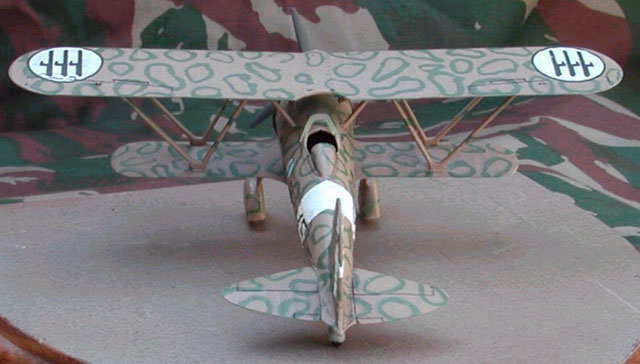
While stripping the paint with oven cleaner I started looking for a suitable colour scheme. The scheme that caught my eye was the one in the Squadron Signal book; Regia Aerobautica, Vol. 1 by Christopher Shores, page 63. This aircraft is from 15° Stormo and has the attractive sand and green sausage ring colour scheme with a white fuselage band and black code letters. Although the picture shows an aircraft without the wheel spats, I left mine on.
After all the paint was removed I started with assembly. Some of the struts were broken and missing and I had to make new ones from plastic strip. The strut attachment points were crude and had to be sanded smooth where they protruded on the top of the wings. This caused the attractive fabric finish to disappear. What now? I then painted a liberal amount of MEK on the affected area and waited a couple of second for the plastic to soften. I then used a stiff paintbrush to stipple the area thus restoring the fabric effect on the affected area. This worked so well that I was unable to see where I had lost the fabric affect due to the sanding. I was quite chuffed with the results. Various small details were added. The prop was also repaired as it had broken during the models life at the SAAF Museum. Once all the details had been completed and attached including the wings and struts it was time for painting.
The model was first undercoated with Humbrol 129 light grey. I then inspected it and corrected any blemishes that still showed. The model was then painted with Modelmasters Italian Olive Green. Once this was dry, after a couple of days, I then made rings from rolled Press Stick (Blue Tac - soft material used to stick posters to a wall). These rings were then stuck to the model in a random manner. Once the top surfaces were covered in rings of Blue Tac, the whole aircraft was painted in Modelmasters Italian Sand. It was then again left for a couple of days to dry and the Blue Tac was removed leaving quite nice looking green camouflage rings on the Sand painted surfaces. The undersurface was painted Modelmasters Italian Blue Grey. The prop and spinner was airbrushed with a dark black green colour, for this I used Humbrol 75. The white fuselage band was airbrushed after it had been masked.
Once the basic painting was completed I gave the model a coat of Future and left it to dry. The decals came from the sparesbox, except for the black 45 serial numbers. I printed on my computer printer by using a piece of clear decal sheet which I had coated with Matt varnish to help with the adhesion of the printer ink. The computer ink was sealed with some light coats of Future. I printed a couple of black "45" letters. I then selected the two best serial numbers and cut them out for use. This seemed to work quite well as can be seen from the results. Once the decals had been positioned and dried, I then washed the model using diluted black poster paint. When the wash was dry I wiped of all the excess wash and sealed the decals and wash with Future. Lastly the windscreen was attached using Future. The wheels were drybrushed to simulate usage. This seems to be an aspect that a lot of modellers forget to do and can ruin an otherwise great model. Please remember to drybrush your wheels as it is the first thing that I look for when judging a model aircraft.
I was quite happy with the effect of the finished model, if one takes into account that it is an old reconditioned model. I am reluctant to give it back to the Museum as I think it would fit in with my collection very nicely! Now for the Macchi C.200, 202 and 205. Model, Text and Images Copyright © 2000 by William
Marshall
|