Home
| What's New |
Features |
Gallery |
Reviews |
Reference |
Forum |
Search
Home
| What's New |
Features |
Gallery |
Reviews |
Reference |
Forum |
Search
|
|
|
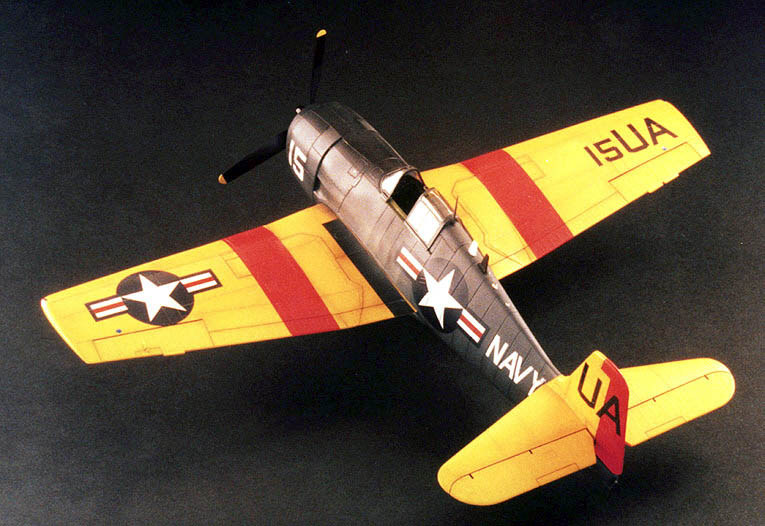
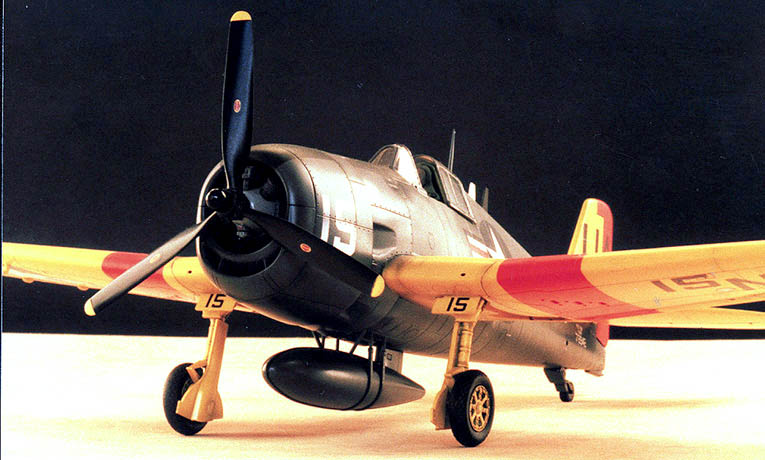
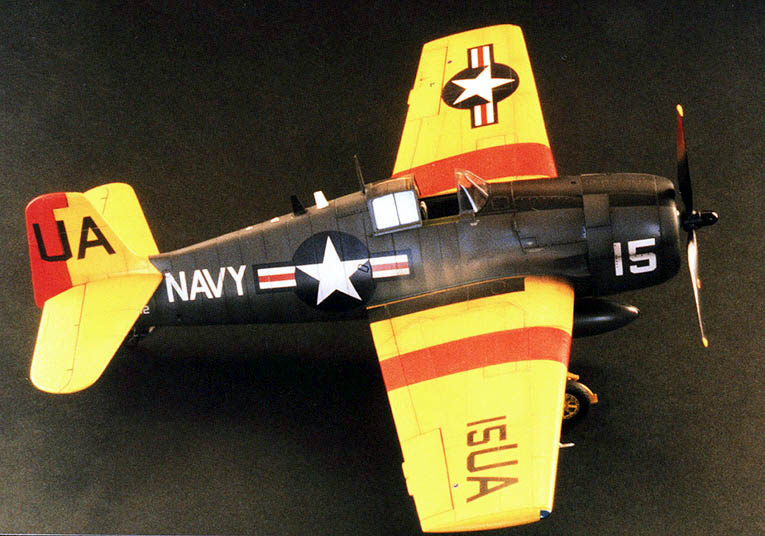
F6F-5K Drone Hellcat by Darren Mottram
This kit was built at the same time as the Academy
P-47N in an earlier article. If there is one colour scheme that I am going to build as a series (other than the "Weather Research" scheme), it's the US Navy’s post war Utility/Drone finish. So when Hasegawa released their Hellcat in these colours I had no choice. I had to do it. The other scheme offered in the Hasegawa kit is an overall orange drone with
white markings. Although the kit itself is very nice and goes together well, there is one major inaccuracy in this rendition that (as usual!) I didn't find out until after I had finished the model. Although I knew that Drone Hellcats had modified wingtips to take tip-tanks, I had also read that some did not have this modification. My assumption was that Hasegawa had found and depicted one of these un-modified airframes. After I had finished this kit I finally got my hands on the Squadron Signal "In Action" title which had a photo of what appears to be this aircraft and guess what. Yep, it has the modified wing tips. DOH!
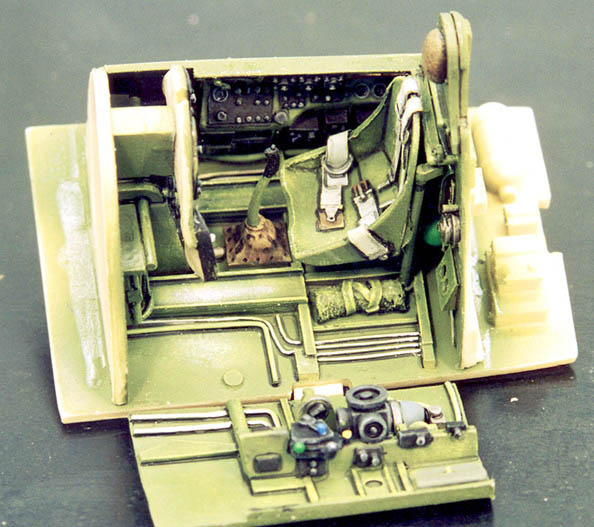
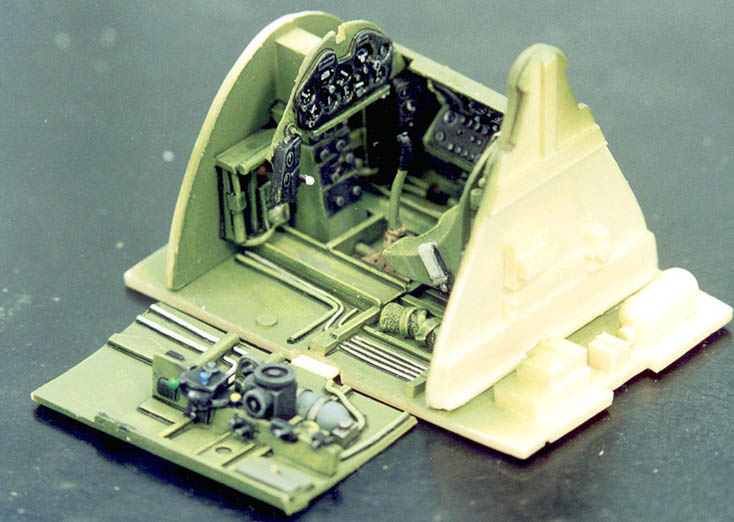
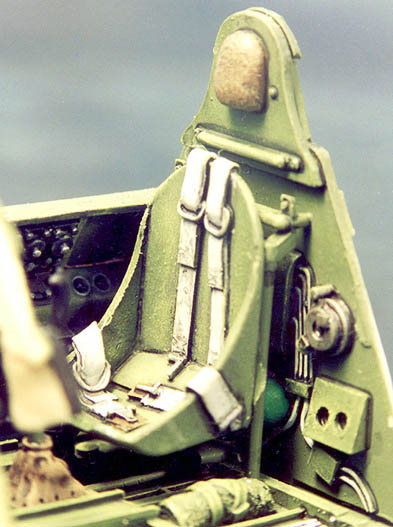
Apart from that, the only real modification was to include a Jaguar cockpit. As you would expect, the detail of this set is beautiful and it fits into the kit very well. The cockpit was given a coat of gloss interior green and as many of the details as possible were also painted in gloss colours (seatbelts etc). An acrylic wash was then applied, followed by matt varnish and dry-brushing with zinc-chromate yellow and various shades of grey as appropriate. Finally, drops of Tamiya gloss varnish were applied to the instruments to simulate glass.
The photos show the amazing amount of detail in the Jaguar cockpit. Unfortunately, most of the detail is not visible when the fuselage is together - I took these photos to remember what it looks like inside!
The kit goes together well with no serious problems. Hasegawa gets around the
problem of common mouldings for different versions by instructing the modeller
to fill and re-engrave a few panel lines and remove the tail antenna as
appropriate. They also give directions to fill the gun ports and construct the
prominent antennas on the fuselage spine from plasticard (not included in the
kit). Once construction was basically complete, the kit was masked up and prepared
for painting. After the cockpit area was given a coat of matt black as an
interior colour, the whole model was given a solid covering of Humbrol matt
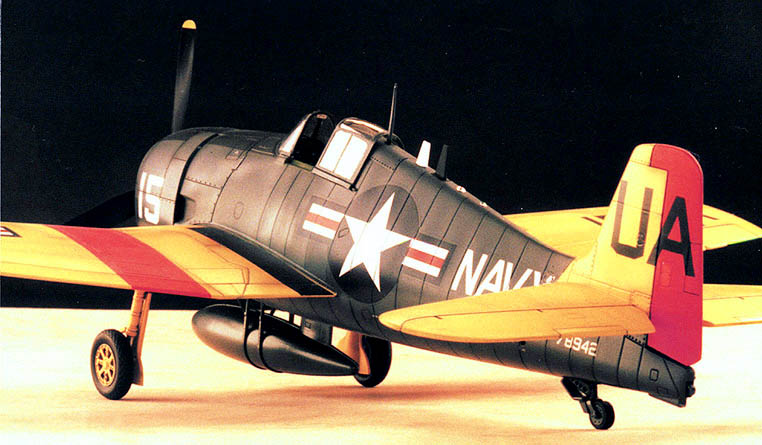
white as an undercoat. The wings, fin and tail plane were painted gloss yellow
(this is where I discovered that yellow needs a *really* good, solid, white
undercoat! Guess who's wasn't?!). Once that was sorted out, the wing stripes and
rudder were masked and painted using Testors "Italian Red" which has a
nice Day-Glo-orange-red look too it and, lastly, the fuselage was painted
Xtacolour engine grey. Kit decals were used throughout and went down well using Aeromasters decal
solvents (plus I usually cut most of my decals along panel lines as a matter of
habit anyway). Washes were applied over the aircraft and wheel wells in various shades of
grey, dark yellows and black using acrylics thinned with water.
"Grime" was then applied to varying degrees (heaviest around the
engine) using Tamiya smoke. A slightly satin matt varnish was used to seal the
decals in and further weathering was achieved by applying a *very matt* matt
varnish (Xtracolour) in patches around the airframe which crates paler areas
within the finish. Lastly, exhaust staining was applied using Humbrol greys and
browns.
The only real inconvenience about the kit is that, due to moulding
limitations, the canopy is too thick to position open. Therefore I used a
Ventura vac-form (sliding portion) so that I could open the canopy. All the
final details such as the undercarriage, prop antennas etc were then added to
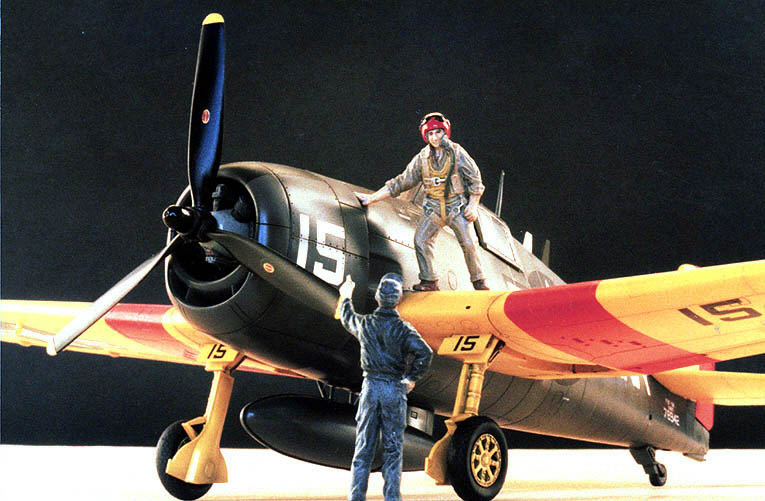
complete the kit. The figures in this photo are a Monogram ground crewman and the pilot figure
from the new Tamiya Corsair, with a helmet made from hollowing out the head of a
pilot from the Monogram Hind kit and an oxygen mask from the Academy Sabre. This is a scheme that really stands out amongst the more bland, standard paint jobs. It can be applied to quite a few different aircraft to make a very eye-catching collection (Sunglasses may be necessary for extended viewing :-) ). I found the Hasegawa Hellcat to
be a simple and rewarding kit to kick off my Drone collection!
Click on the thumbnail to view the
image full-size.
Article, Model and Images Copyright © 1999 by Darren
Mottram
|