Home
| What's New |
Features |
Gallery |
Reviews |
Reference |
Forum |
Search
Home
| What's New |
Features |
Gallery |
Reviews |
Reference |
Forum |
Search
|
|
|
Yakovlev Yak-1 by Rick Marshall
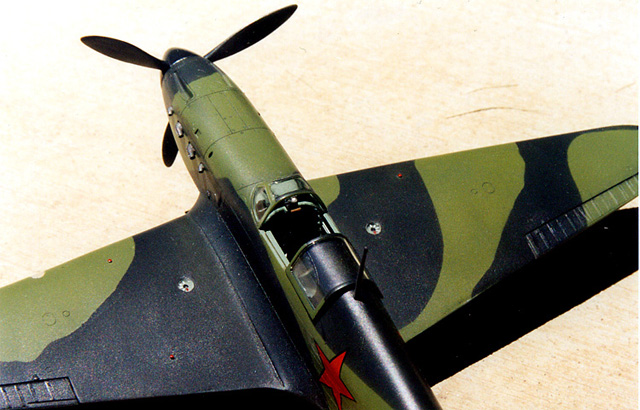
This is another of Accurate Miniatures excellent injection molded kits. Plastic parts are cleanly cast and there is no flash. The kit's fuselage and wings feature recessed panel lines and cowling details. The only problems with the kit parts were the clear parts. There was a faint seam line that ran up the center of the front and sliding portion of the canopy. Sanding and polishing the parts removed this blemish. Once the polishing was completed the parts were dipped in Future. This resulted in a nice clear distortion free canopy, at least for now, but more to come on the canopy later. The kits' decals looked good in the box and were in register. As I am not an expert on VVS subjects I cannot comment as to the colour of the stars, but they looked right to me.
If you have not previously built an Accurate Miniatures kit please take note - follow the instructions carefully, resist the temptation to look at the assembly diagram, grab the parts and glue. If you do, odds are you are going to run into trouble. Heeding my own advice when building the model, I followed the instructions to the letter. I should mention that the instructions are excellent and contain some photos from the Great Patriotic War. They also contain some colour references, which will help the builder. As with most aircraft, construction starts in the cockpit. The pieces are nicely detailed and the fit was excellent. Included in each assembly step are the painting instructions and from what I could tell AM did a considerable amount of research in developing the parts colour scheme. To create the interior grey-green I used Model Master British interior green and darkened it slightly, this gave me a fairly close match to the recommended FS24226. To add some colour to the cockpit I used a colour photo of a YAK-3 cockpit that was in winter 2000 issue of Flight Journal. As I stated earlier I am no expert on the Russian aircraft but when the cockpit was completed it looked quite busy and I figured that the throttle and some other cockpit levers would be similar in colour to the colour photo mentioned earlier. The only addition made to the cockpit was a Sutton Harness from Reheat. For the AM's clear instrument panel I used the reverse decal on the back of the panel and it looked good. After the cockpit was completed the fuselage was next. I like the way AM broke down the parts for fuselage: the lower portion was the conventional two sides split down the center; then the fuselage top was placed over the two halves. The top joined the rest of the fuselage in a natural break down the spine and at the cowling at the front. However, this may have resulted in the rear fuselage decking behind the cockpit, being too low. Regardless, the parts went together almost perfectly and only some minor sanding was needed to eliminate any seams. I did, however, make another alteration to the kit at this stage. My references indicated that the fuselage mounted 7.62mm guns are just visible. The kit didn't have these guns so I used some stainless tubing and had them protrude into the blast tubes about 2mm. Once the fuselage parts were together the instructions had you slip the cockpit up into the fuselage from the bottom and not use any glue! Remember to read the instructions. Step 4 is the Wing Assembly. This is where someone not reading the instructions in going to run into trouble. The first step in the wing assembly is to put the spar part D20 onto the bottom of the wings. This is an important piece as it sets the wing dihedral. Take your time and you should have no trouble. The part does fit but I needed to bend the wings upward to get the spar to fit the lower wing. Another reason to be careful with this step is that the spar not only forms the rear of the wheel wells, it is also what holds the cockpit in the correct position. I followed the instructions to the letter and everything clicked together. Oh, I almost forgot another assembly point that almost caught me. Once the spar has dried you position the lower wings into the fuselage BEFORE attaching the upper wings, not doing so would make installing the wings difficult. The wing joint to the fuselage is the only place I needed some filler. The tops fit very well, however the lower wing didn't match up at the rear or around the radiator. Also the air intake part C49 did not fit well. I spent a considerable amount of time eliminating the seams around the front of the wings and air intake. Once satisfied, I rescribed the panel lines I lost and replaced dutz fastener detail. To do this I sharpened some stainless steel tubing and used my pin vise to press the sharpened tubing into the plastic, this worked very well and all detail was restored. For the long, very fragile looking pitot tube I substituted more stainless steel tubing. To simplify the aircraft Yakovlev used the fuel filler cap on the wing to locate the fuel gauges. I was reading on HyperScale and learned that a Mr. Gregg Cooper had some colour photos of a Yak 1 showing the fuel gauges and flap and landing gear indicator pins. These would be very useful to anyone super detailing the kit.
The rest of the assembly went well. However when assembling the landing gear I would recommend one departure from the instructions. Step 5 has the builder adding the landing gear legs to the wings and Step 6 has you adding the landing gear doors. Here is what happened to me. The gear is well detailed and is supplied in several parts. The main gear leg has a 90 degree elbow in it that fits into the rear of the gear well, the spar in this case, the fit was good and an actuation arm ensures the correct angle of the gear leg when looking at the gear from the front. I was careful to get both gear legs in line when viewed from the sides. This is where I ran into trouble. Step 6 has you attach the gear doors and there are two pieces for each side, the gear doors should line up in a straight line when viewed from the sides. I had mine leaning too far forward and this resulted in ill-fitting gear doors. To remedy the misalignment I snapped off the gear legs and re-attached the gear legs at the same time as the doors. Unfortunately I damaged the main gear legs and had a nasty time getting them back on. To avoid this problem I suggest using slow drying CA and adding the gear doors at the same time the gear is attached. Get everything lined up and use a dab of accelerator to fix the parts in place.
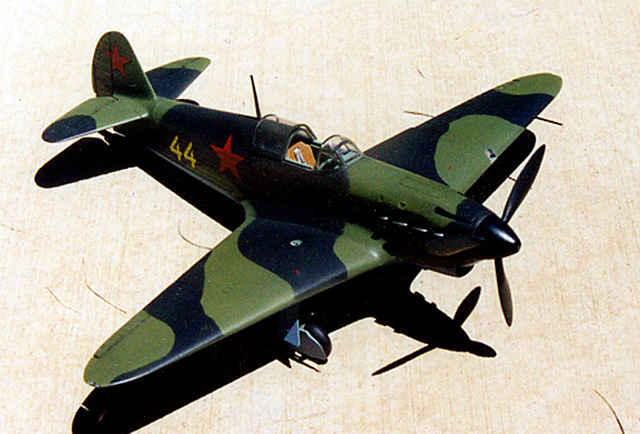
When I build a model I like to add the canopy before painting. This way I can ensure a nice smooth canopy seam. To avoid scratching the canopy I mask it before gluing to the model. This was the first time I had ever used Future on a canopy. The fit wasn't perfect so a small amount of filling and sanding was needed to get the result I wanted. The model was painted with Gunze Acrylics. I used paper masks to achieve a hard edge to the camouflage scheme. The upper colours are unique and the black and green is reported to be correct. For the green, I used Gunze FS 24102 Green and 401 Dark Grey for the black. I mixed a color for the underside to match FS 252190, I found this to look too blue and it just didn't look right. Consequently, I opted to tone the colour down with about 25% white, this may not "correct" it but it looks better on the model.
The decals went on perfectly and only needed a small amount of Micro Sol to get them to conform to the model. Now that the painting was done, the model was looking pretty good and it was time to remove the canopy masks. For this kit I used EZ masks. They went on well and fit the canopy well. However, they stick on too well - read they are hard to remove - but fortunately they did not affect the Future at all. However, I did manage to pull the front canopy off the model! The interesting linguistics that followed brought my wife into the room to see what had happened. I am not sure if the Future affected the bond of the CA or not but this was the first time I have pulled off a canopy. Anyway, the filler came out so there was some damage and replacing the canopy resulted in some repairs being needed. Oh Well! Undaunted I continued to remove the masks, restarting with the rear canopy mask. Well, this time I pulled too hard on a small corner of the mask, the mask tore and my tweezers dug a nice gouge down the rear of the fuselage, you guessed it - more colorful linguistics, this time my wife left the room for a safer location. I don't blame the EZ Masks for my troubles; this was simply carelessness on my part. As the Yak had wooden wings and rear fuselage I didn't weather them all that much. The panel lines on the cowling were emphasized with an oil paint wash, the dutz fasteners received some paint chips from a silver pencil crayon and the exhaust stains were created with pastels. The undersides received more attention. Oil stains around the engine were added. Again oils were used. Once the weathering was completed the model was sealed up with Model Master semi-gloss clear.
Kit High Points
Kit low points
Even with my difficulties the finished model does look good. Had I not messed up at the end this would have been a real beauty. I thoroughly enjoyed building Accurate Miniatures' Yak-1 and would recommend it to anyone.
Text and Images Copyright © 2000 by Rick
Marshall
|