|
A-4E
Aggressor
by
David W. Aungst
|
|
|
A-4E Skyhawk |

Hasegawa's
1/48 scale A-4E Skyhawk is available online from Squadron.com
As I alluded to in my "Fake MiG"
A-4E article, I had to build more aggressor Skyhawks. To that
end, here is another Skyhawk in aggressor camouflage. I actually built
this model at the same time as the "Fake MiG". With so much of
the construction of the two models being the same, it was easy to build
both of them at the same time and get two aggressor Skyhawks for my
display shelves in only a little over the time it would have taken to
build one.
For years I have been building W.W.II German aircraft as a means of
modeling relaxation. I use these as "painting projects" where
I can relax, keep the model construction out-of-the-box, and enjoy just
painting a mottled camouflage (different from those worn by most modern
aircraft). Now that I have a very easy to build, mostly accurate A-4
Skyhawk kit, the "painting projects" have shifted topics. With
an almost endless variety of aggressor camouflages applied to the
Skyhawk, I can get modeling relaxation and unique paint schemes without
departing from my favored topics of modern aircraft.
Now, if only some manufacture would produce an updated kit of the
F-5E/F, I could get a even more variety into my "painting
projects". Monogram's F-5s are not bad, but they could stand being
replaced by current technology moldings like the Skyhawk was. Of course,
there is always the Luftwaffe ... ;o)
Hasegawa's
1/48 Scale A-4 Skyhawk
|
I am not going to say anything about the construction of the kit,
here. I built it using only the pieces that were provided by Hasegawa in
the box. For a full review of the Hasegawa Skyhawk kit, see my previous
postings about this kit.
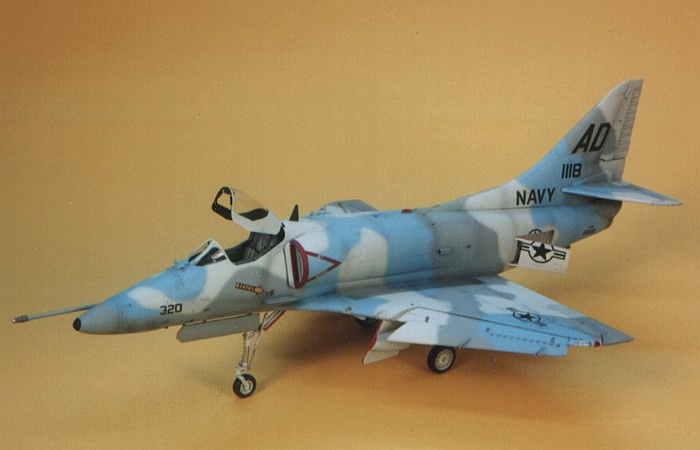
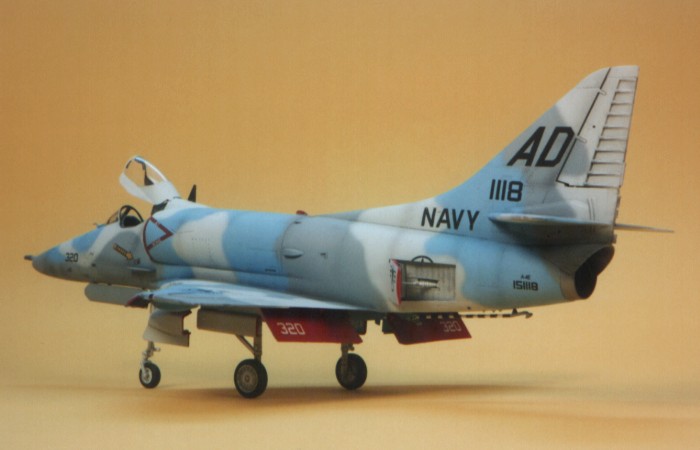
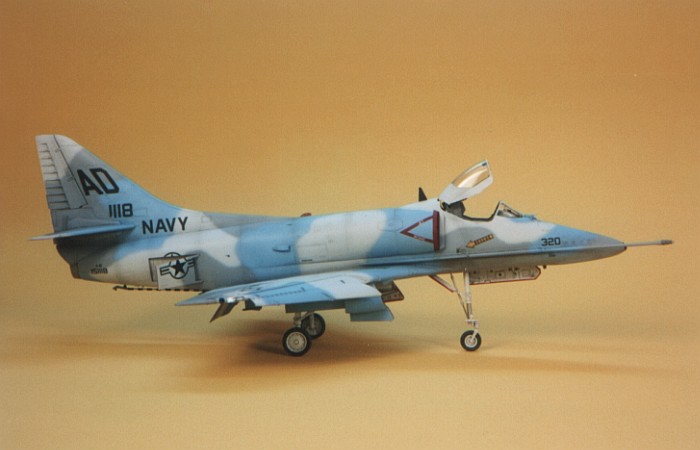
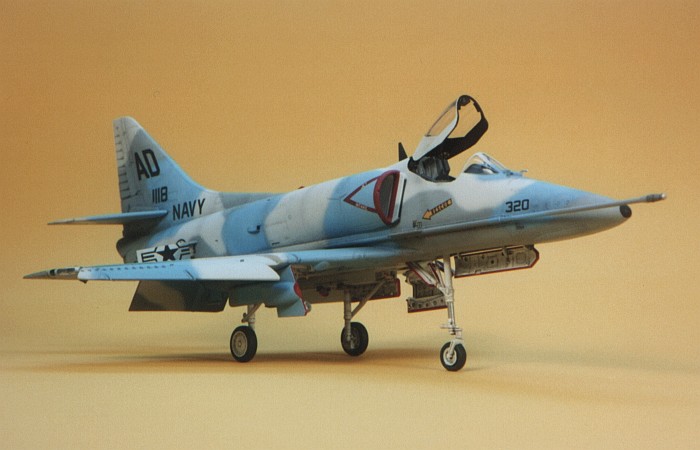
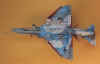
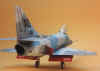
I used mostly Testors Model Master enamel paints for this project.
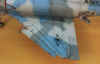
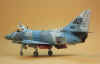
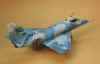
The aircraft is from VA-43 (later VF-43) from June of 1975, the early
years when the unit was first becoming an adversary-training unit. This
may well be one of the first non-standard camouflages applied to a VA-43
aircraft. When it comes to camouflages, blues and browns are what I like
the most. This aircraft qualifies under the "blues" part of
the rule.
I obtained most of the documentation to build this model from a
couple old SuperScale decal sheets (32-037 and 72-170). If SuperScale
ever produced these markings in 1/48th scale, I am unaware of it.
According to SuperScale, the camouflage colors are "Light
Blue" (which I originally mistook as Bright Blue, F.S.35183),
Neutral Gray (F.S.36270), and Camouflage Gray (F.S.36622). The one color
photograph of this aircraft I found in Famous Airplanes of the World #3
(Douglas A-4 Skyhawk) sort of supported these color choices.
On painting these colors on the model, I was unsatisfied by the look
of the colors. The Camouflage Gray was much too light, almost white. The
Neutral Gray was much too dark, especially in contrast to the Camouflage
Gray. The Bright Blue was way too dark, also, making the entire aircraft
too vivid. I decided to try different colors.
I did some more study of the FAOW picture and decided to try a more
logical approach to the colors. For the time period, aggressor paint
schemes were a new thing. The first schemes tended to be painted in
readily available paint stocks (why order paints you otherwise would not
need?). To that end, I decided to consider what colors would be readily
available at the time. I decided on Light Gull (F.S.36440) and Dark Gull
Gray (F.S.36231) as the two gray colors. I scale effected both of these
with white in 5:1 mixing ratios.
For the blue, I think this was a nondescript custom mixed color,
probably using a lot of white and a little Dark Blue (F.S.35109). This
Blue would be readily available as the color of practice bombs
("Smurf Killer" Blue). The color in the FAOW picture
approximated a light blue color close to F.S.35250. I found a Testors
"Little Bottle" enamel paint of Flat Sky Blue (stock#1162) in
my paint stocks that was close, so I decided to use it. I mixed this
bottled color 50:50 with flat white to achieve a fair match to the color
picture.
With these color choices, I was a little happier with the look of the
camouflage as I painted the model. It was still not quite right, though.
When a friend came over to visit, he pointed out that the colors did not
work as I had painted them. The blue color looked good, but the gray
colors were off -- too much brown. We set out and ran through another
set of color experiments to come up with better choices.
Five different gray colors later, we settled on some lighter shades
that made both of us feel better about the camouflage. The final colors
that are on the model as seen in the pictures with this posting are a
custom mixed light blue (as described above), Light Ghost Gray
(F.S.36375), and Light Gray (F.S.36495). After a total of six hours of
camouflage painting and two complete camouflage jobs on the model, I
finally called it quits on camouflage painting.
 The
SuperScale instructions are rather poor and hard to make out. I squinted
and studied every little piece of them to figure out what I could on the
actual camouflage pattern. I had some help from an old issue of Scale
Modeler Magazine (Vol-11/No-9, September 1976). Bob Archer built a 1/32
scale Skyhawk using the SuperScale decals and his model provided me some
insight into some of the trickier camouflage areas. To the left is a
link to a camouflage diagram I created for this aircraft using all these
resources (click thumbnail to enlarge diagram). The
SuperScale instructions are rather poor and hard to make out. I squinted
and studied every little piece of them to figure out what I could on the
actual camouflage pattern. I had some help from an old issue of Scale
Modeler Magazine (Vol-11/No-9, September 1976). Bob Archer built a 1/32
scale Skyhawk using the SuperScale decals and his model provided me some
insight into some of the trickier camouflage areas. To the left is a
link to a camouflage diagram I created for this aircraft using all these
resources (click thumbnail to enlarge diagram).
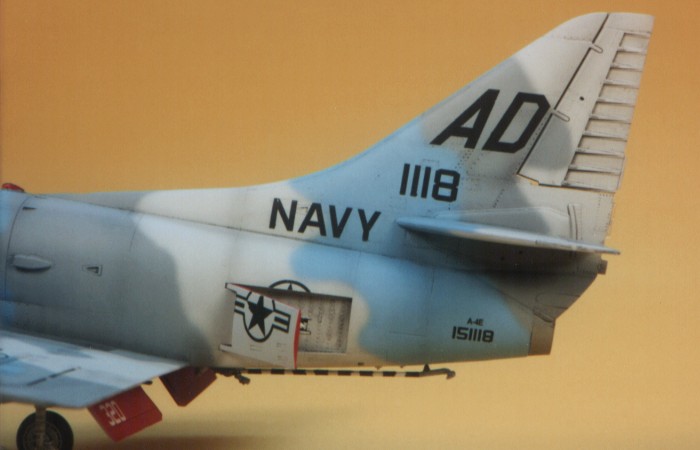
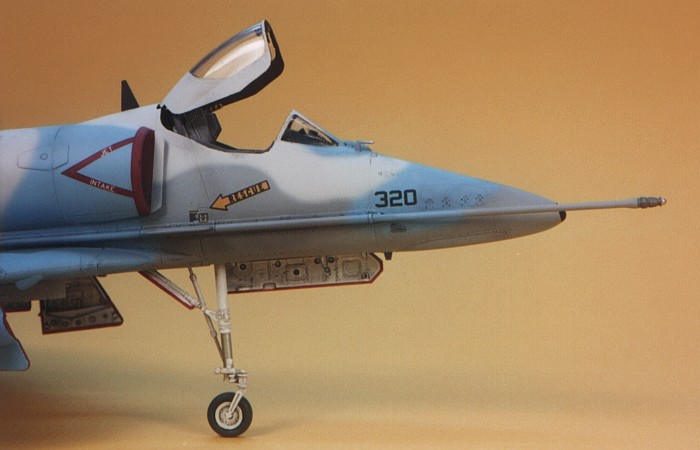
To get decals for the model, I scanned the 1/32nd scale SuperScale
decals and cleaned up the images to have them print cleaner. The image
below shows my cleaned up decal image (reduced in size to save space).
Then I resized the image to 1/48th scale and printed it on clear decal
film using my HP laser printer. Since the markings are all black, I did
not need to use my ALPS printer. The few color markings around the
engine intakes were taken from the Hasegawa kit decals.
For weathering, I used my typical style of thinned down enamel paint
washes and air brush shading. I finished the weathering with some dry
brushing to pop out the surface details. For a more complete discussion
of what I do to weather my models, see my Reference
Article on "Weathering Aircraft".
I hope nobody gets too tired of seeing more Skyhawks as I am sure
this will not be my last. The combination of an easy to build, mostly
accurate kit with an almost endless variety of camouflages is just too
good to ignore. Stay tuned for more...
Reader
Bonus:
Print Your Own Decals Using a Free Decal Image
 As
I noted above, I do not know whether markings for this aircraft
were ever produced in 1/48th scale by SuperScale. Click here to
see an enlarged image of the decals you need to build this
aircraft. Be aware that while the file size is small (at around
27K), the image size is quite large (740x2000 pixels). Doing a
major reduction of the image during printing provides better
quality designs in the decals. As
I noted above, I do not know whether markings for this aircraft
were ever produced in 1/48th scale by SuperScale. Click here to
see an enlarged image of the decals you need to build this
aircraft. Be aware that while the file size is small (at around
27K), the image size is quite large (740x2000 pixels). Doing a
major reduction of the image during printing provides better
quality designs in the decals.
Right click on the enlarged decal image and save the file to
your PC (it is a .GIF file). You can use this file to print your
own decals for this VF-43 aircraft. Print the image at 16% (for
1/48th scale) on clear decal film using a laser printer with at
least 600 DPI resolution. The image provides most everything
that you will need.
If you have access to an ALPS printer, the gray 320 numbers
should be printed in white for use inside the wing flaps. If you
do not have access to an ALPS printer, use the printed decal
image to select the correctly sized numbers from a white US Navy
Block Lettering decal sheet. Use standard Skyhawk data
(available in the Hasegawa kit) to do the aircraft data markings
that are not provided on this decal image.
Use the camouflage diagram provided in this posting as the
decal instruction sheet. Enjoy! |
|
Additional
Images and Project Summary
|
Click the
thumbnails below to view images full-sized.
Click the "Back" arrow on your browser to return to this page.
|


|
|
Project
Statistics
|
|
Completion
Date:
|
13
April 2001 |
|
Total Building
Time:
|
39.9 |
|
Research:
|
1.3 |
|
Construction:
|
7.5 |
|
Painting:
|
24.9 |
|
Decals /
Markings:
|
6.2 |
|
Extra Detailing /
Conversion:
|
0.0 |
|
Text and Images Copyright © 2001 by David
W. Aungst
Page Created 28 May, 2001
Last Updated 04 June, 2007
Back to HyperScale
Main Page
Back to Features Index
|
 Home
| What's New |
Features |
Gallery |
Reviews |
Reference |
Forum |
Search
Home
| What's New |
Features |
Gallery |
Reviews |
Reference |
Forum |
Search