|
Vought
F4U-1A Corsair
by
Franck Oudin
|
|
|
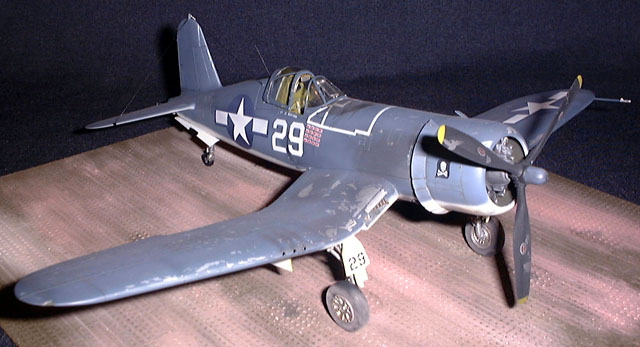
Vought F4U-1A Corsair |

Tamiya's 1/48 scale F4U-1A
Corsair is available
online at Squadron.com
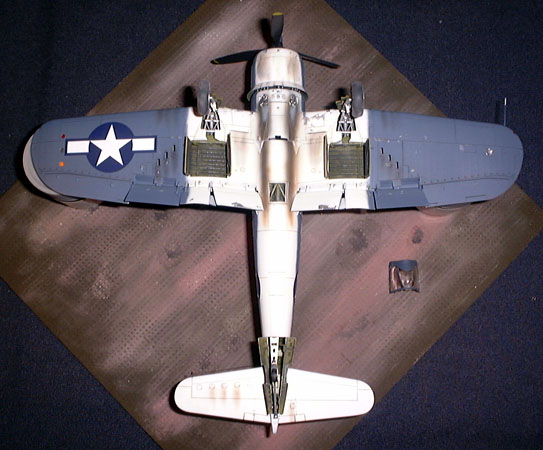
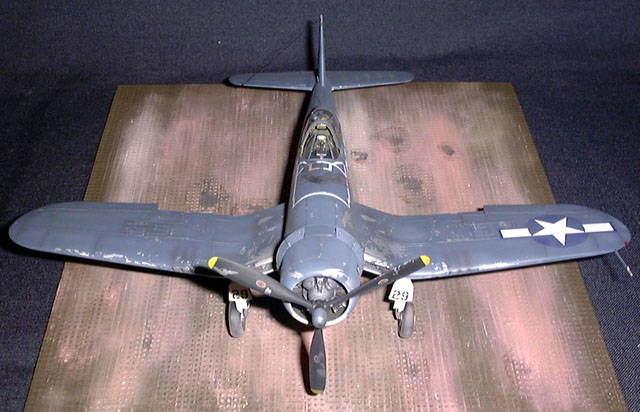
Here is Tamiya's 1/48 scale F4U-1A Corsair. I addition to the
excellent Tamiya kit, I also used the Eduard photo-etched set and the
decals are from Aeromaster.
The aircraft depicted was flown by LT Ira Kepford from the VF-17,
based in Bougainville off New Guinea in January 1944.
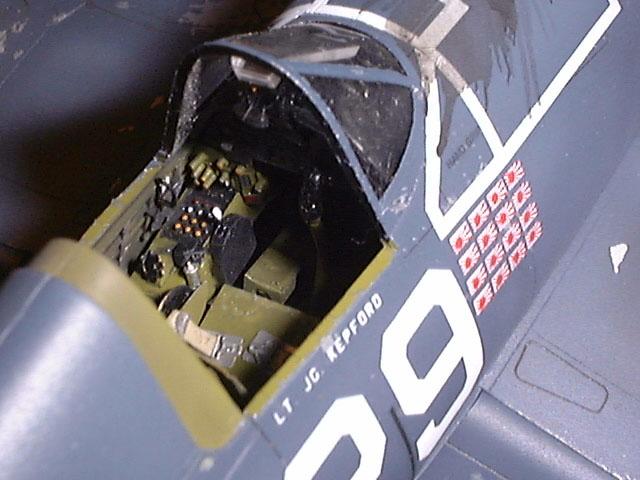
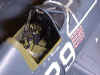
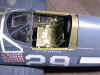
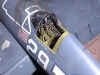
In common with most of my models, I started with the interior. The
complete cockpit was painted interior green and some details were
painted in black. The instrument panels was sanded back and replaced
with an Eduard PE part, and a drop of clear varnish is added every dial
to represent a lens.
The complete seat was also replaced with PE as well as being painted
in green. The seat belts are painted in a buff color to give a bit more
life. For a realistic look to the interior I applied a dark brown/black wash, and
then added graphite with a large but soft brush. It does give a nice
effect.
Click the thumbnails below
to see the completed Cockpit:
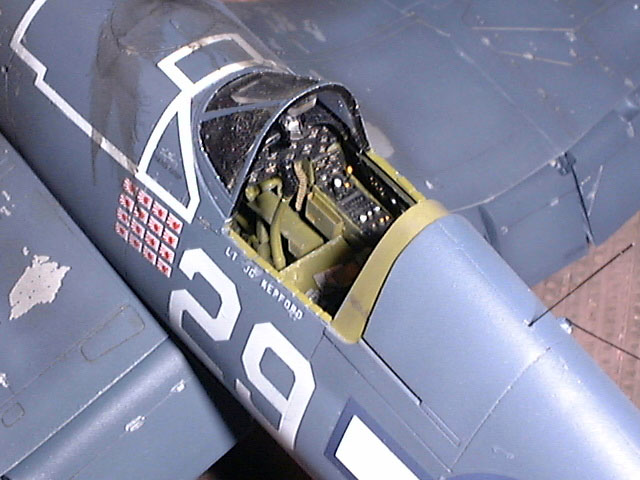
I made the oxygen hose from scratch. The tailwheel bay was painted at
the same time, and weathered like the cockpit.
The fit of the completed interior was no problem. The fuselage halves
were now glued together and the antiglare panel painted in black. The
front canopy was glued in place and the stabilizers are put into place
as well.
The interior of the engine cowl is painted interior green and
receives again the same treatment as the cockpit. The engine has been
painted with Alclad aluminium and receive an acrylic wash. The front of
the engine is painted in neutral gray. The circuit of wires from the PE
set is painted with a mix of copper and gun metal and put in place, then
again a tiny amount of graphite is put with a soft brush, after which
the engine is glued to the fuselage.
In the meantime the cockpit has been masked and the canopy too. The
tailwheel receive some serious surgical treatment. If you decide to use
the same PE set that I used be prepared to do some work, but the result
looks pretty good.
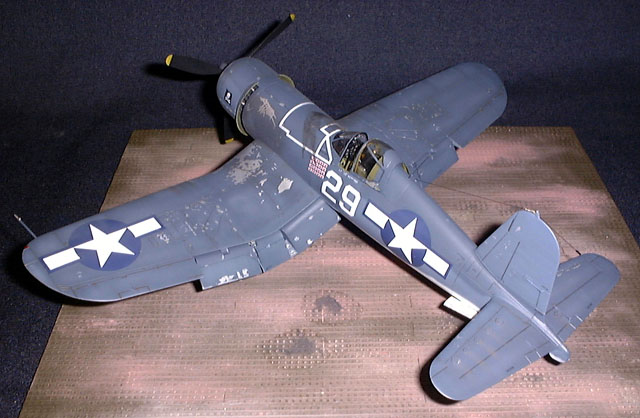
Now the wings. I did not modify anything at all on the wings. The
adjustment is so perfect, just a spot of glue and you are done. The
wheel bay was painted with interior green, and a wash was applied to
every corner. I also made a chipping paint effect with a silver pencil.
The landing gear and the tail wheel have been painted with Alclad and a
wash of acrylic has been applied. A brake line from a copper wire has
been had,on each strut.
The wings were now glued to the fuselage. No problem and no filling
was required.
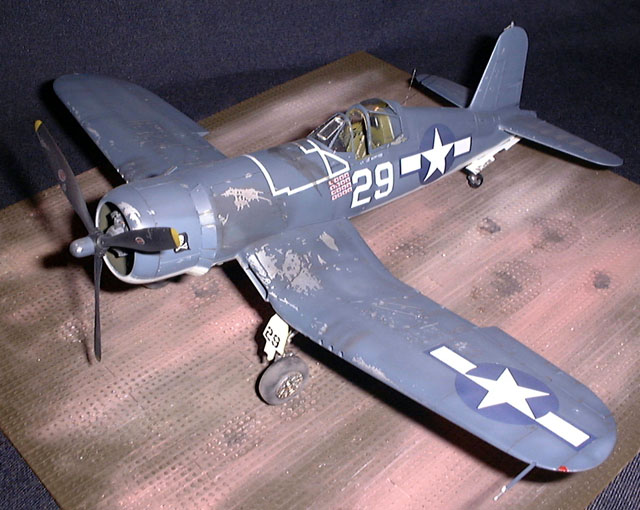
After I had masked all the appropriate areas (cockpit, wheel bay etc)
the aircraft was now ready for painting. However, beforehand I polished
the complete aircraft with steel wool (very fine quality 00) and then
buffed with a soft cloth. Next came an overall coat of Tamiya chrome
silver. I let this dry for 24hrs.
I forgot to mention that the flaps received the same treatment.
The aircraft was now buffed again, and a random coat of Future was
been sprayed on the model, followed by the white paint. Several layers
were needed to obtain a nice opaque white.
Again I let the paint dry for 24hrs, and then both blues were painted
on freehand. This is my preferred method for painting aircraft
models.
Then the fun started. It was the first attempt for me to try to do a
nice chipping paint effect, and i am happy with the result. I took a
piece of magic tape and pressed it on the area where I wanted to chip
the paint. I then pulled it quickly and some paint came off. I repeated
the operation until I was satisfied, then applied a coat of Tamiya Clear
X-22. At this point a wash of black/brown /grey was applied to the panel
lines, then the decals are added with the assistance of some Aeromaster
setting solution.
The exhaust stain is made with the airbrush. I used 3 different
colors - first soot, then brown, and at last grey. The rest
of the weathering is achieved with pastels. All the small parts were now
added including wheels landing gear, gear door etc. The antenna
wires are from stretched sprues. The exhausts pipes are replaced with
plastic tubing, and finally a complete coat of flat Aeromaster varnish
is applied to the aircraft.
This kit was pleasure to build.
The overall fit is perfect, and it does deliver a very model of this
fantastic aircraft.
Model, Text and Images Copyright © 2001 by
Franck Oudin
Page Created 22 June, 2001
Last Updated 04 June, 2007
Back to HyperScale
Main Page
Back to Features Index |
 Home
| What's New |
Features |
Gallery |
Reviews |
Reference |
Forum |
Search
Home
| What's New |
Features |
Gallery |
Reviews |
Reference |
Forum |
Search